It's a lot easier (and more fun!) to do projects in a space that's neat and tidy, and these clever tips will help you achieve just that in your home workshop.
Saw Dust Filter Fan
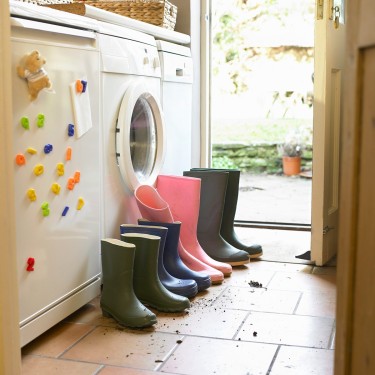
My workshop doesn’t have air conditioning, and it gets pretty hot while I’m working. I used to blow a fan directly at myself, but it sucked in dust from around the shop and blew it at me. I had a few extra furnace filters lying around, so I tried attaching one to the back of the fan using hook-and-loop fasteners. This made a huge difference! Don’t use a super-high-performance filter, as it could cause the fan to have to work too hard to pull air through, resulting in an overheated motor. — Larry Brannock.These 34 incredible tips will help you complete your woodworking projects faster and better than ever before!
How to Remember your Grits
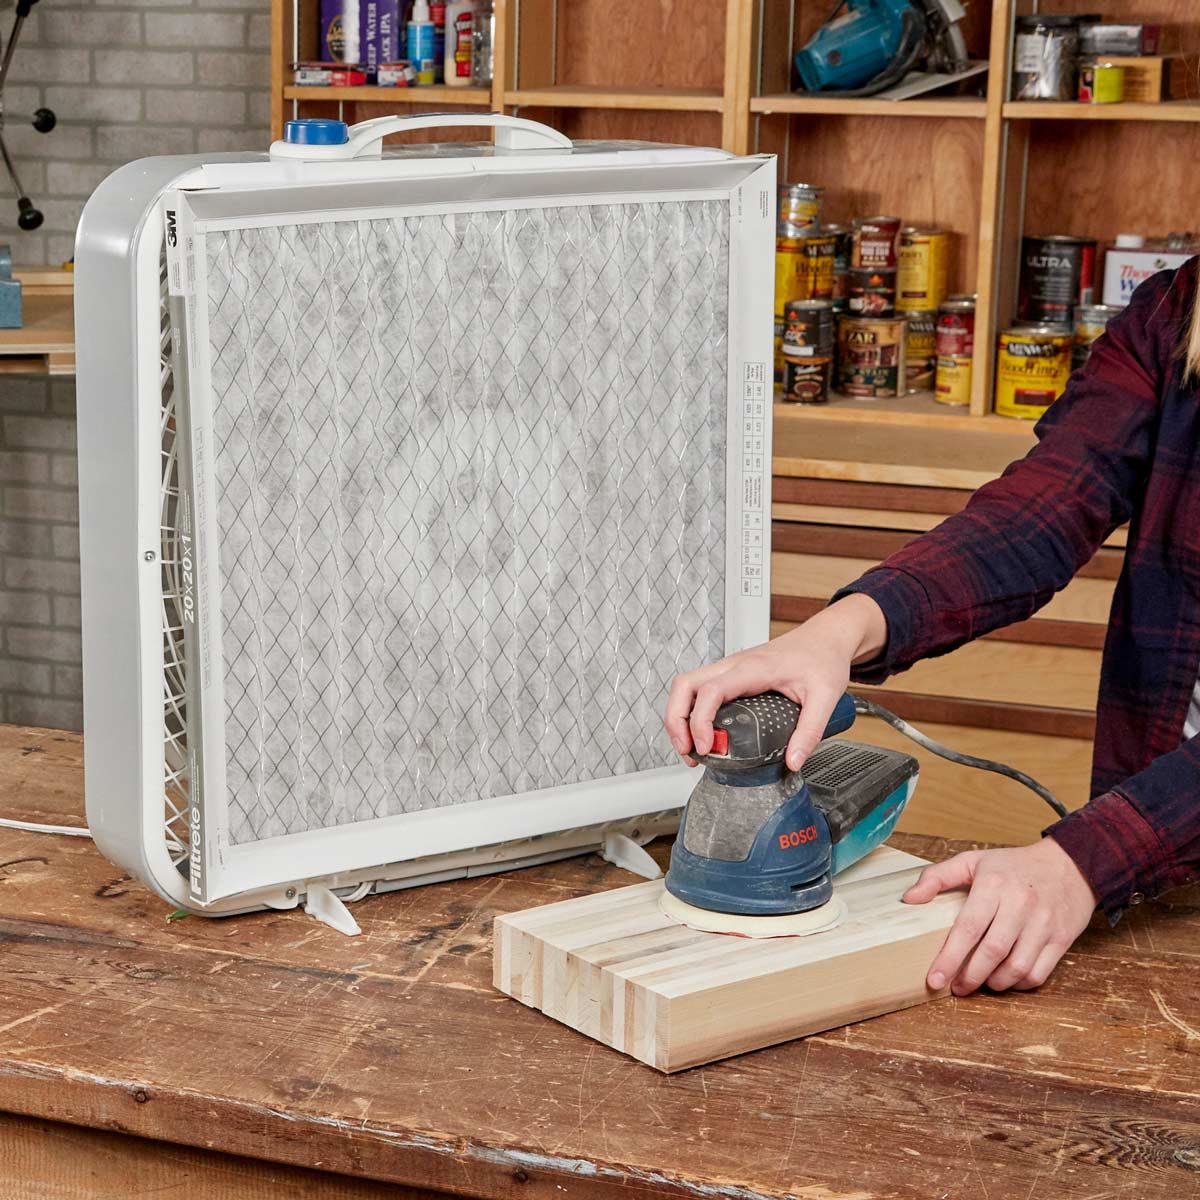
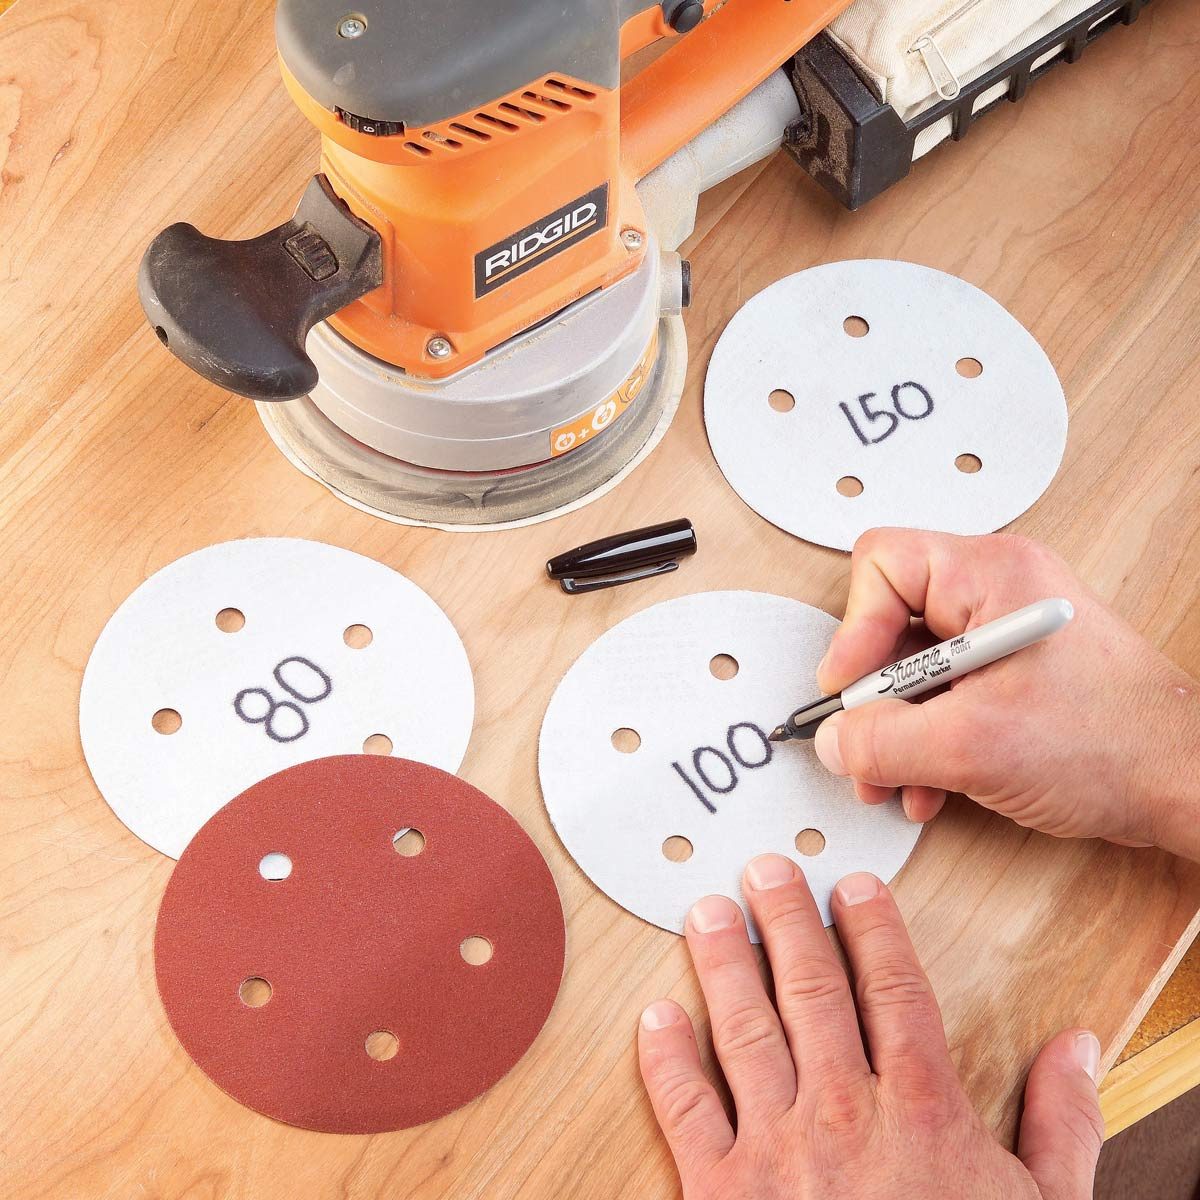
Hook-and-loop sanding discs work great for sanding jobs, and you can reuse them several times before they’re worn out. But it’s almost impossible to read the grit labels on the discs after you’ve used them once because the markings get scrubbed off by the loops. Below is the incredibly simple way to remember sandpaper grits without needing to squint to see a faded number.Learn 7 pro-approved tips for hand sanding right here.
The Greatest Shop Tip in History
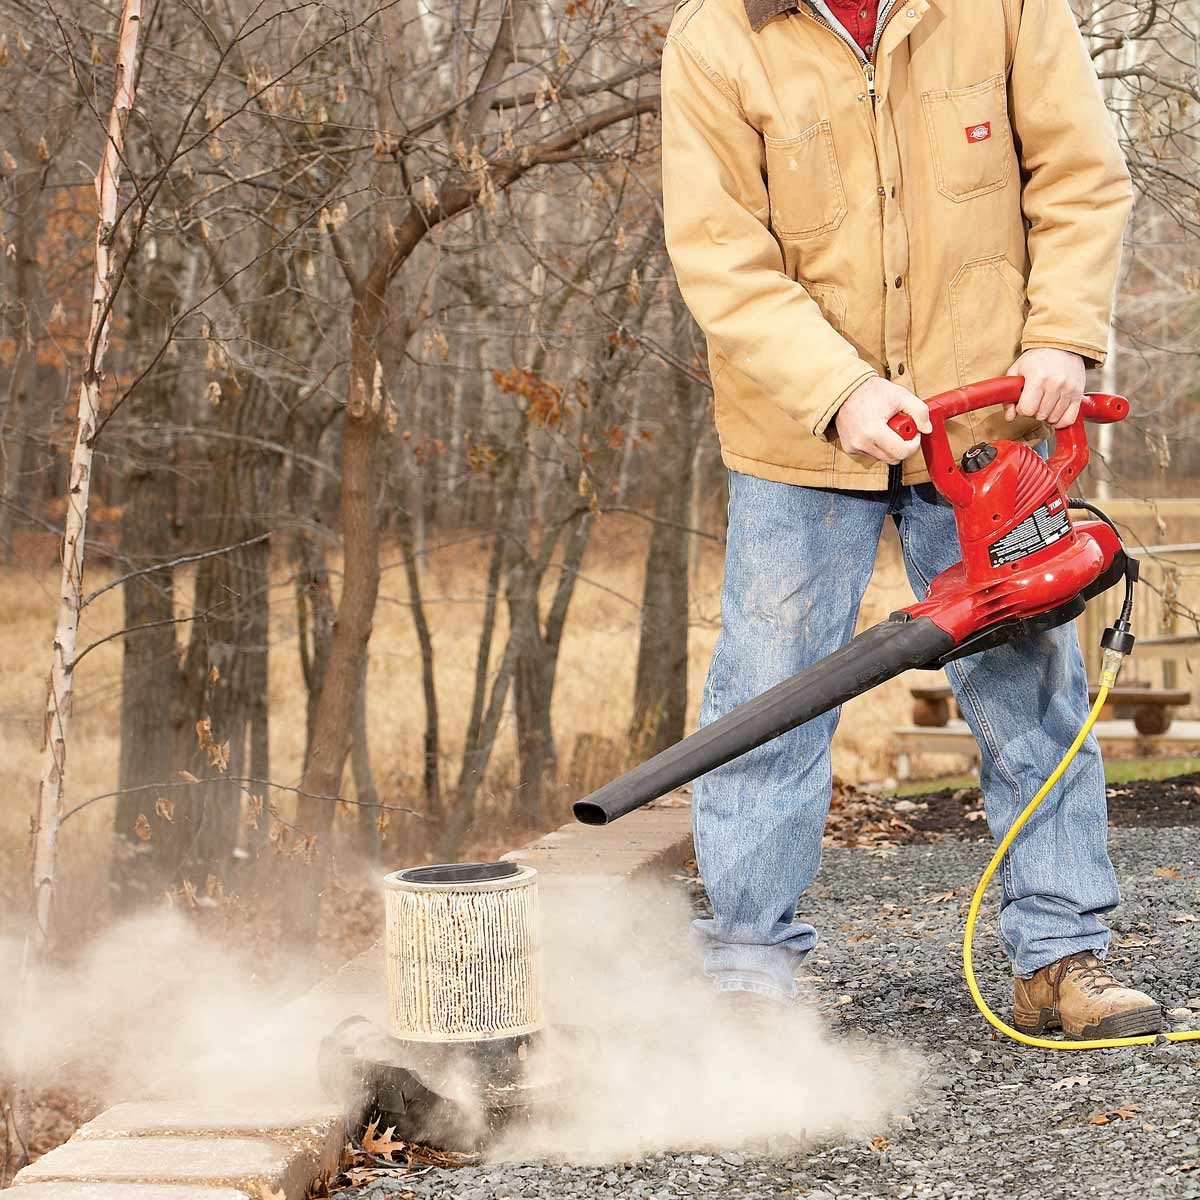
Last fall, I was out running the leaf blower and noticed my filthy shop vacuum filter sitting on the slab waiting for a cleaning. That meant hauling the air hose outside and holding the filter at arm’s length while I became enveloped in a giant dust cloud. Not this time. It took me about five microseconds to put two and two together. Five more microseconds with the leaf blower and that filter was cleaner than ever. Now the filter—and the dust—are 5 ft. away from my lungs, clothes and hair. Can’t call me Pigpen anymore. — Travis Larson
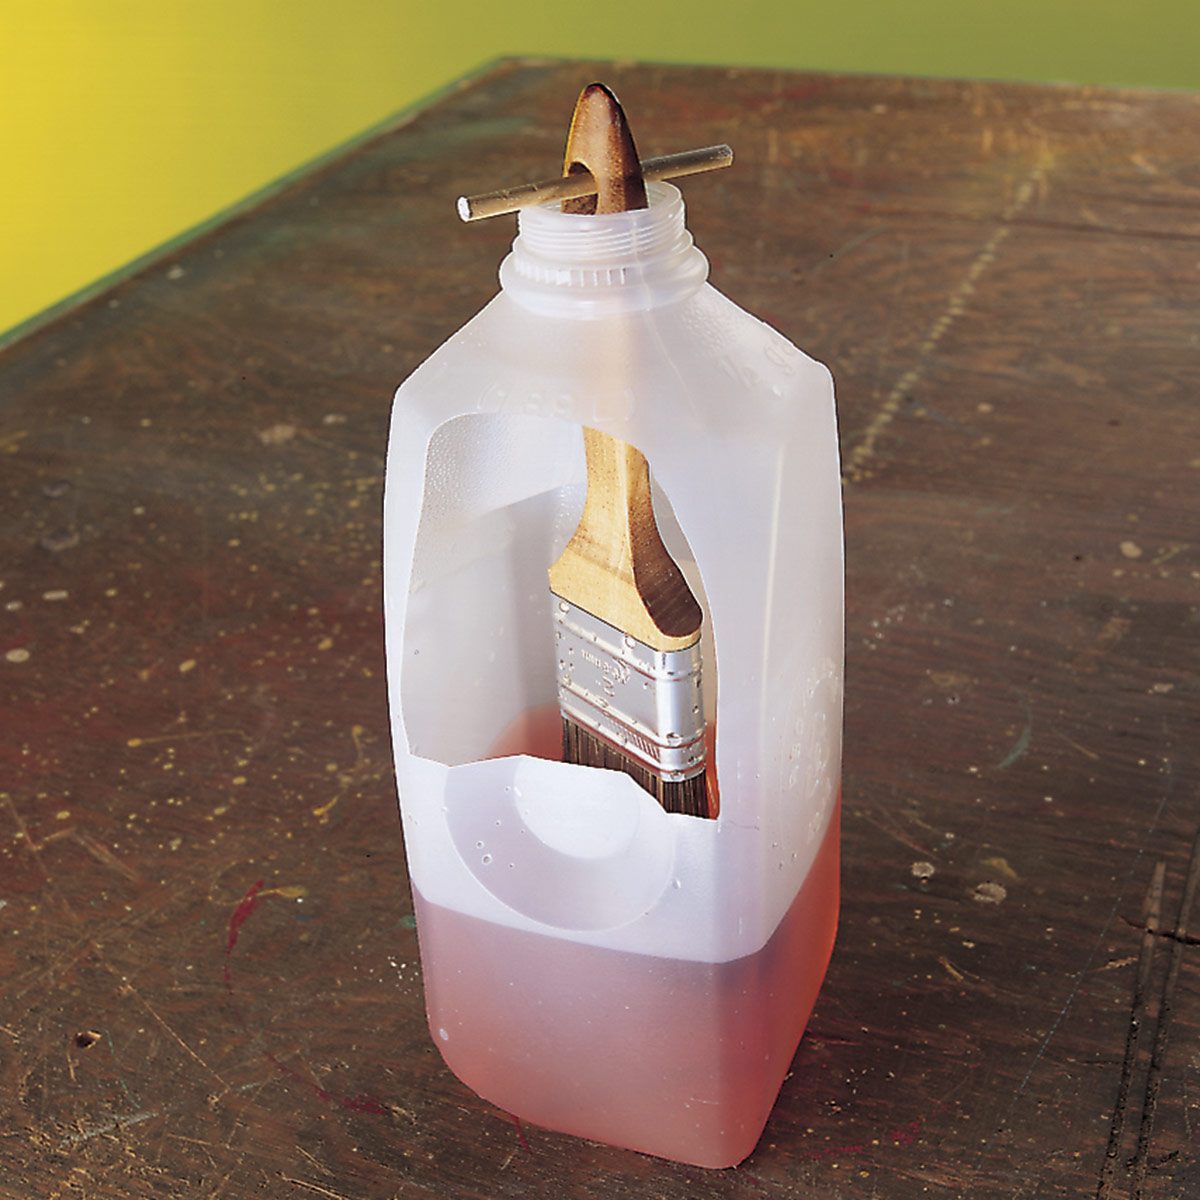
Brush-Cleaning Abode
Don’t recycle all of your half-gallon plastic milk bottles. Save a couple for cleaning paint brushes. Cut out one side halfway down, pour in paint thinner and stick the brush handle through the side and up the bottle spout. Slip a dowel or nail through the hole in the brush handle to keep the bristles from resting on the bottom of the container while soaking. Check out more workshop handy hints here.
Plus: Easy ways to keep your workshop neat and tidy.
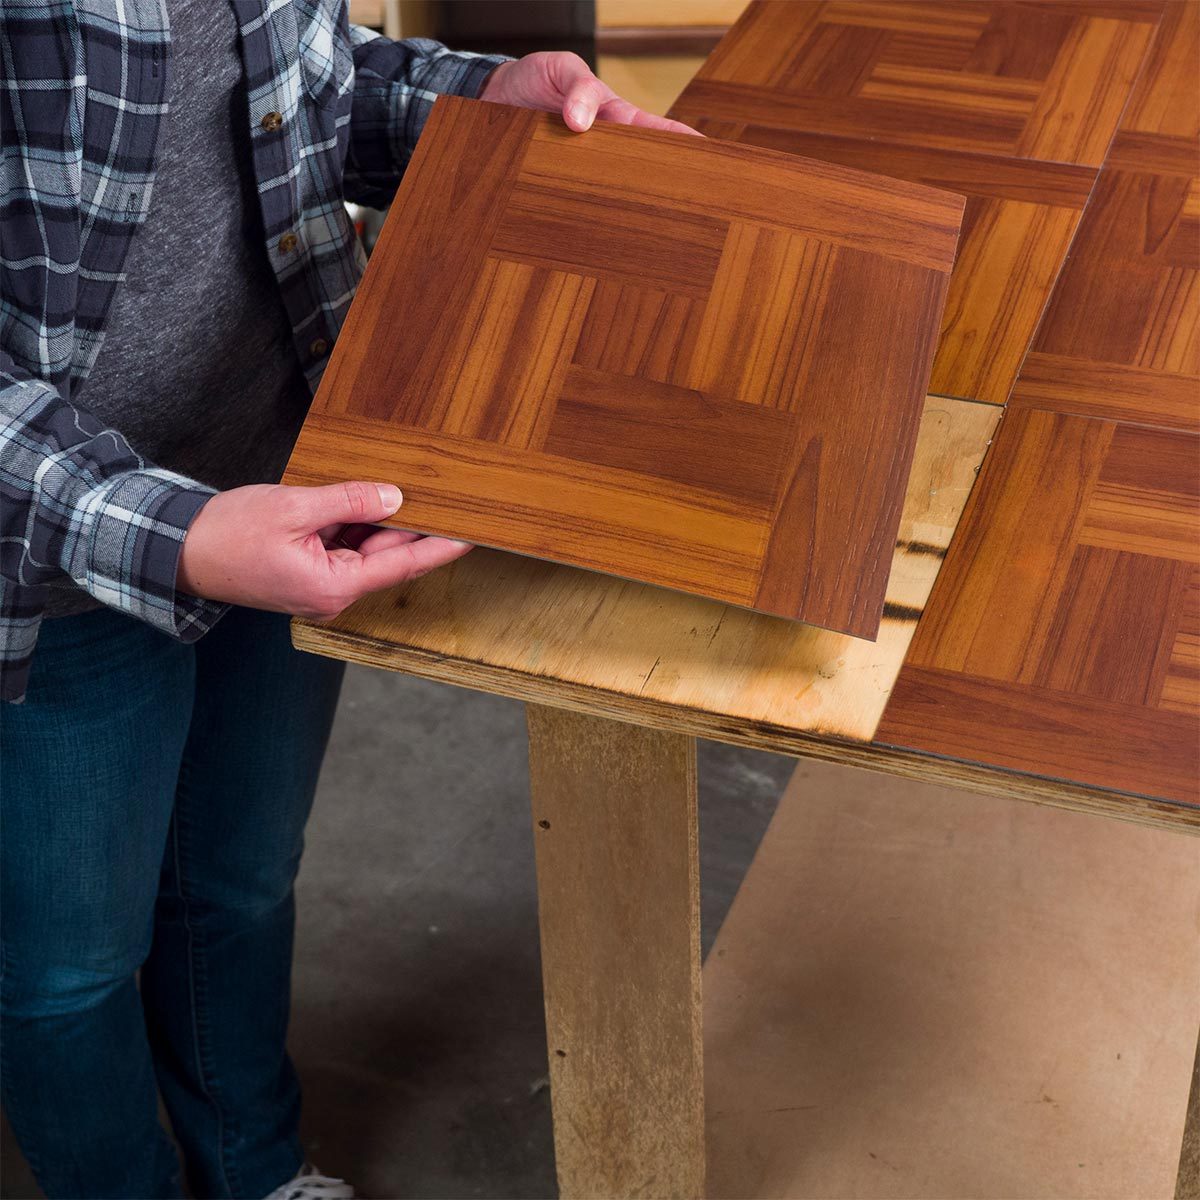
Peel-and-Stick Vinyl Work Surface
I use peel-and-stick vinyl tiles on all of the work surfaces in my home shop, especially cutting areas. The smooth surface makes cleanup so much easier! From sawdust to glass shards, the tiles make cleanup a cinch. — Carol Cordero
Vinyl is also great for cleaning up liquid spills, as it prevents the mess from soaking into the surface. We covered a plywood-topped cart in the Family Handyman workshop, and the adhesive-backed tiles were very easy to work with. Compared to the rough plywood, the tiles make the cart much easier to wipe clean with a dry or wet rag after any project.Learn how to build one of these carts right here.
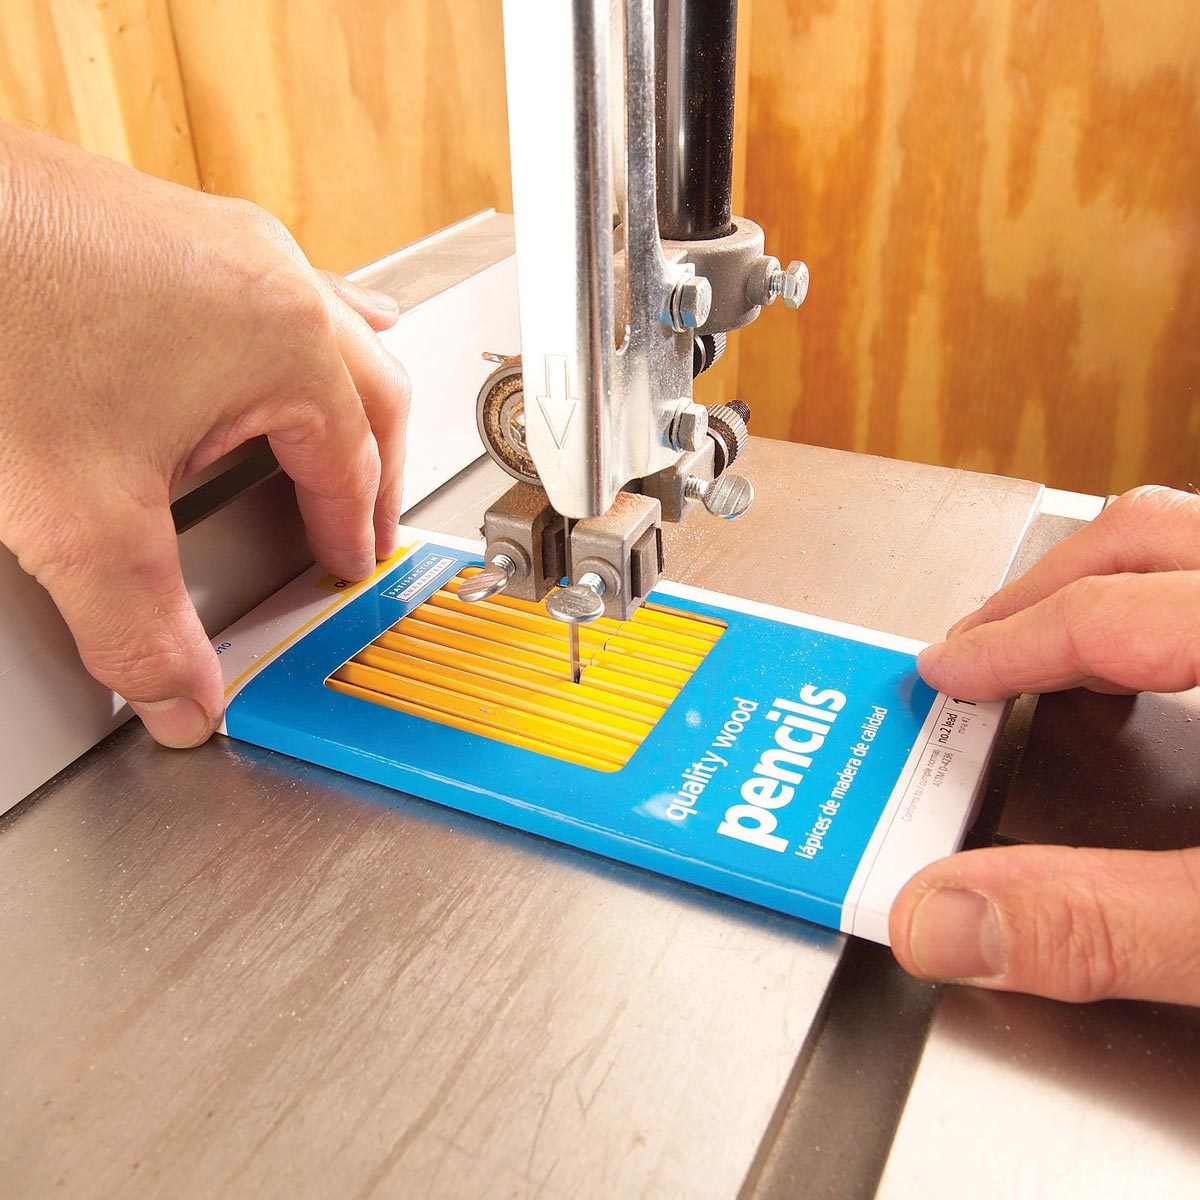
Pencils on the Double
Can’t find your pencil? Try this sharp idea from Ruth Brunner. Saw a package of pencils in half with a fine-tooth saw and stick pencil cap erasers on the eraserless halves. You’ve just doubled your stock of pencils and made them a lot harder to break!
Plus:51 Brilliant Ways to Organize Your Garage
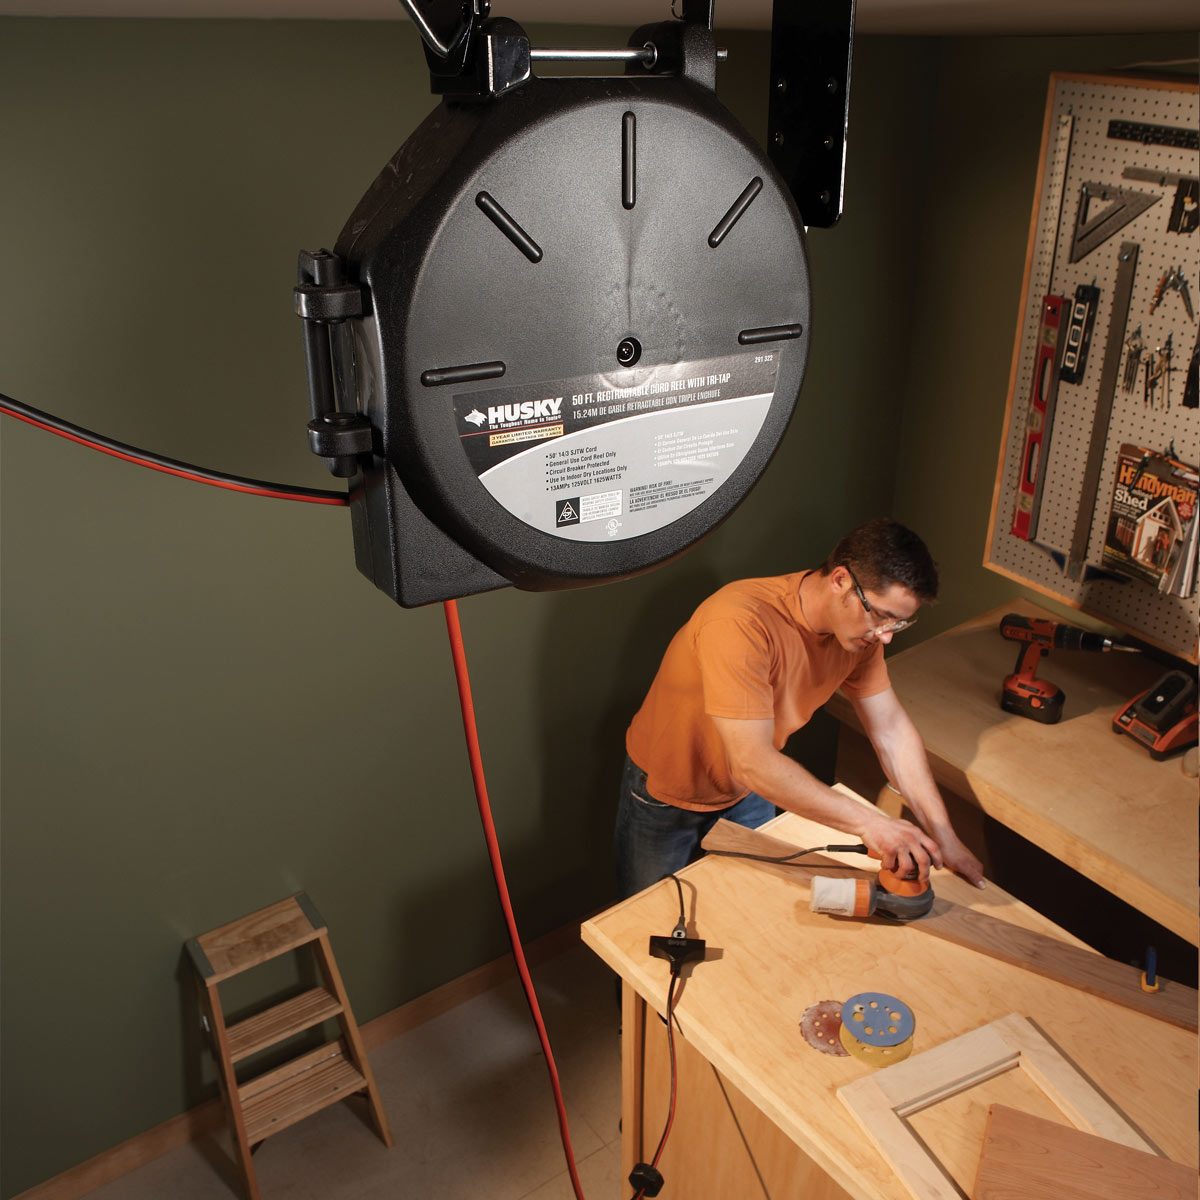
Bring Universal Power to Your Shop
With a retractable extension cord in the shop, there’s no more searching for the extension cord, no more tripping over cords on the floor, and no more constantly bending over to plug in whatever you need. But stay away from wimpy 16- to 18-gauge corded models. They don’t carry enough current for many tools. The Husky 14-3, 50-ft. model ($70 at Home Depot) works great, but any 14-3 model with a 13-amp rating will do fine. But as you know, the more you spend…
The ReelWorks Extension Cord is the best heavy duty retractable cord out there. Click here for it on Amazon.
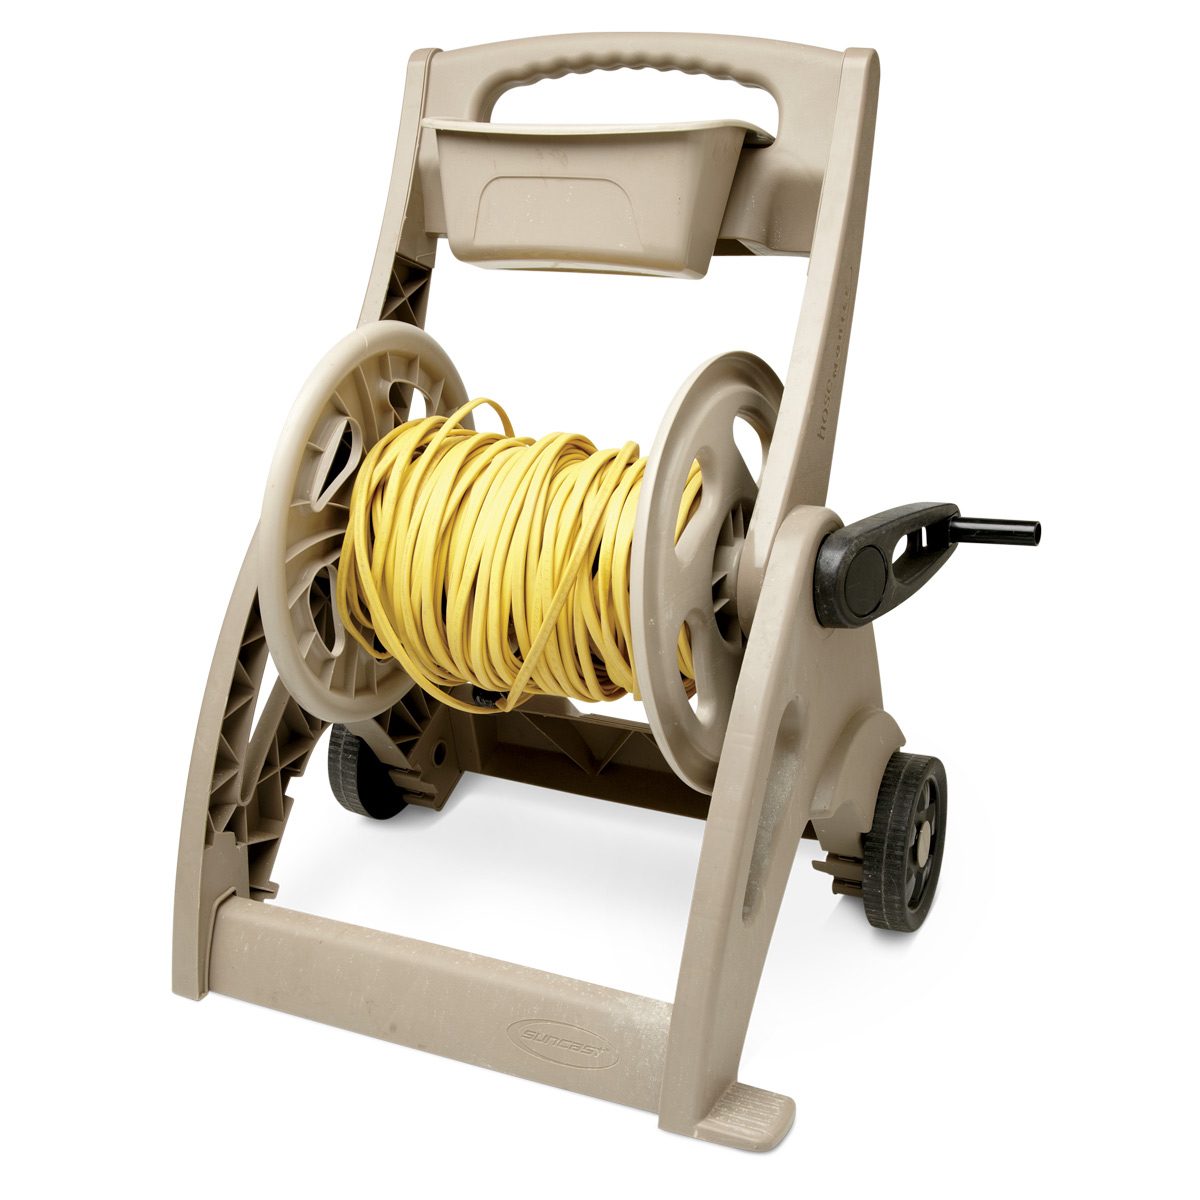
Use a Garden Hose Reel in Your Workshop
Here’s a neat way to store air hoses or extension cords without the fuss of knots and kinks. Use a garden hose reel. It stores 200 ft. of hose or cord, and it’s easy to transport in the back of a truck or trailer. —Michael VanSant.Try out some of these 50 extraordinary uses for ordinary items.
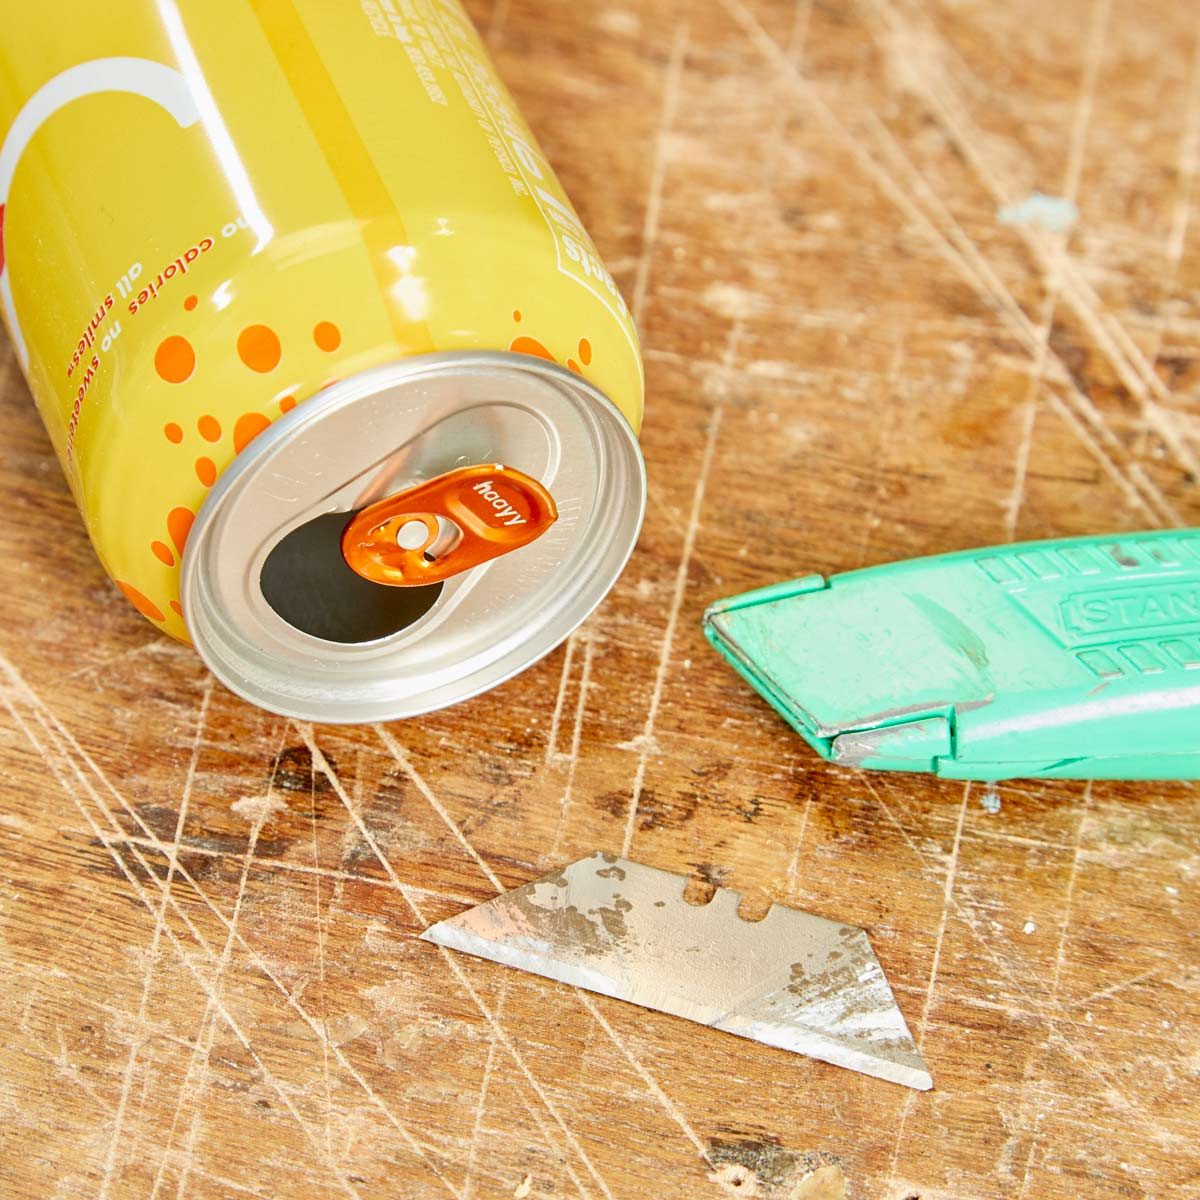
Safe Blade Disposal
I was recently removing a lot of old caulking on my boat with a utility knife. To safely dispose of the used blades and eliminate the risk of cutting through a trash bag and injuring someone, I put the used blades in a soda can and pushed the pop top back over the opening to contain the blades.—Justin Zack
Check out theseDIY Safety Tips. Our field editors tell of the DIY mistakes they’ve made and the lessons learned from ladders, electricity, roofs, power nailers, drills, pressure washers and more.
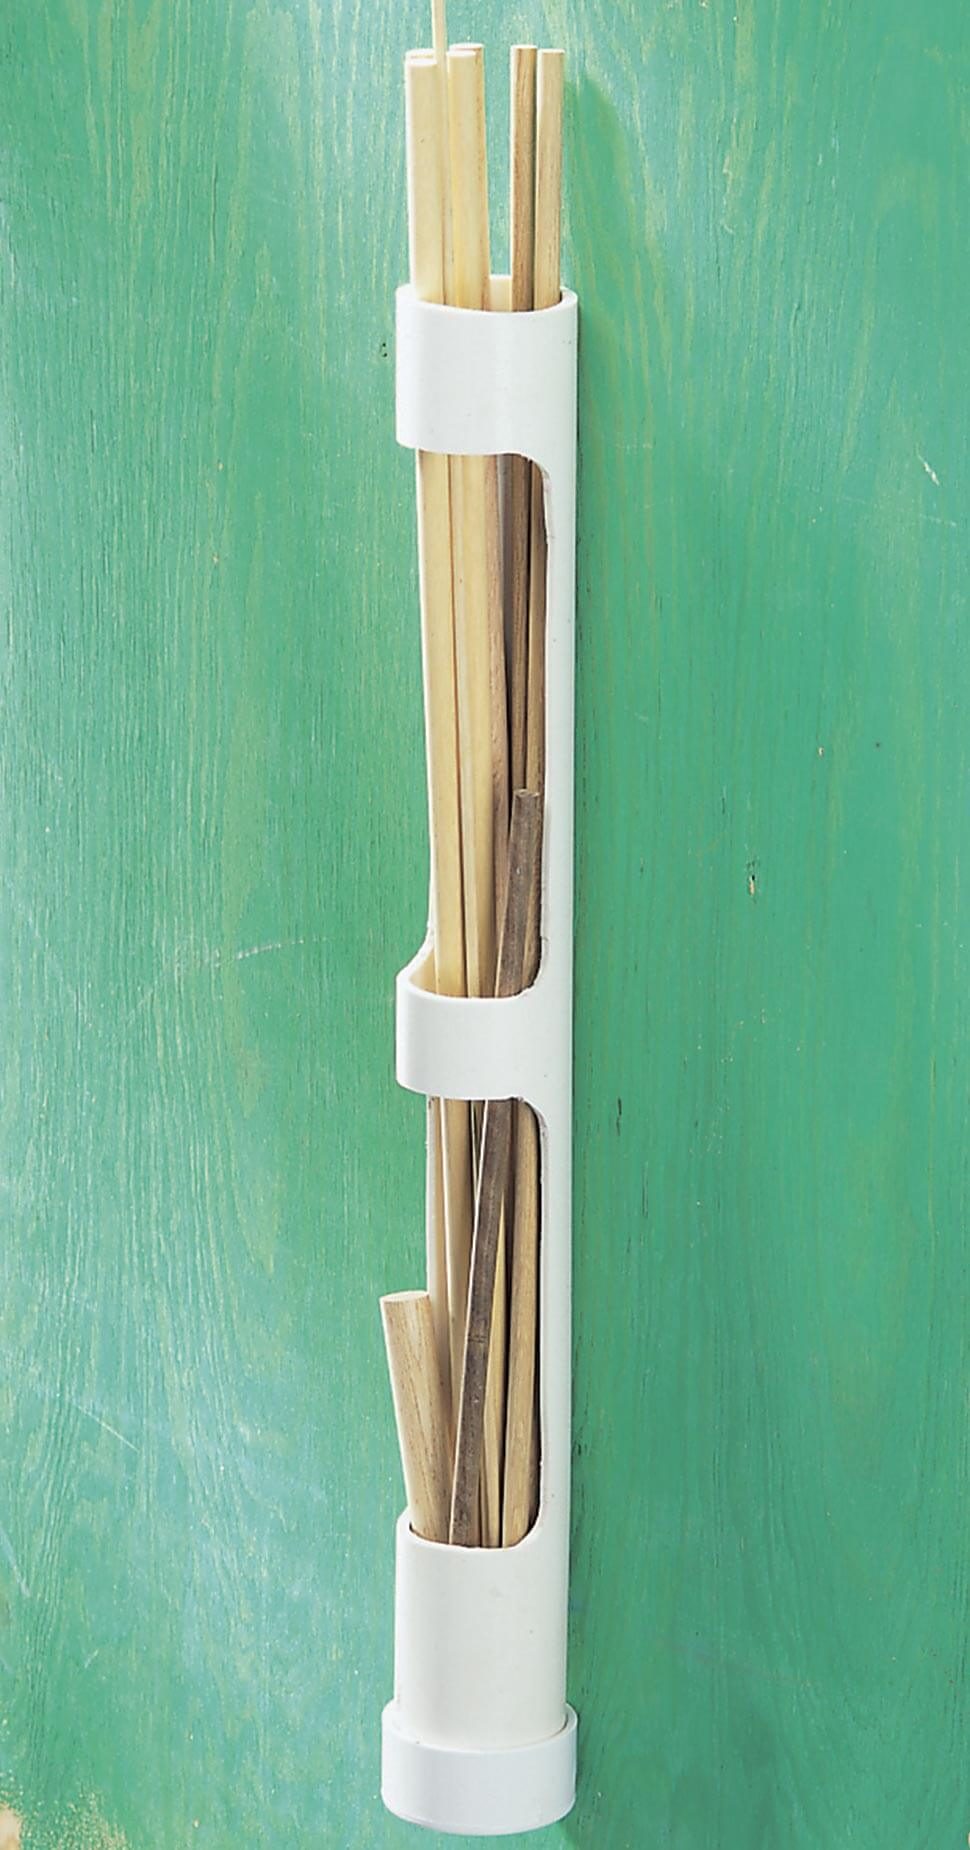
Dowel Quiver
Use a saber saw to cut lengthwise notches in a 30-in. long piece of 3- or 4-in. dia. pipe then glue on a PVC end cap. Drill pilot holes in the pipe opposite the notches and screw the quiver to a shop wall. Your notched-out quiver will hold any size dowel—from standard 36-in. lengths to stubby leftovers—for instant access. Thanks to George Marchalk for sending this tip down the pipeline.
Need more storage for your dowels? Check out this high-rise storage option.
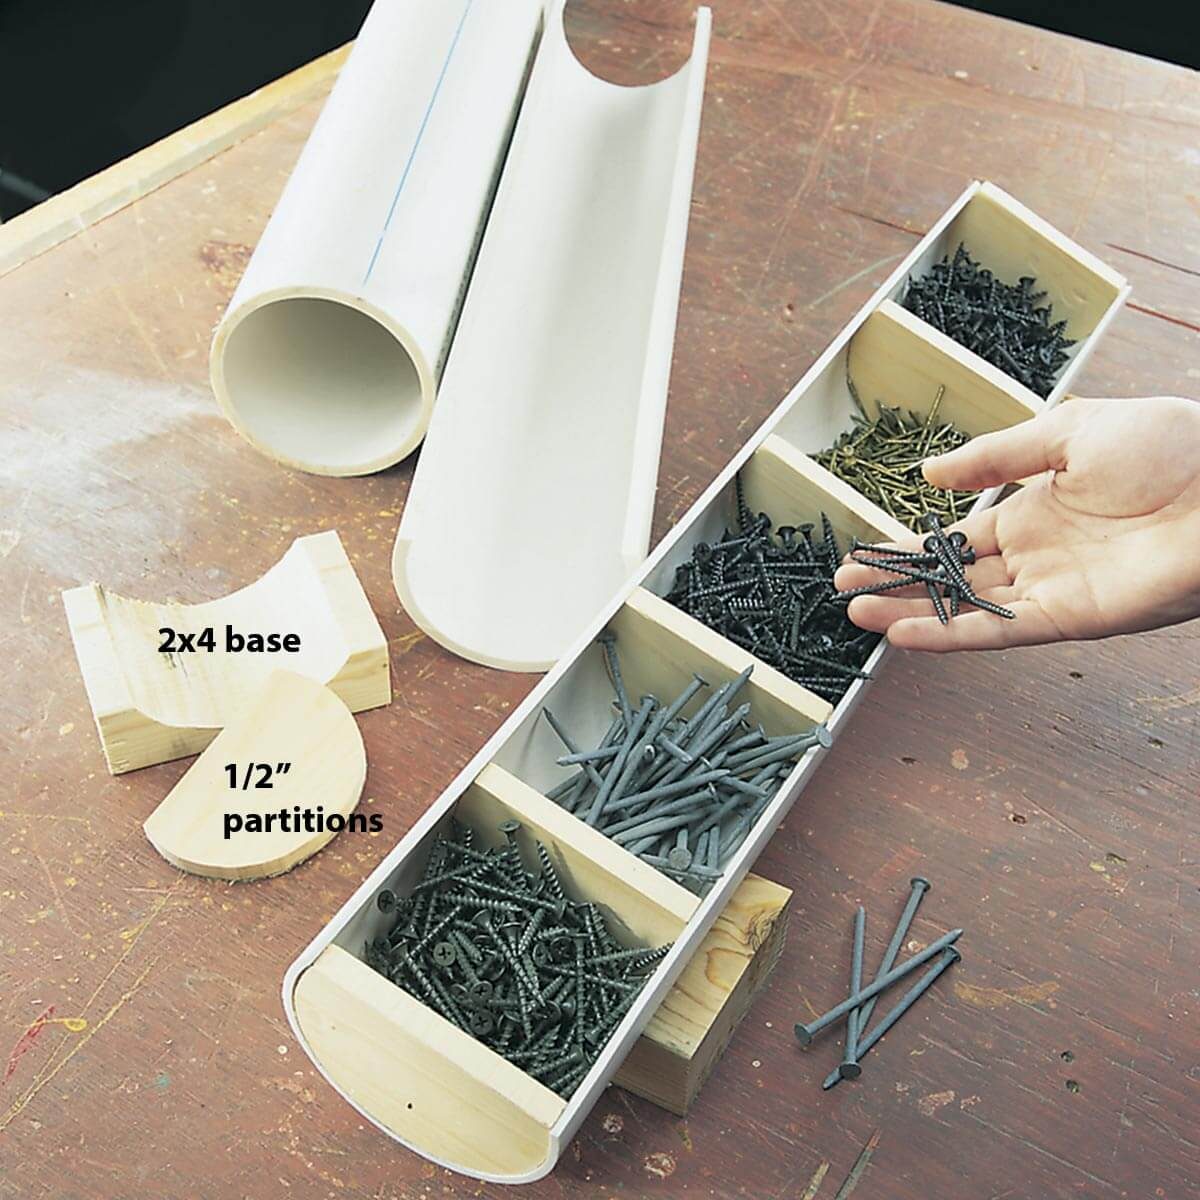
Fastener Trough
Cut a 2-ft. length of 4-in. PVC pipe lengthwise with a scroll saw, creating a trough that’s a little more than half the pipe’s diameter. Glue or screw in 1/2-in. thick wood partitions to create compartments for often-used screw and nail sizes. To make it tip-proof, trace the pipe’s curve on a couple of scrap 2×4 blocks, power-sand or saw out the curve, and screw the pipe on this scrap block base.Click here for 12 more fastener storage tips!
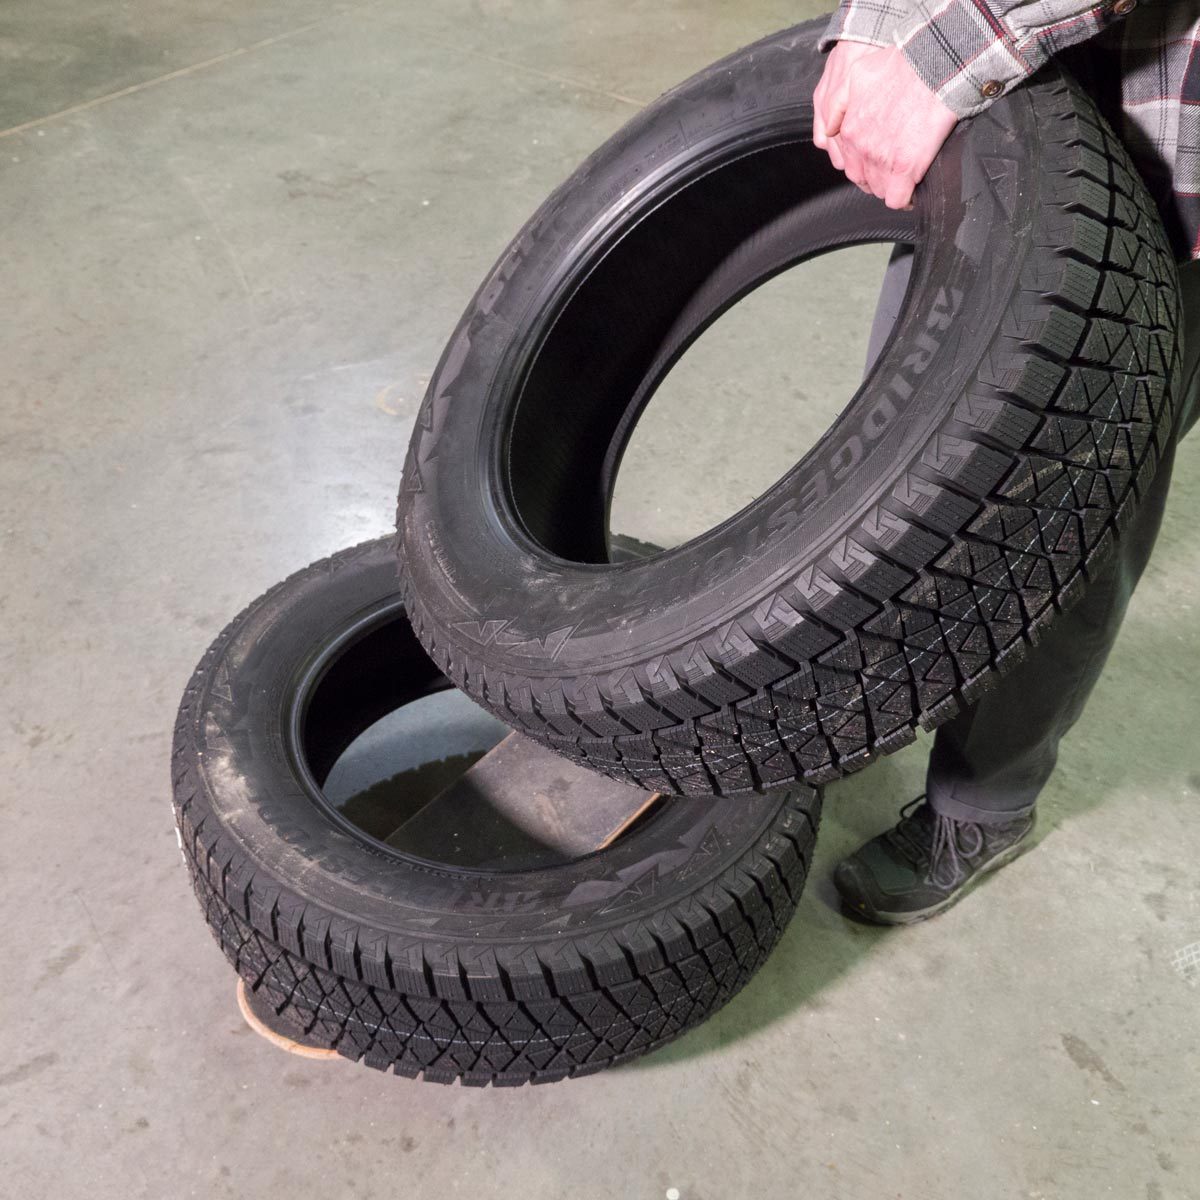
Skateboard Helper
A skateboard isn’t just useful for rolling through the park, it also makes a handy hauler on the fly. Just load it up with your heavy items such as tires or large sheets of plywood, and easily tote them from one area of your shop to another. If you don’t have a skateboard handy, keep an eye out for one at garage sales or at thrift stores. Even if you don’t ride it, it’s worth a few bucks to buy one exclusively to haul stuff around your workshop!
Click here for more moving techniques.
Gum Containers
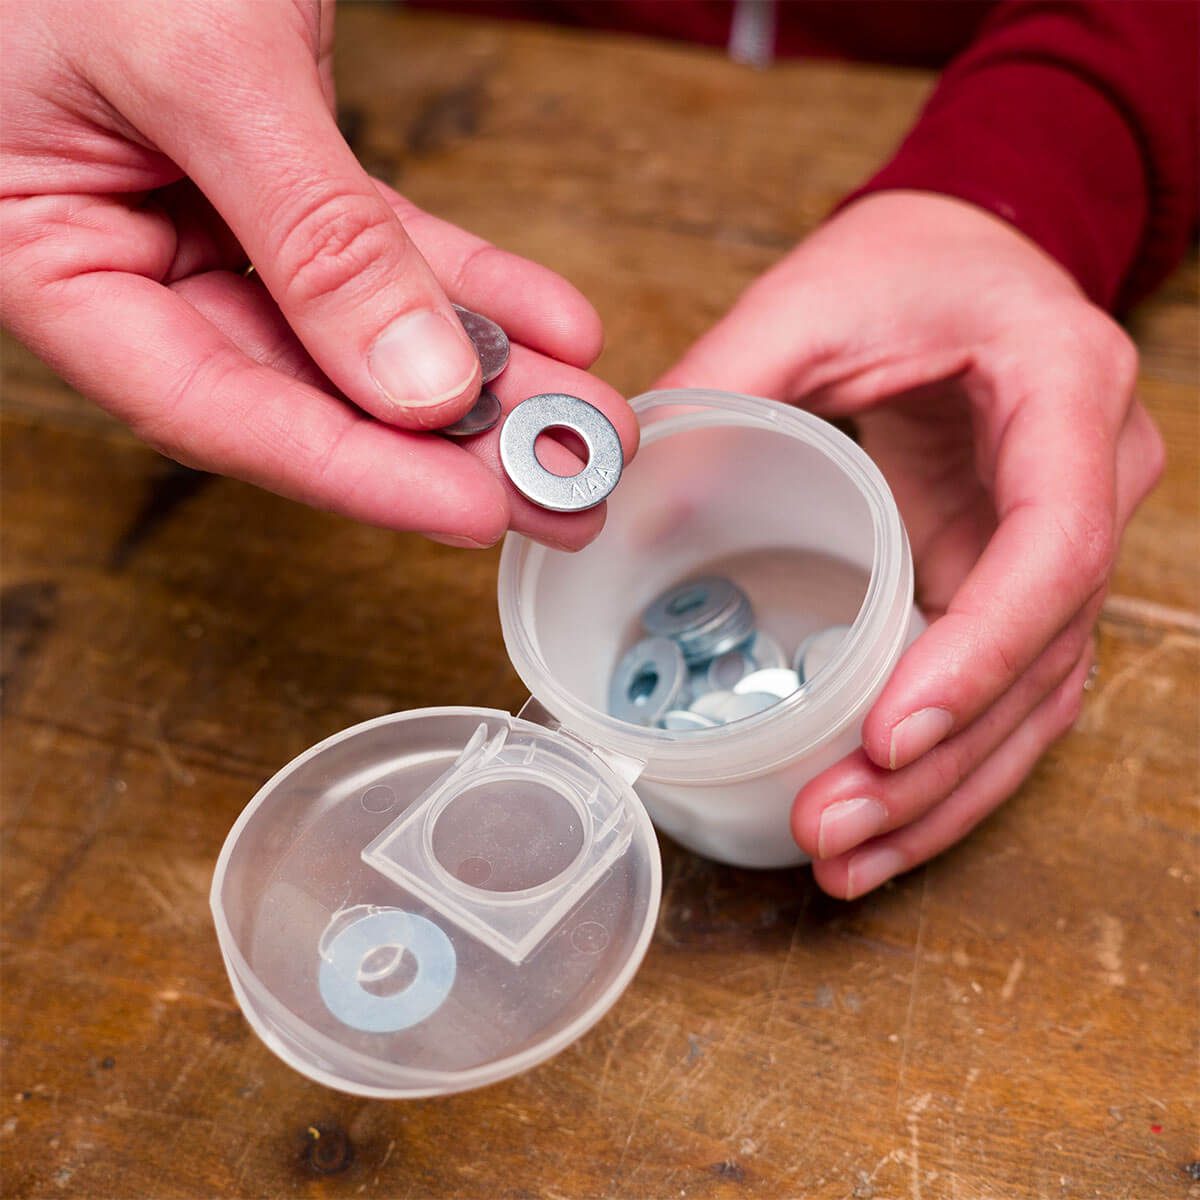
When you go to the big box stores in need of some washers, wood screws, drywall anchors, etc., those little plastic or cardboard boxes just don’t work well for storage once you open them.
So I took an empty gum container, removed the labels and filled it up with washers—except for one. I glued one washer to the top of the lid of the gum container. That way I can see what parts are inside the container at a glance. Plus the gum containers are very durable and look organized on shelves in my shop. — Jerry Bullock
Learn the best ways to get gum out o different things around your house.
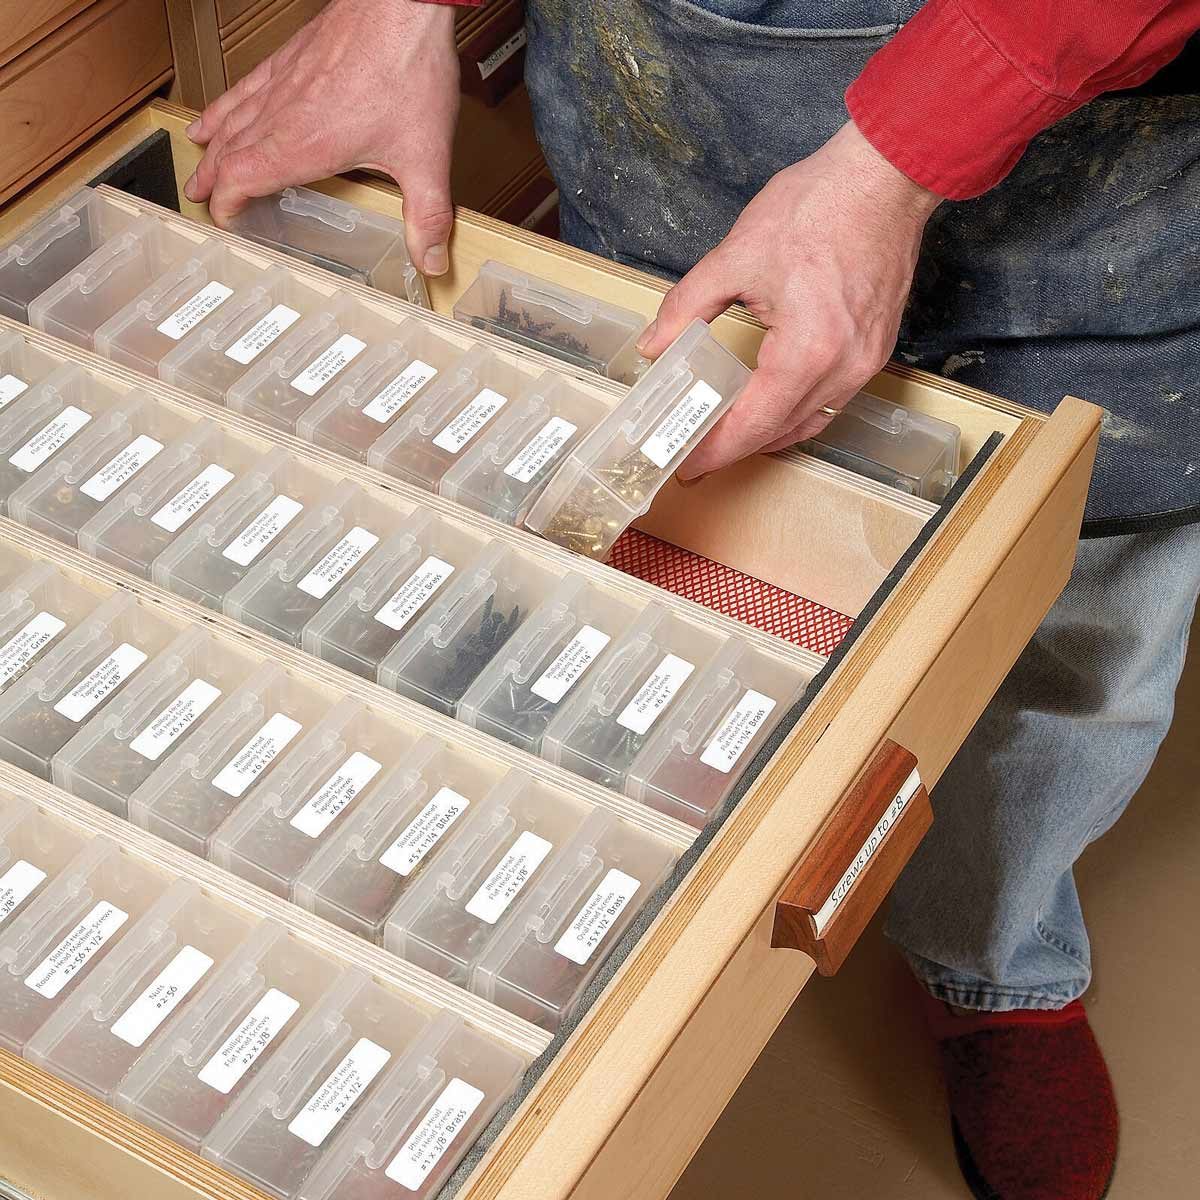
Find-Anything Hardware Drawer
Nothing has a chance to randomly accumulate in Bruce’s shop—not in apron pockets, on cabinet shelves, not even in a drawer. There is truly a place for everything, everything goes in its place, and no usable area remains empty. Even just one of his hardware drawers is a sublime example.Learn how to build roll out cabinet drawers here.
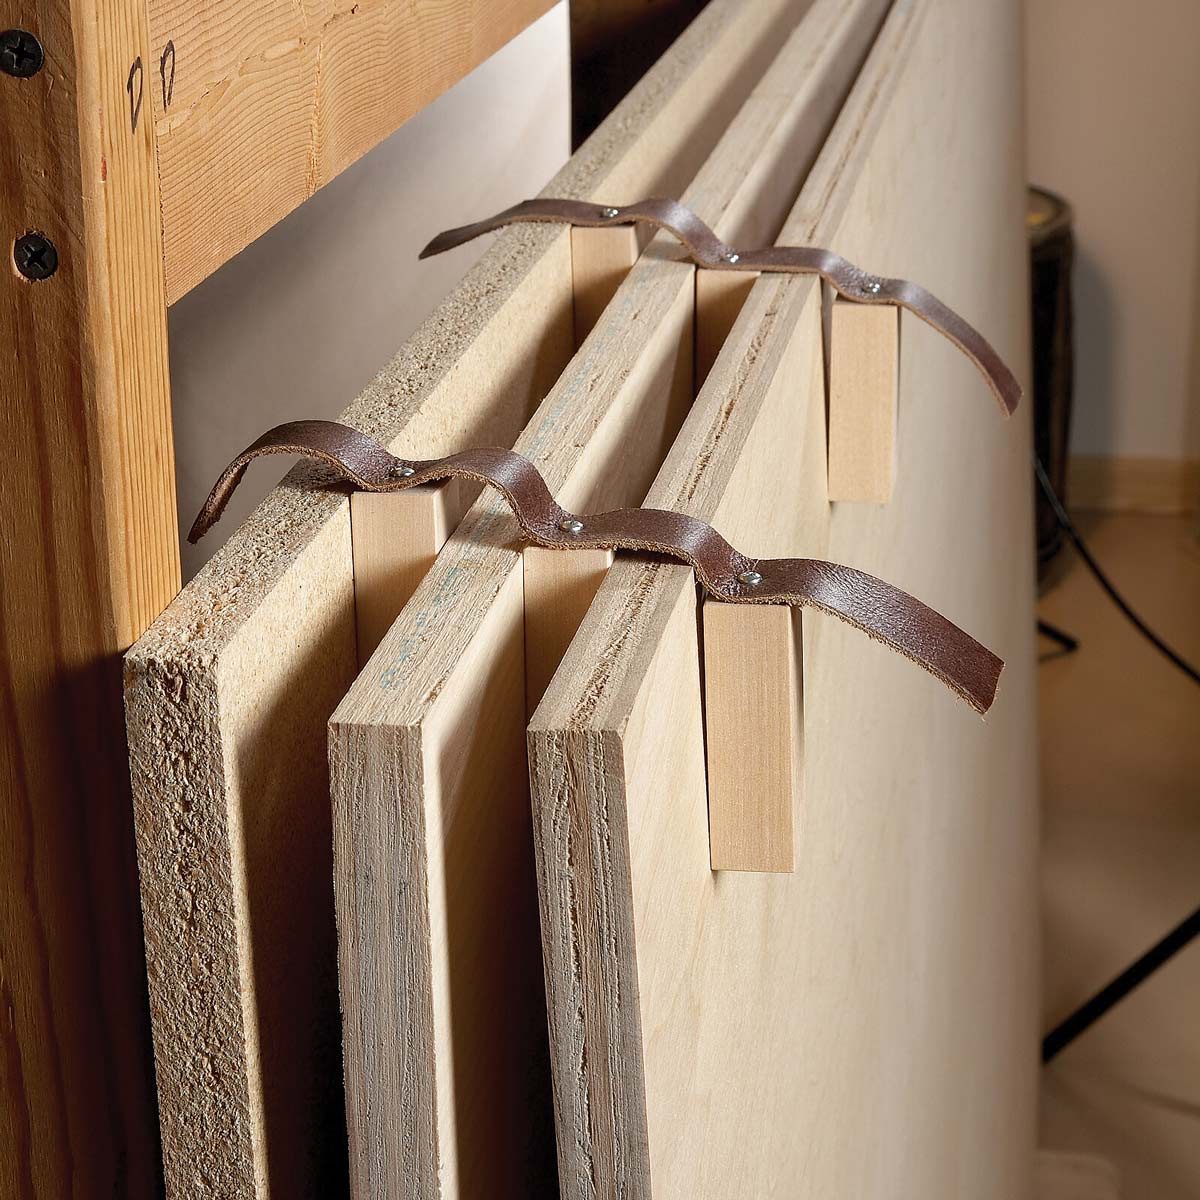
Best Hack For Storing Plywood
We were puzzled by the little belted-together blocks that were stuck between pieces of plywood alongside Bruce’s lumber rack, and received eye-opening instruction.
“Plywood or other sheet stock can warp, especially if it’s stored surface to surface. The blocks separate the sheets so air can circulate on both sides. Flat sheets from the lumberyard stay flat this way, no matter how long they’re stored,” Bruce said.
The leather is flexible, so you can use them on any combination of thicknesses of sheet goods.
The blocks are a snap to make from scrap wood and leather. Cut two 1-in.-wide strips of leather (or vinyl or heavy cloth) and space and screw 2-in. x 3/4-in. x 1-in. blocks along the strap.
“The air space also keeps them a lot easier to grab when you need to pull one out. For full sheets, use three sets of spacers, one at each end and one in the middle.”
Carrying plywood is incredibly simple with a simple length of rope.
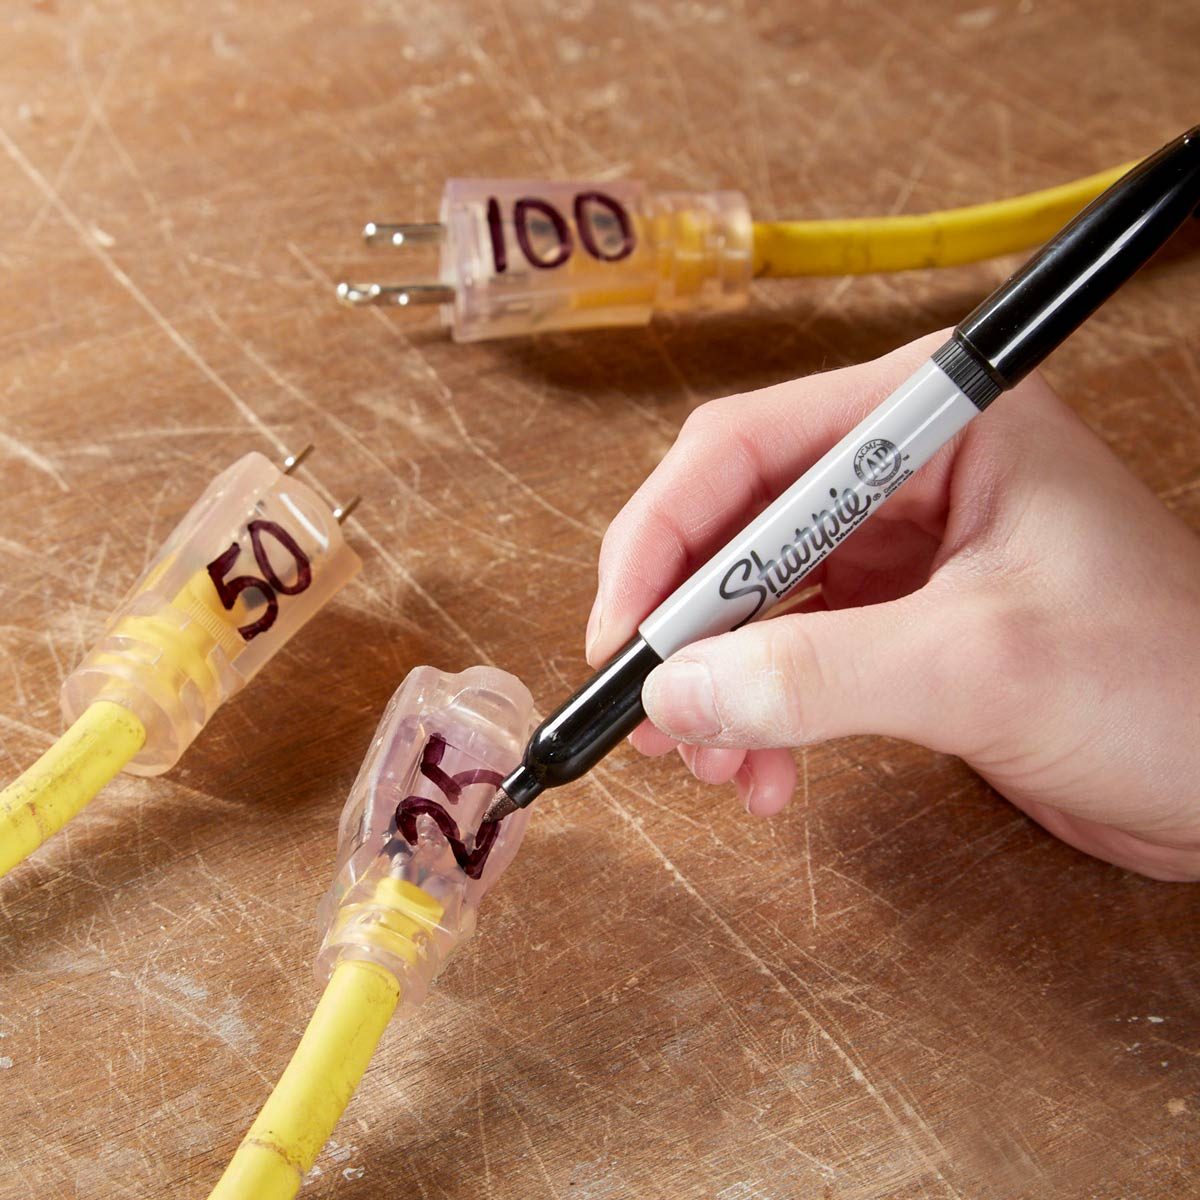
Quick Check Extension Cords
“Extension cords are workshop necessity, but they can also be a messy pain. When in a rush, I grew tired of not easily being able to tell the length of each extension cord. There’s no need to haul out and unreel a 100 ft. when a 50 ft. will do! So, I simply marked both ends of the cord with a permanent marker indicating their length. Now I know exactly which cord to grab for the need of each job!” — Dave Switzer
This brilliant cord organization project takes a cue from the kitchen. It’s so easy to DIY, the instructions need no words—literally.
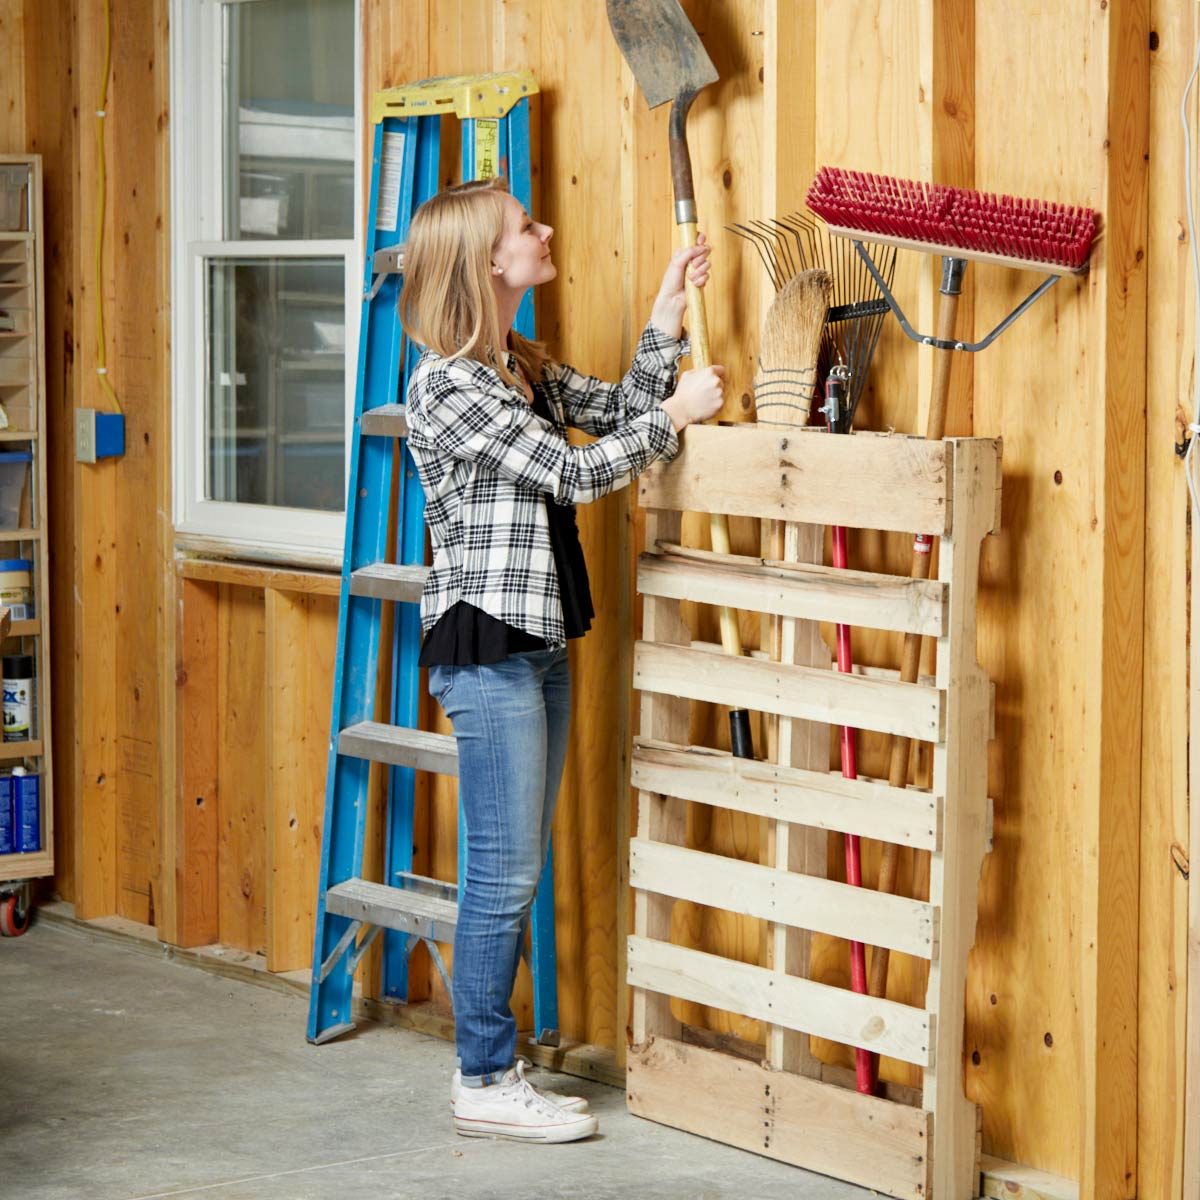
UseaPallettoStoreLawnandGardenEquipment
If you have a yard or a garden, you know that there are a lot of long-handled tools involved. You probably also know how obnoxious it is when you need the shovel or the rake and have to walk all over to find it. All you need for this pallet organization hack is a pallet, a couple of screws and a drill. And if you don’t have any pallets lying around, they are easy to get for free. Many businesses will give them to you, but you should call first! Another great place to check is local Craiglist ads. This is a quick one-hour project and after you’re done, your tools will be organized and easy to reach.
You could easily attach this pallet to a fence, shed or to the exposed wall studs in your garage. No matter what you choose, you’ll want to make sure that your screws are long enough to go through both your pallet and the wall you are attaching it to. We drilled two screws into the pallet, one into each exposed wall stud. You won’t need a ton of screws or nails because the pallet isn’t all that heavy. Now you have a quick and (possibly) free way to store your lawn tools!
Looking for more ways to work smarter in your workshop? Here are 19 tips from a seasoned woodworker and do-it-yourselfer.
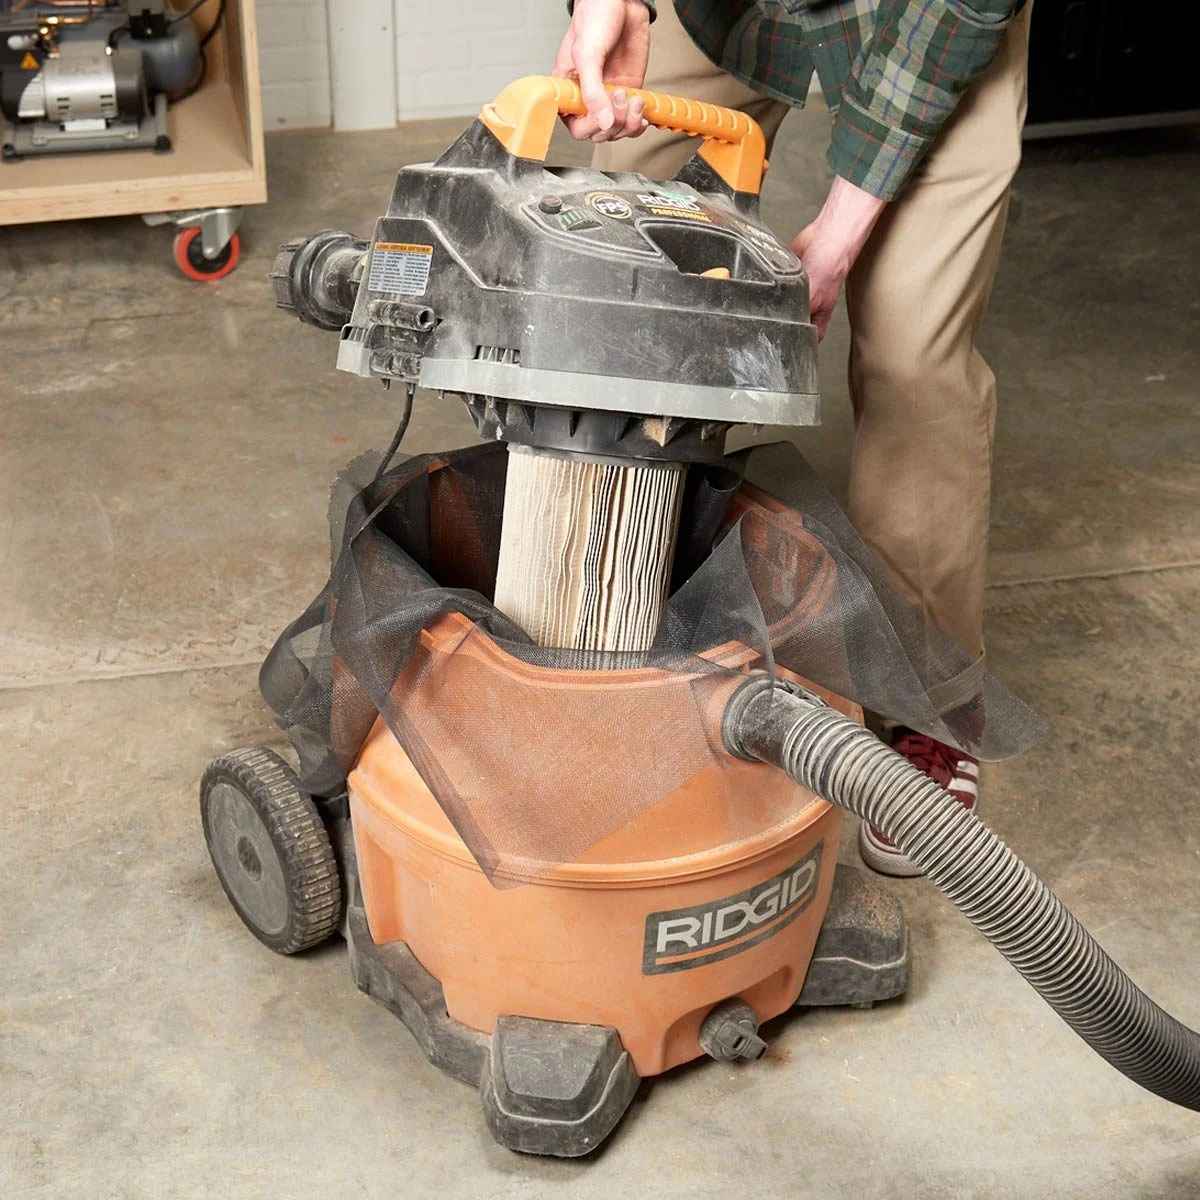
Extend the Life of your Shop Vac Filter with this Trick
Now that I have started wood turning, my shop vacuum gets a lot of work. I stopped using filter bags since they quickly fill with the large volume of chips and other wood debris, and instead I use a pleated filter. However, the filter can get plugged, reducing efficiency of the vacuum. I solved this problem by placing a large sheet of window screen fabric between the tank and the top part, which includes the filter. Now, dust and chips enter below the screen and won’t clog the filter. — Bill Wells
We love the Ridgid shop vacuum showed above. Check out the 16-gallon vacuum on Amazon.
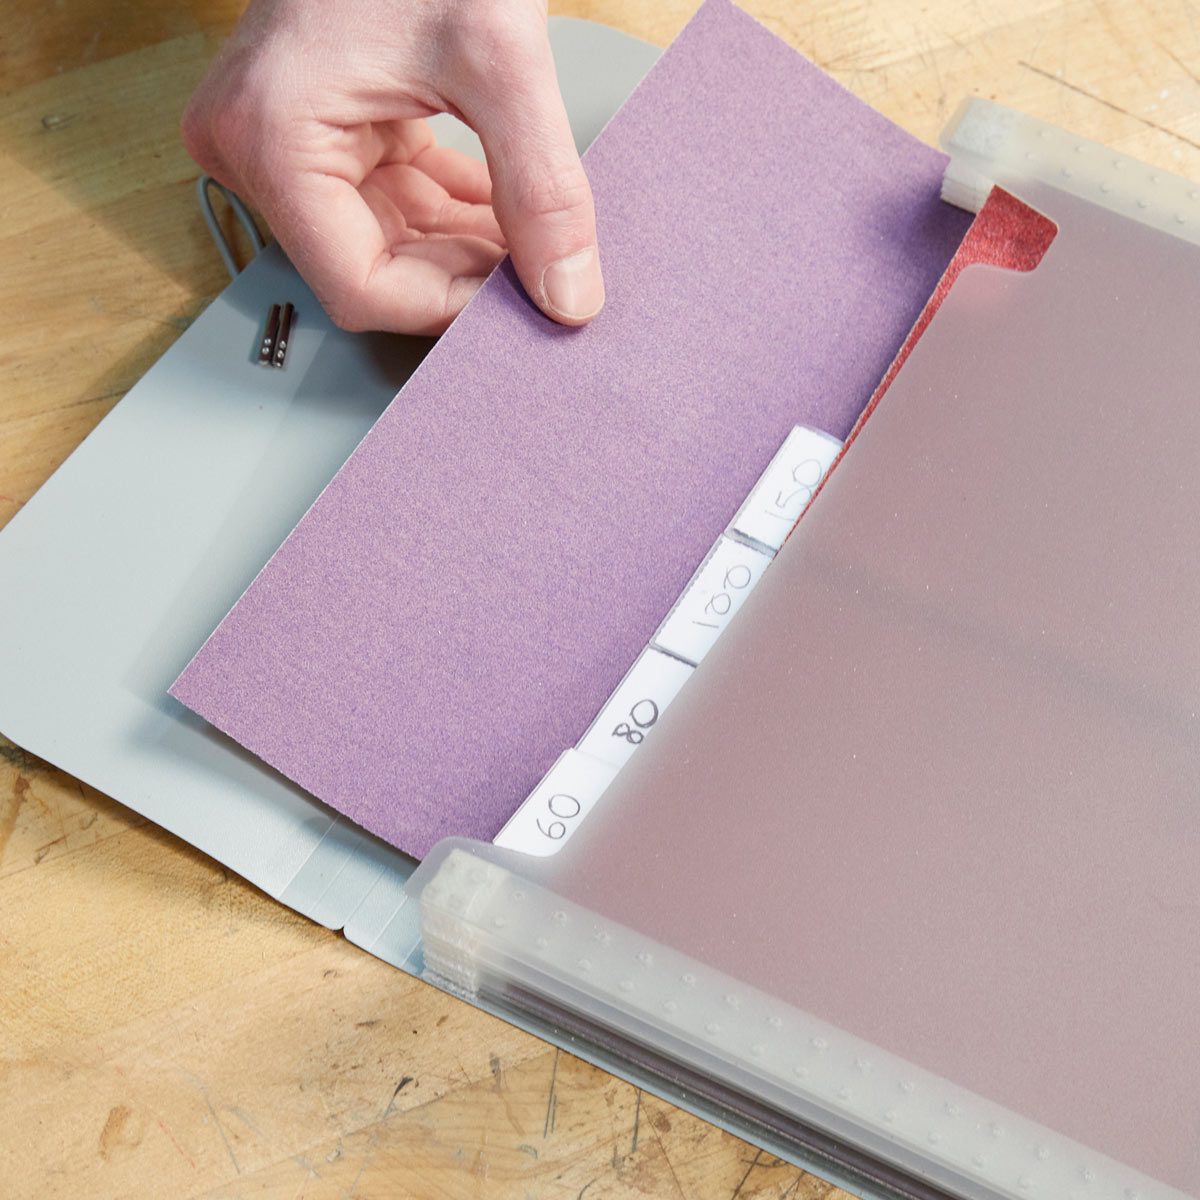
Accordion-Style Sandpaper Organization
Keeping sandpaper organized has always been tough for me. The best method I’ve found is to store my sandpaper in an accordion-style file folder, labeling the different grits on the folder tabs.– Spencer Olivier
Need one of these file folders? Check out this color-coded one on Amazon!
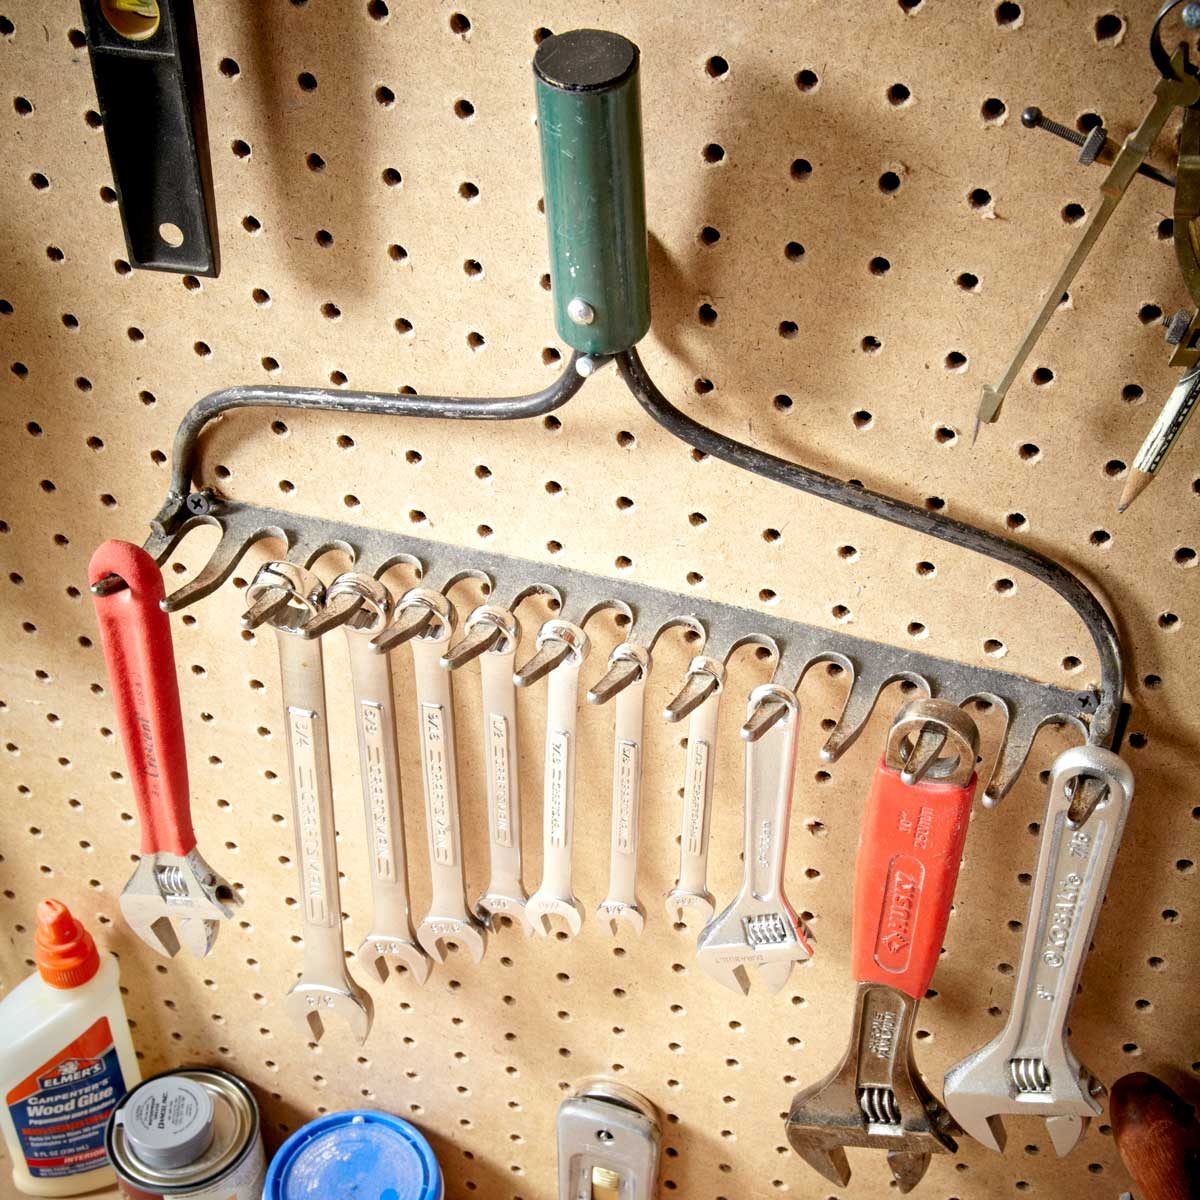
Turn Your Old Garden Rake Into a Shop Storage Solution
Don’t put your old rake out to pasture. Put the rake to use in your workshop instead. Just cut off the handle and hang it on the wall or on your pegboard. It’s a handy place to store wrenches and other tools. — Roy Dupont
Get a load of these creative tool storage options.
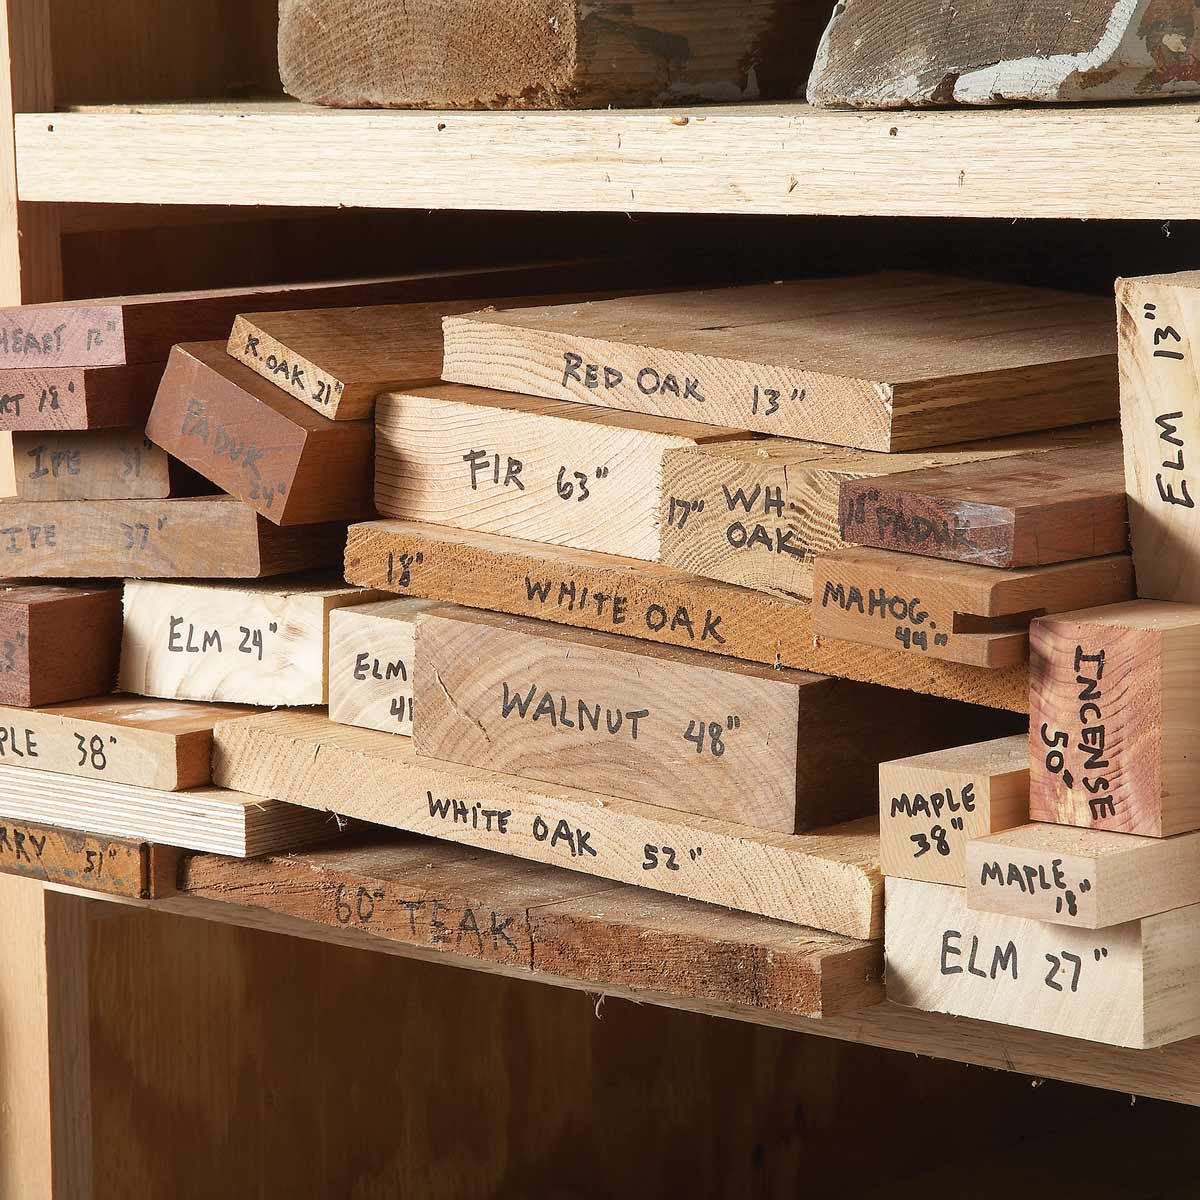
Lumber Library
OK, you know the drill. You go to the lumber pile and wonder what length the board is, what species of wood it is and then, whether it’s worth digging through the pile to get it out. Sometimes it’s easier to just go and do the Sunday crossword. Reader Jamie Smith has a simple tip. Label the ends with a permanent marker when you put them in the rack to begin with.
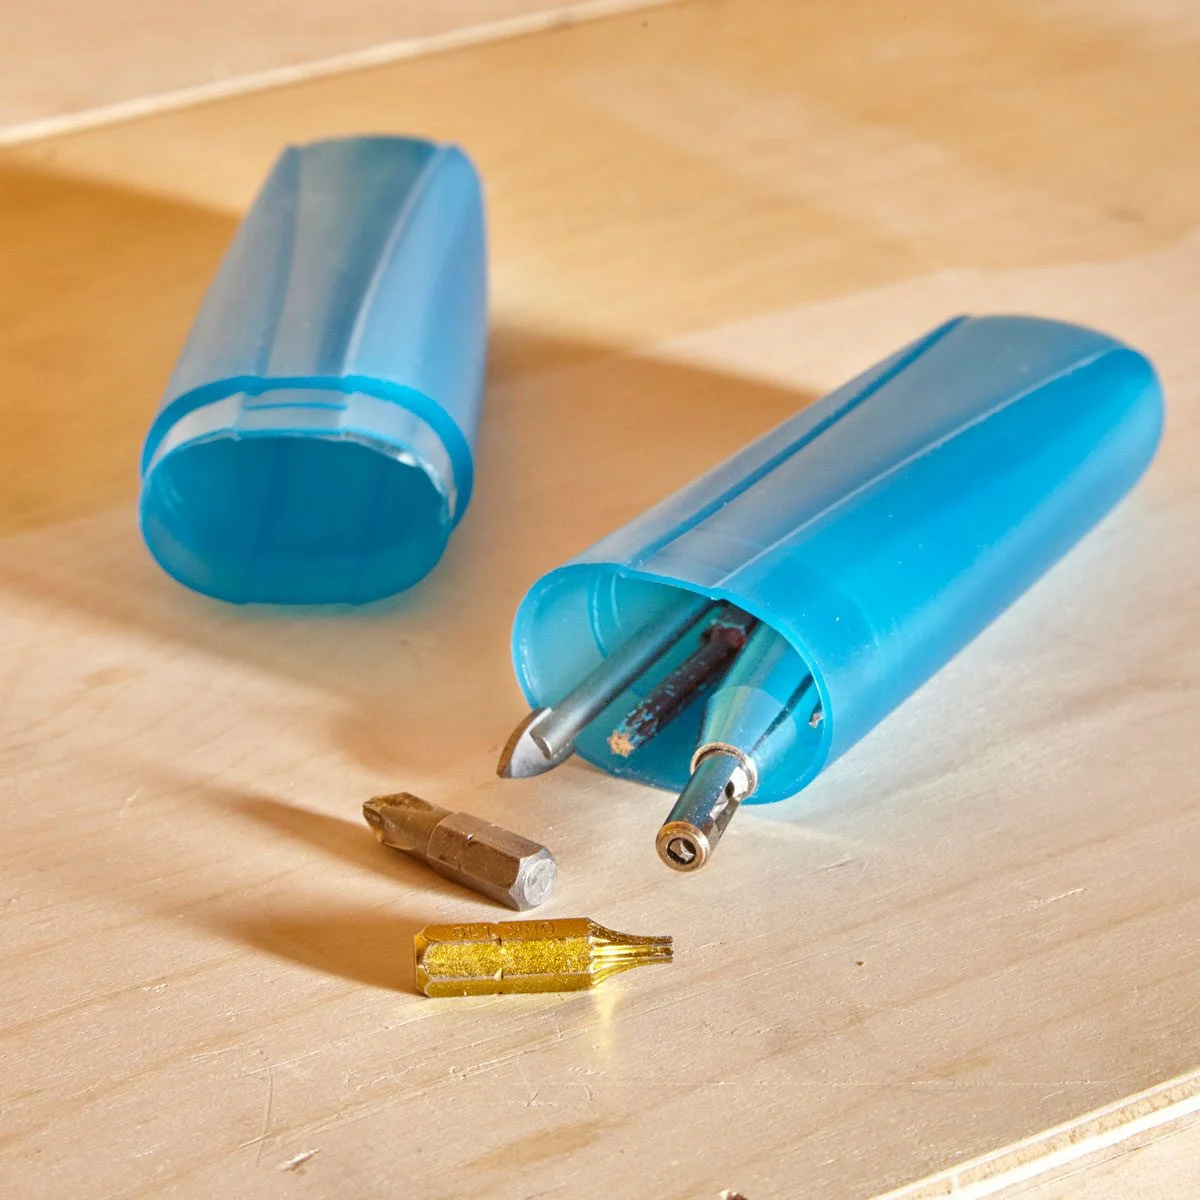
Cheap Travel Size Bit Holder
Toothbrush holders make great, inexpensive holders for drill and driver bits. You can find them at discount stores and drugstores in the sample/travel section. Label the holders with a permanent marker and keep them in your drill tote or tool pouch. — Vincent Lucrezi
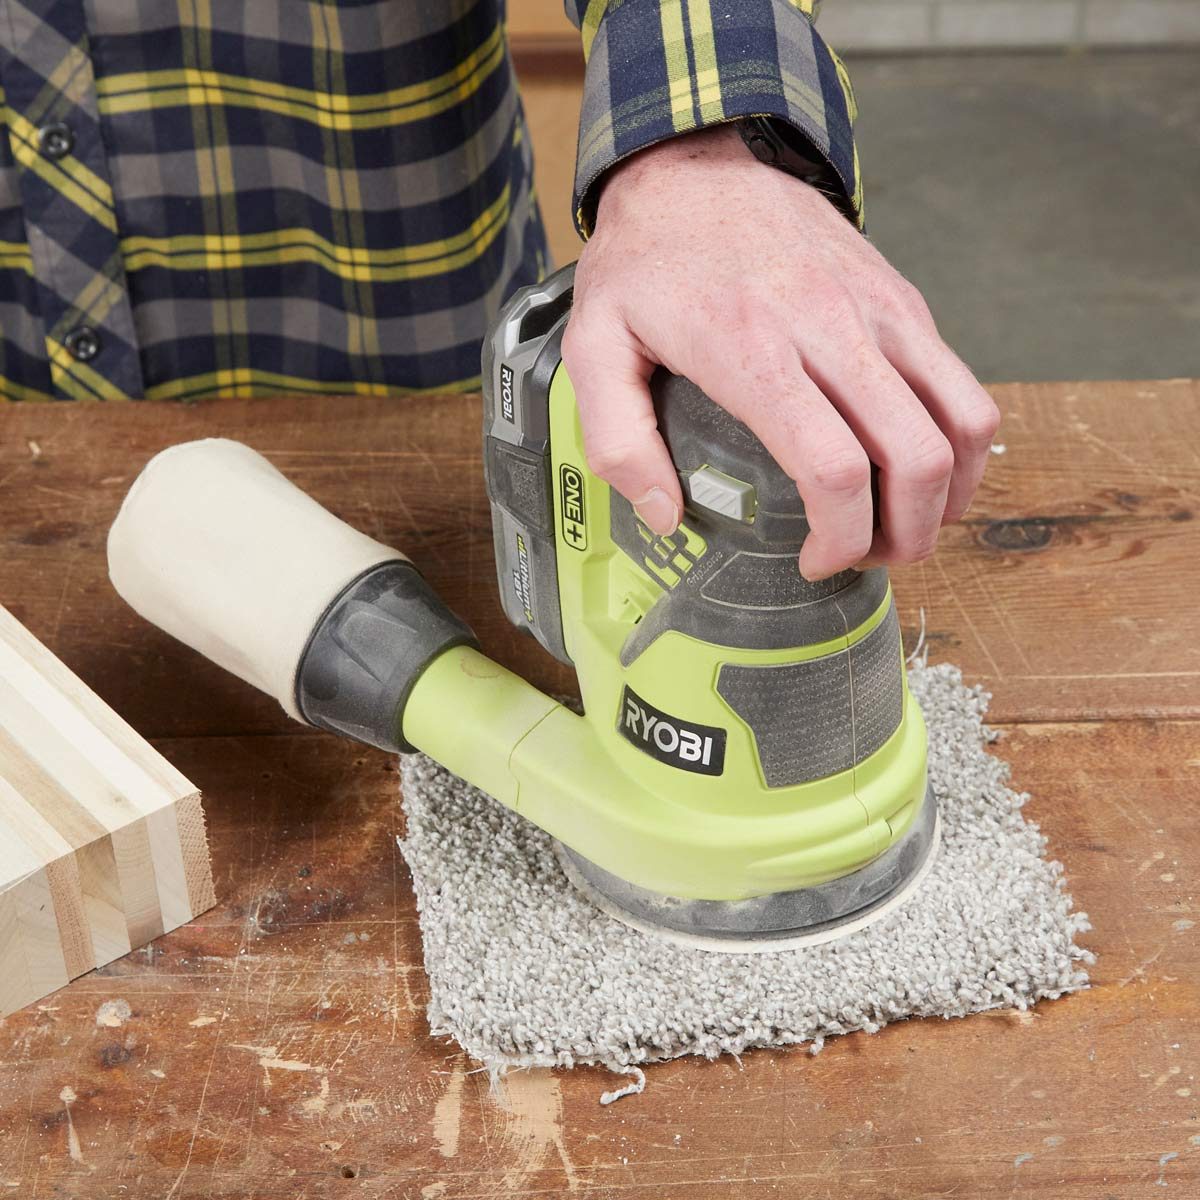
Landing Pad for Your Sander
It used to drive me nuts waiting for my random orbit sander to stop spinning so I could set it down. If I didn’t wait, it would dance around and tumble off my workbench. My solution was to keep a piece of carpet on my bench. I just set the sander on the carpet and let it wiggle quietly to a stop. — Phil Wortford.Here’s another brilliant use for carpet in your workshop.
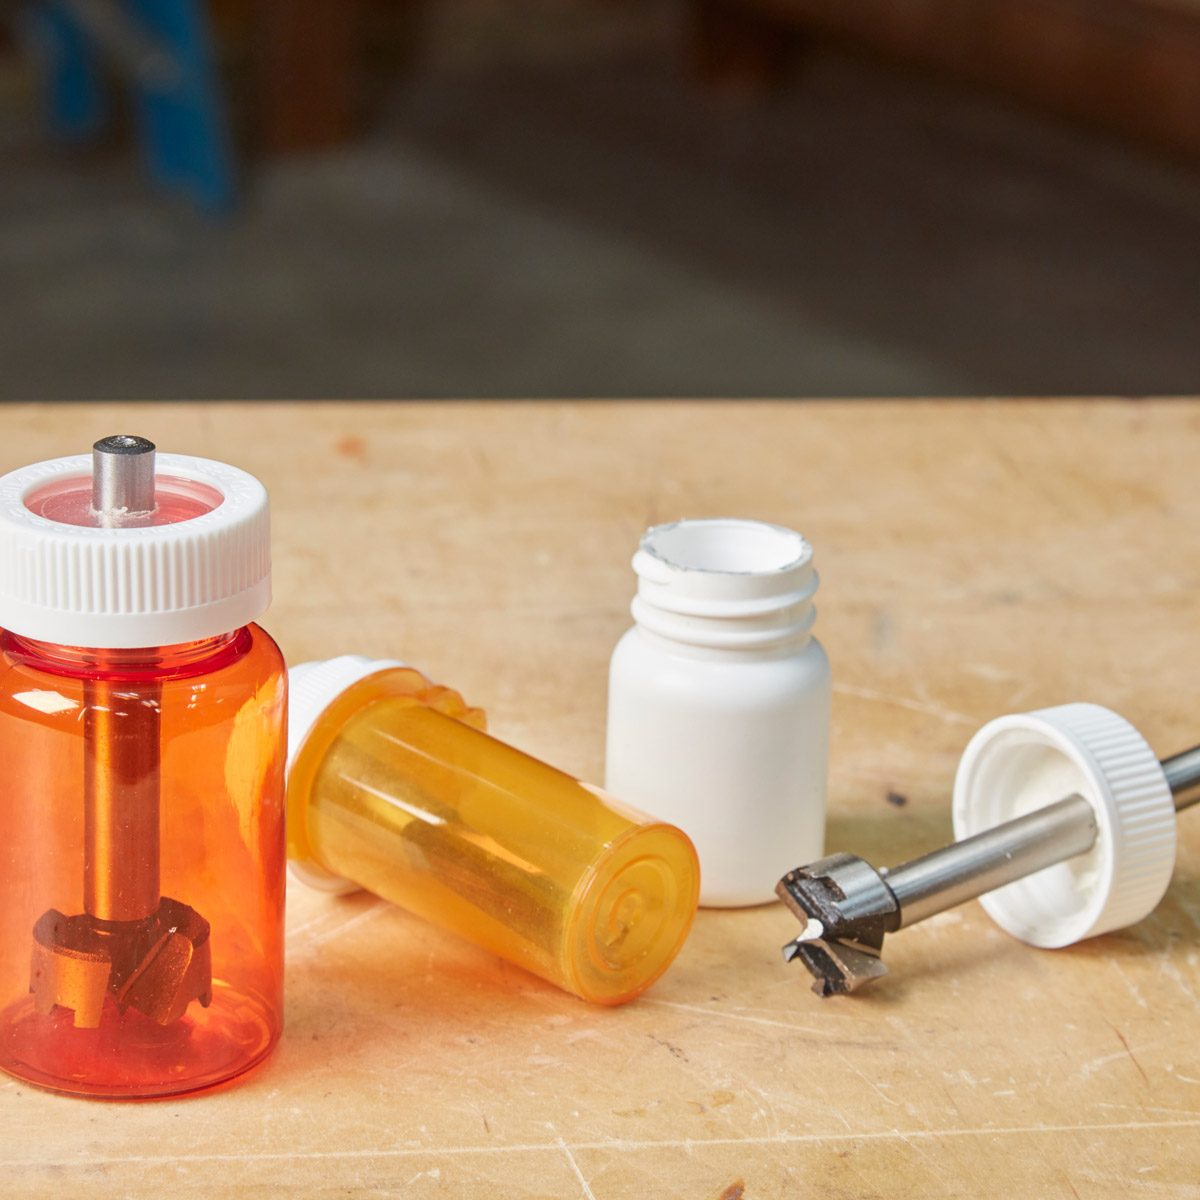
Pill Bottle Storage
Sometimes I carry Forstner drill bits in my toolbox. To protect the cutting edges, I customize plastic pill bottles by drilling holes in the lids for the shank to poke through. Works great for router bits too! — Earl Hagen
Irwin has a great set of Forstner bits that come in a handy case. If you don’t want to see your bits in pill bottles, check out this set from Amazon.
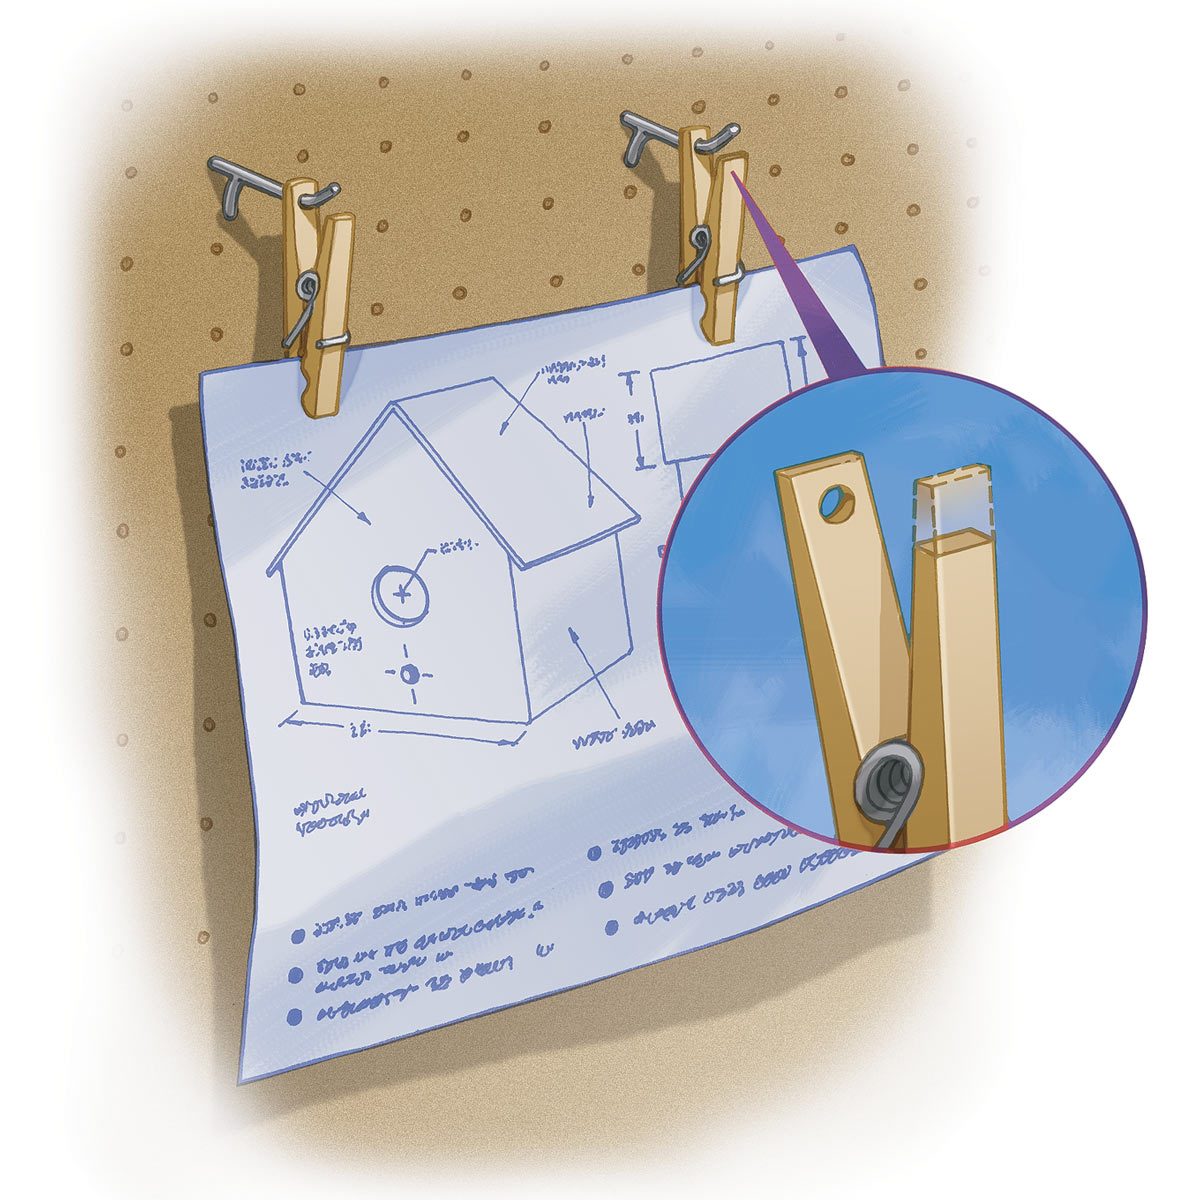
Pegboard Plans Hanger
If you have Pegboard over your workbench and you need to hang plans or drawings where you can see them, use two clothespins with a hole drilled in one end of each. Then hang each clothespin from a Pegboard hook and they’re ready to hold those plans.
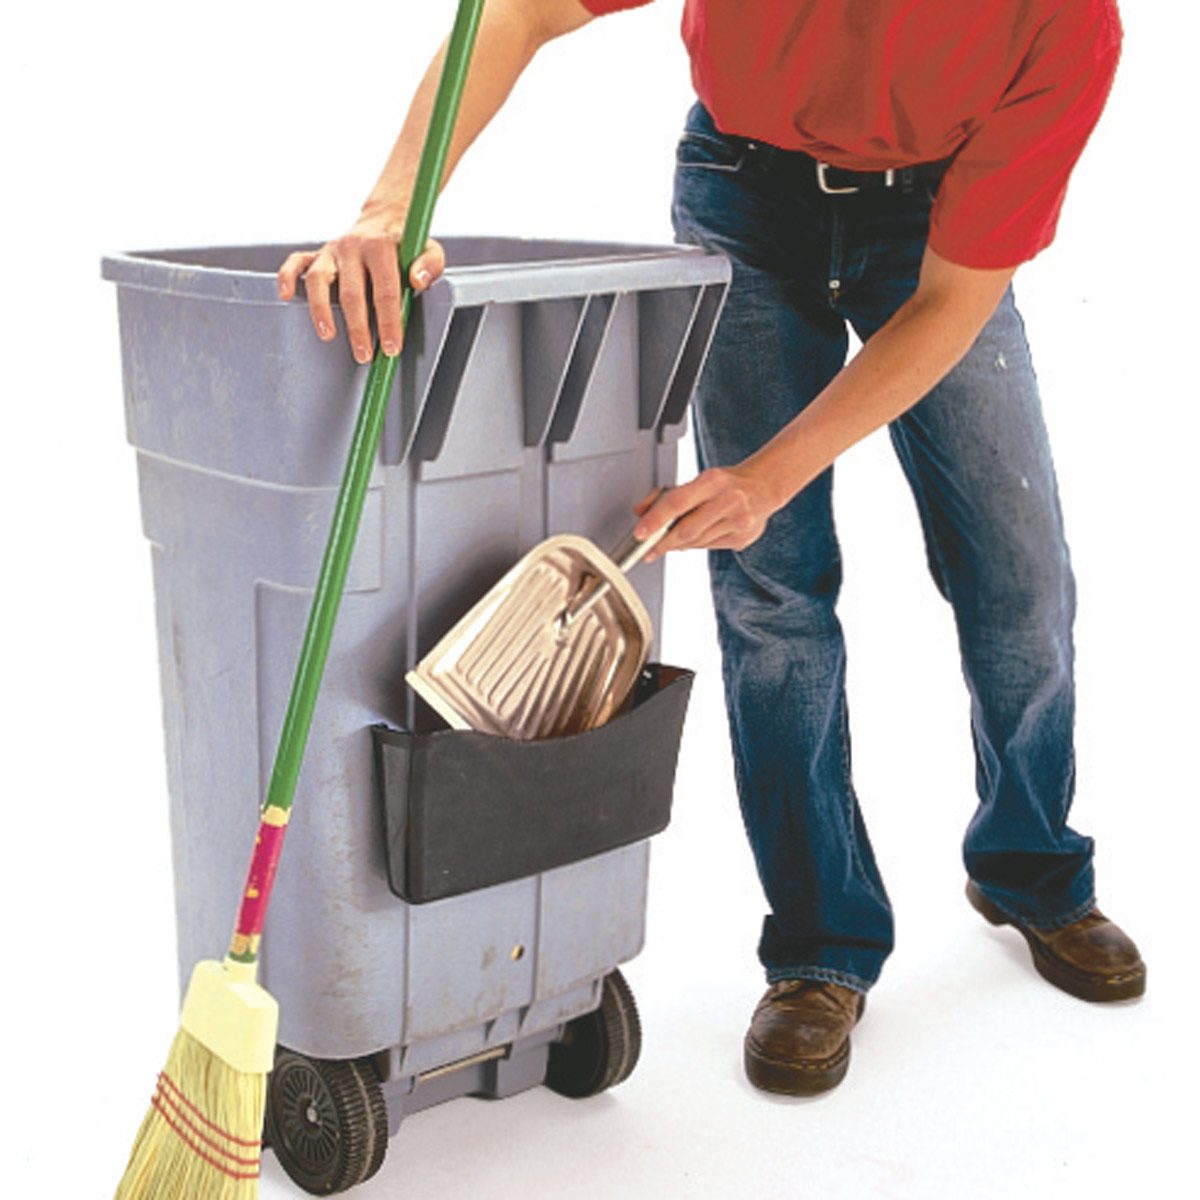
Dustpan Caddy
Keep a dustpan handy with an “unbreakable” wall file folder ($8) from an office supply store. Attach the file folder to the garbage can with 8-32 x 3/4-in. machine bolts and nuts. Position the screw heads inside the garbage can so the bag doesn’t snag on the end of the bolt. — Joe Hyde

Instant Paper Towel Holder
If you need a way to hang paper towels in your workshop, find an old 9-in. paint roller, hang it on a nail and put a roll of paper towels on it. You can move it around whenever you want. And best of all, it’s free! — Ramon Chavez. Plus: Check out these other awesome painting tool hacks.
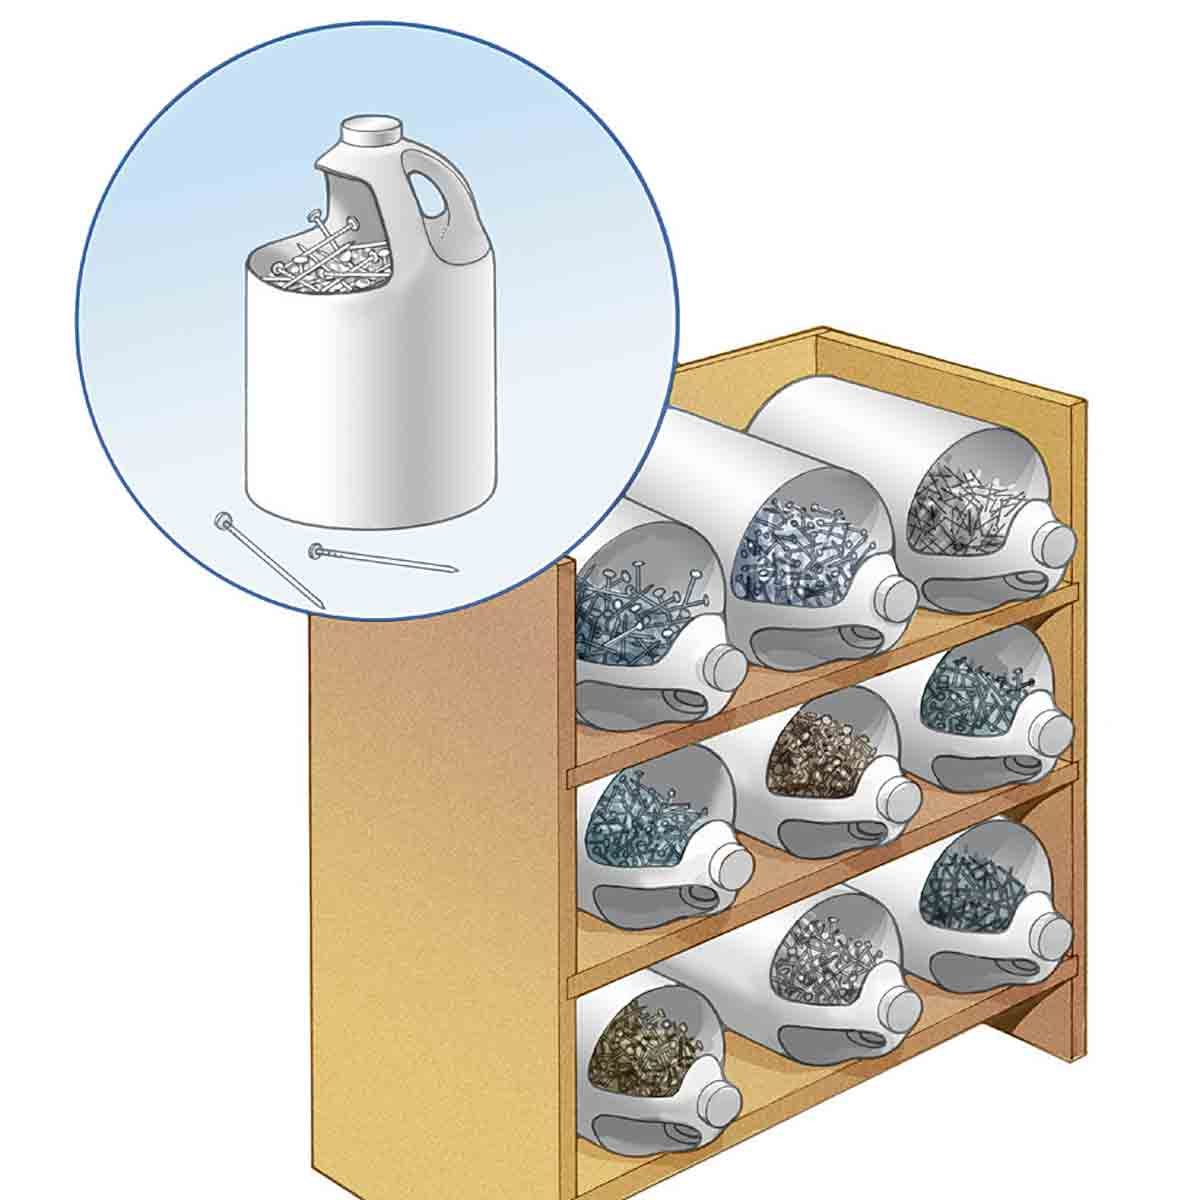
Neat Nail Organizer
Bleach bottles make great nail organizers, once you cut out a section of the top. When the bottles are stored on their sides, the weight of the nails keeps them from rolling. The handles make for easy carrying, and they can stand upright when off the shelves.
Quick and Clever Workshop Storage Solutions
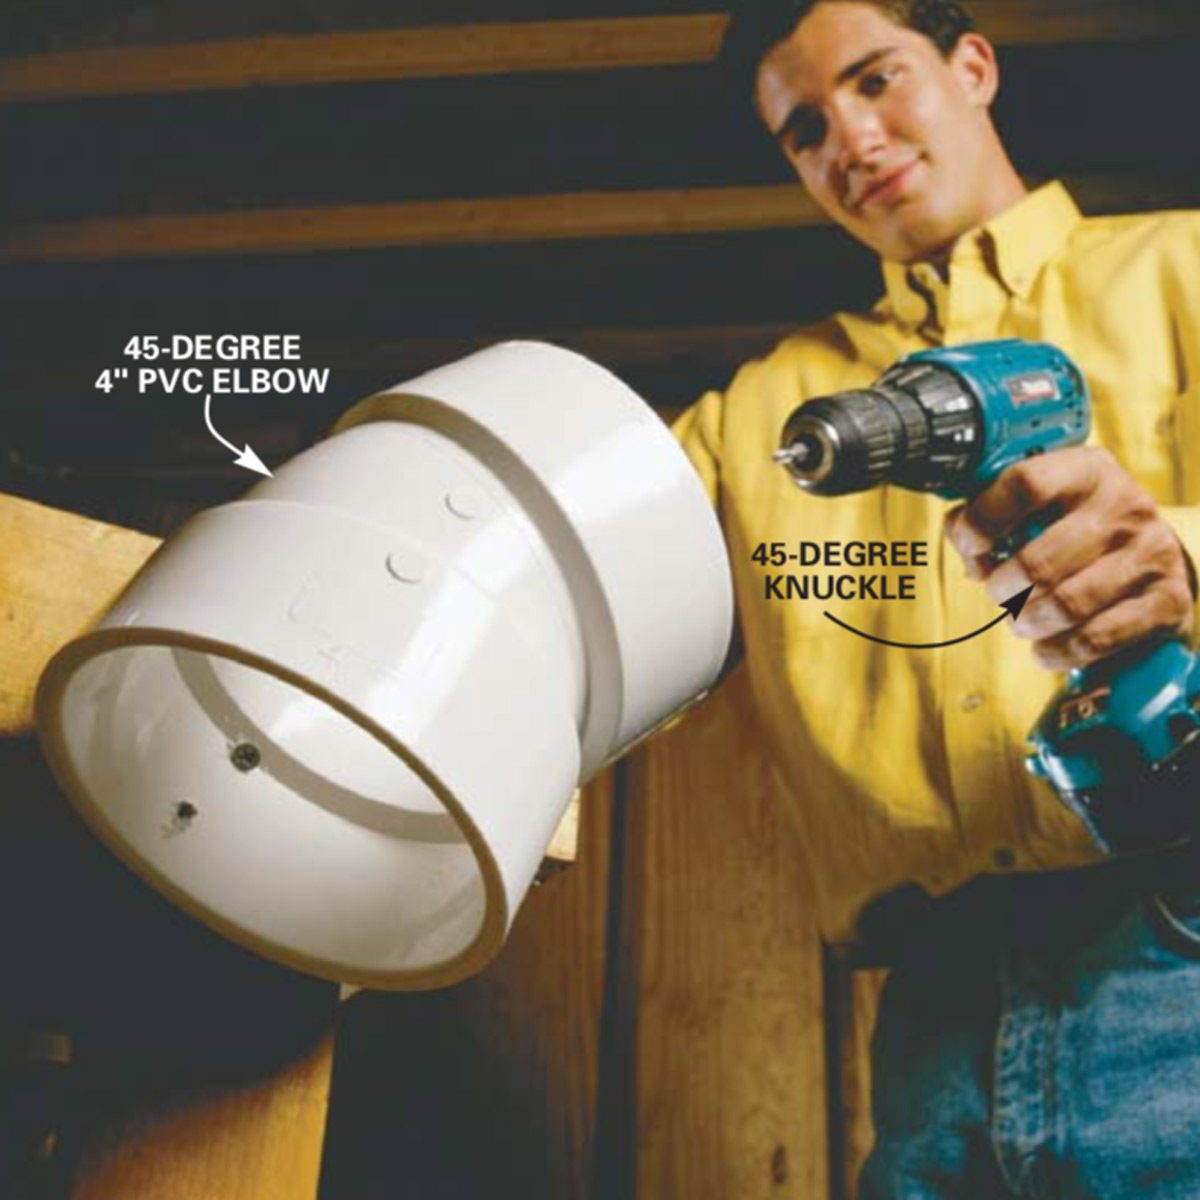
Cordless Drill Holster
Make a nifty cordless drill holster by screwing a 45-degree 4-in. PVC elbow ($3) to the side of your workbench. Quick- draw the drill out of the holster when you’re ready for action.
Need a new drill? Try this great Dewalt option.
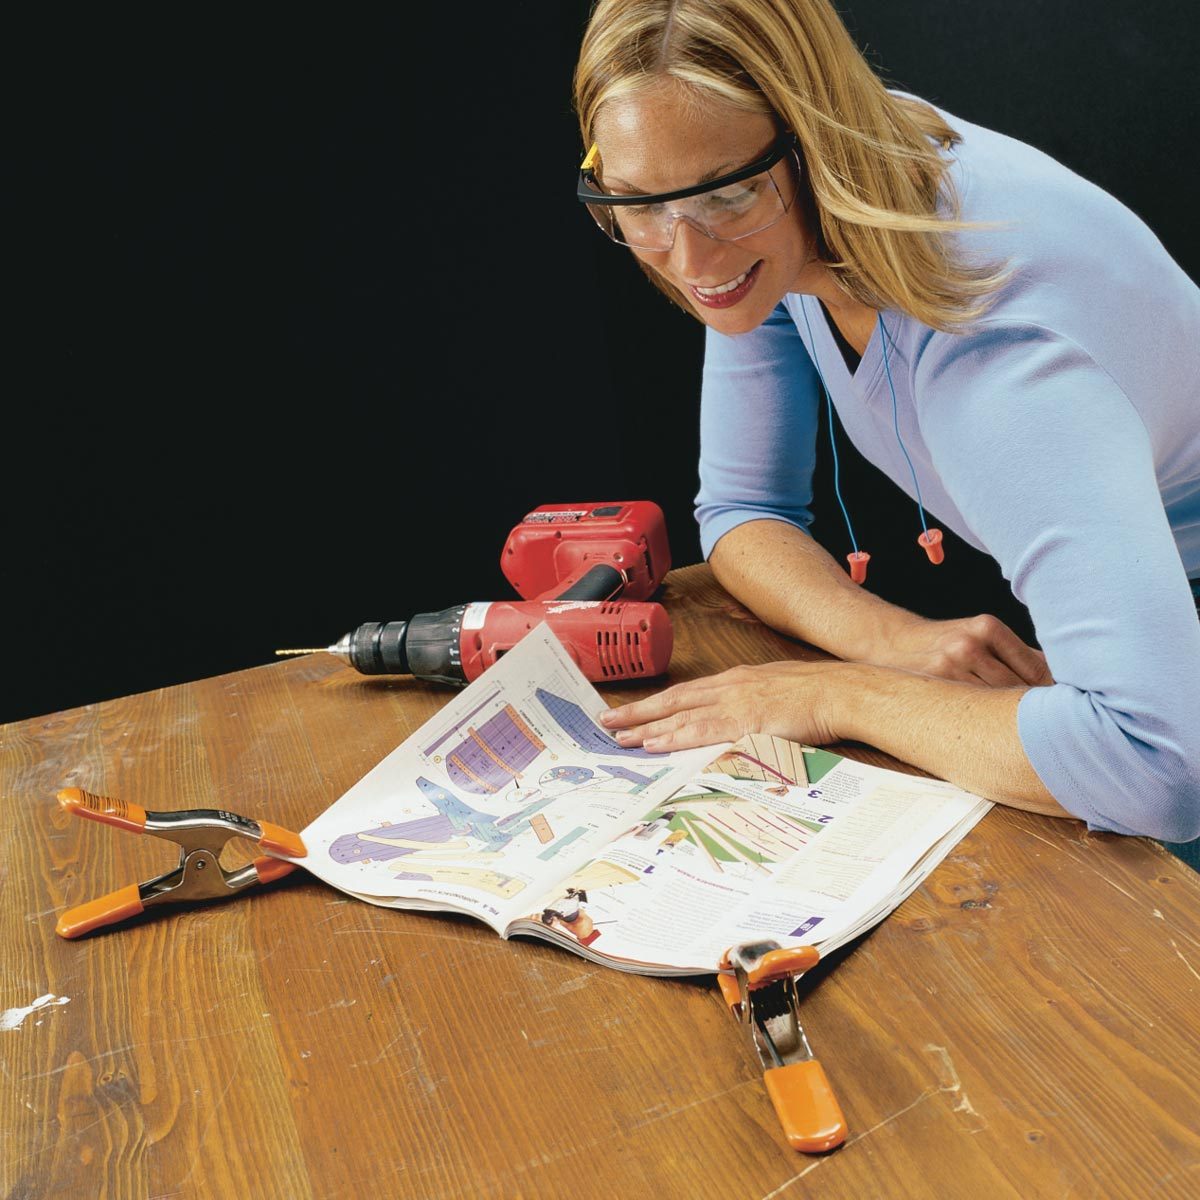
Project Plan Hold-Down
I like to use my workbench outside in nice weather, but the slightest breeze sends my plans flying or turns the magazine page. So now I put spring clamps at the corners of the plans or magazine to keep it on the table and open to the page I’m on.
Need some spring clamps? Try these from Pony.
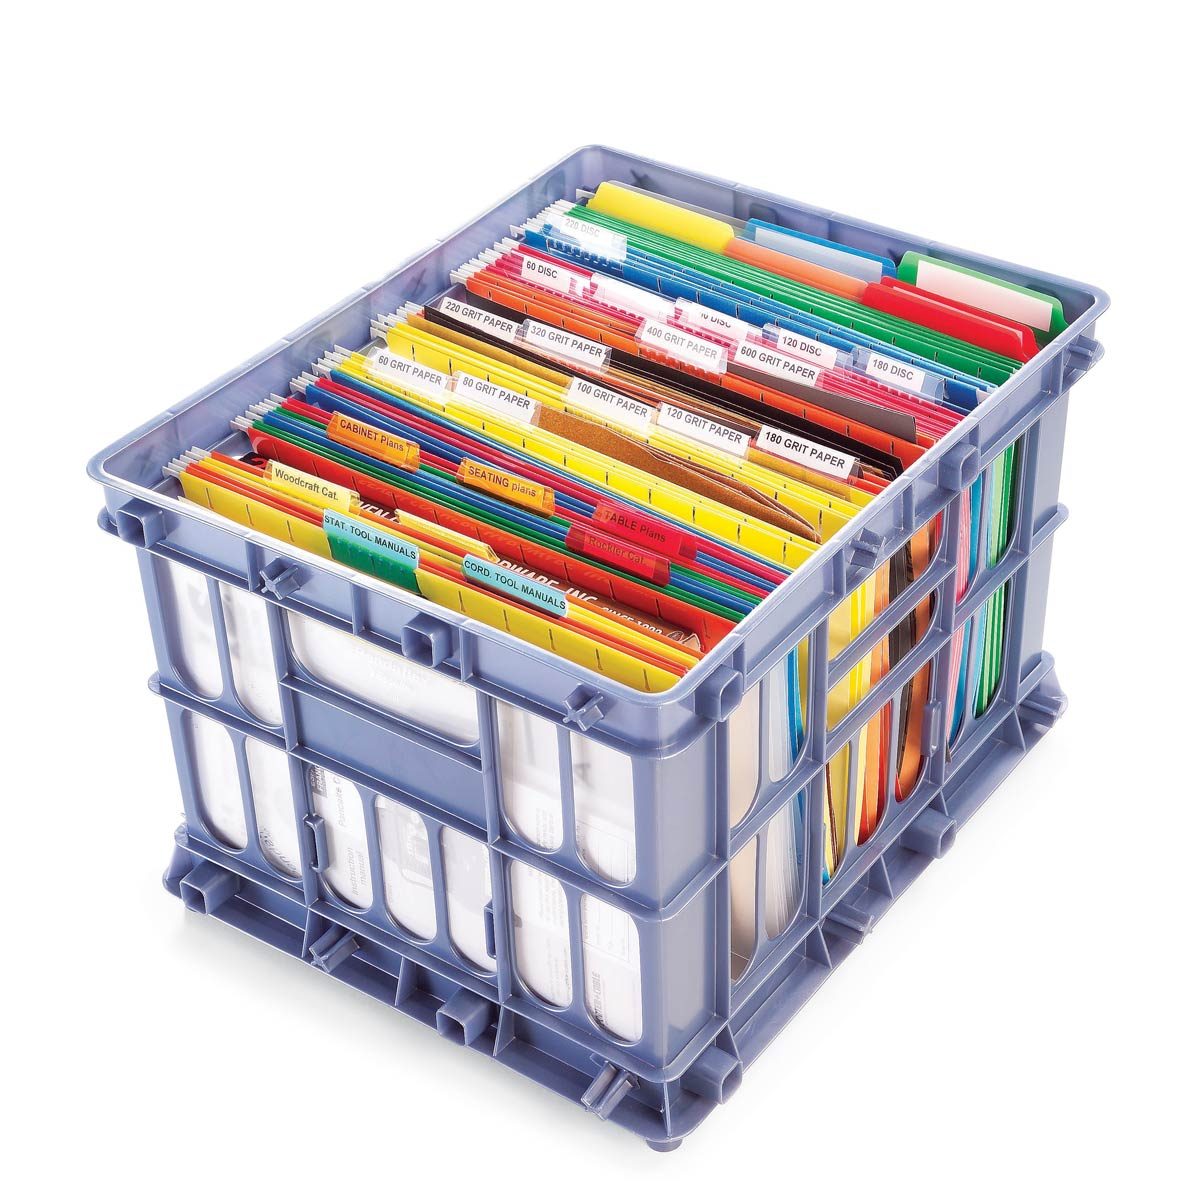
Workshop File Crate
Organize all your tool manuals, sandpaper, receipts, project plans and more in a plastic file box ($5 at an office supply store) loaded with hanging files. If you neatly label the files, the next time you want to take apart the chain saw, or need a piece of 220-grit sandpaper, you won’t waste a second rummaging around for the manual or sandpaper. Thanks to reader Lauren Baugrud for this orderly tip. Check out our clutter-busting strategies inside the home too!
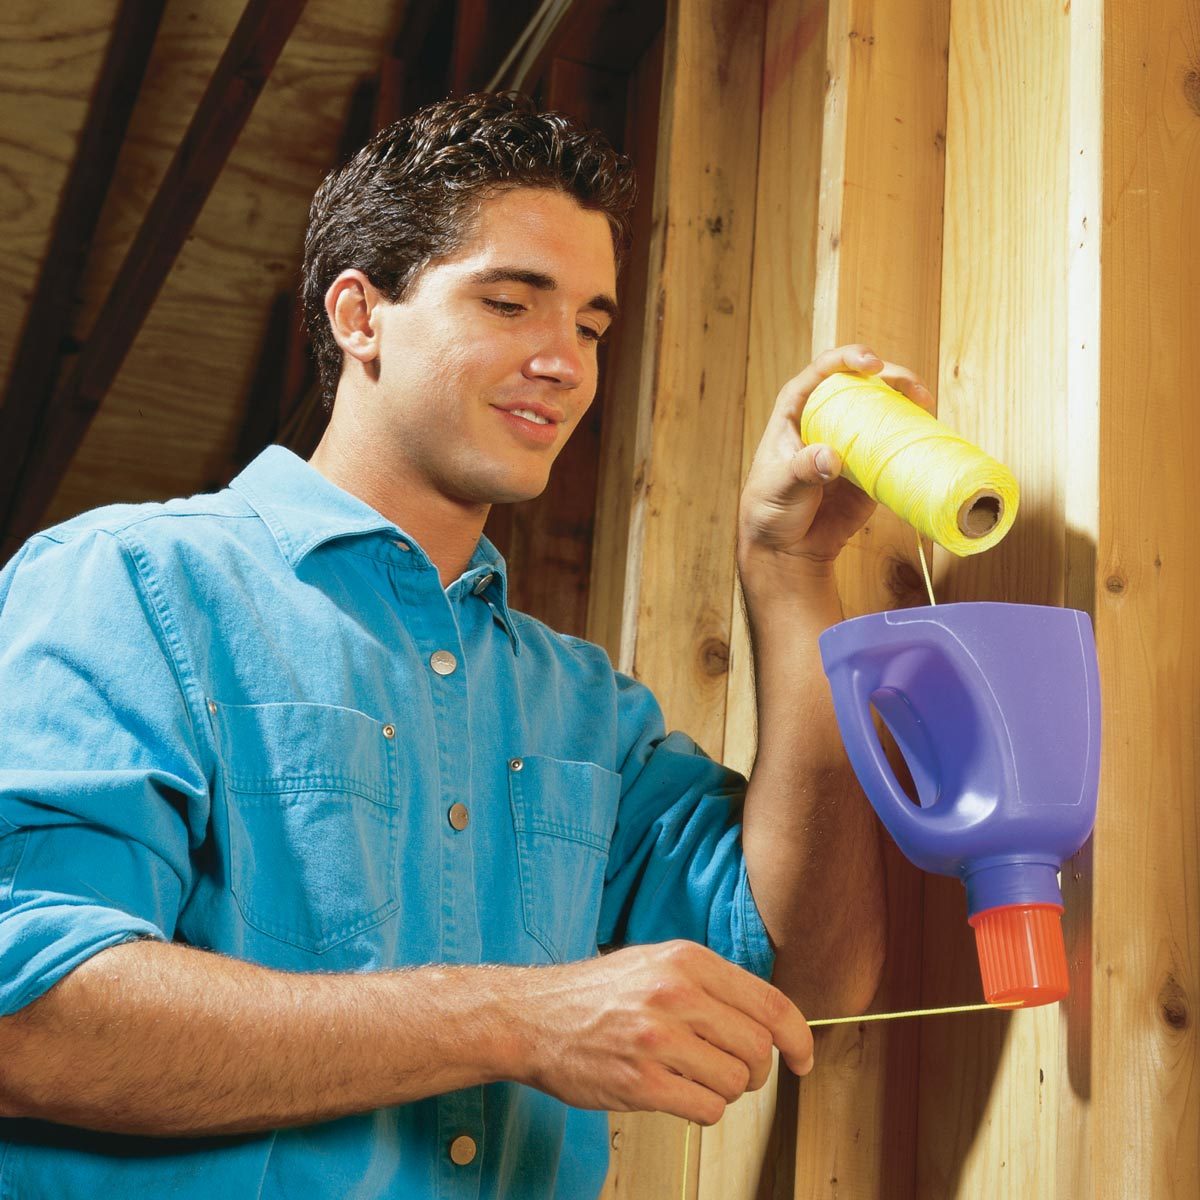
Twine Dispenser
Prevent balls of twine from tangling up by making a twine dispenser from an empty plastic detergent jug. Cut the bottom off the jug and drill a hole in the cap. Screw the jug to your shop wall with the spout facing down. Drop the ball of twine into the jug, thread it through the hole and screw the cap on.
Click here for 21 more ways to reuse old plastic jugs and bottles.

Reuse Plastic Containers
Keep your string easily accessible and tangle free with this string holder. Take an old plastic peanut butter jar and drill a hole in the bottom of it. Place a ball of string inside and pull the end of the string through the hole. Fasten the lid to the wall or cabinet near your workbench, and screw the jar onto the lid. — Wayne Ufford
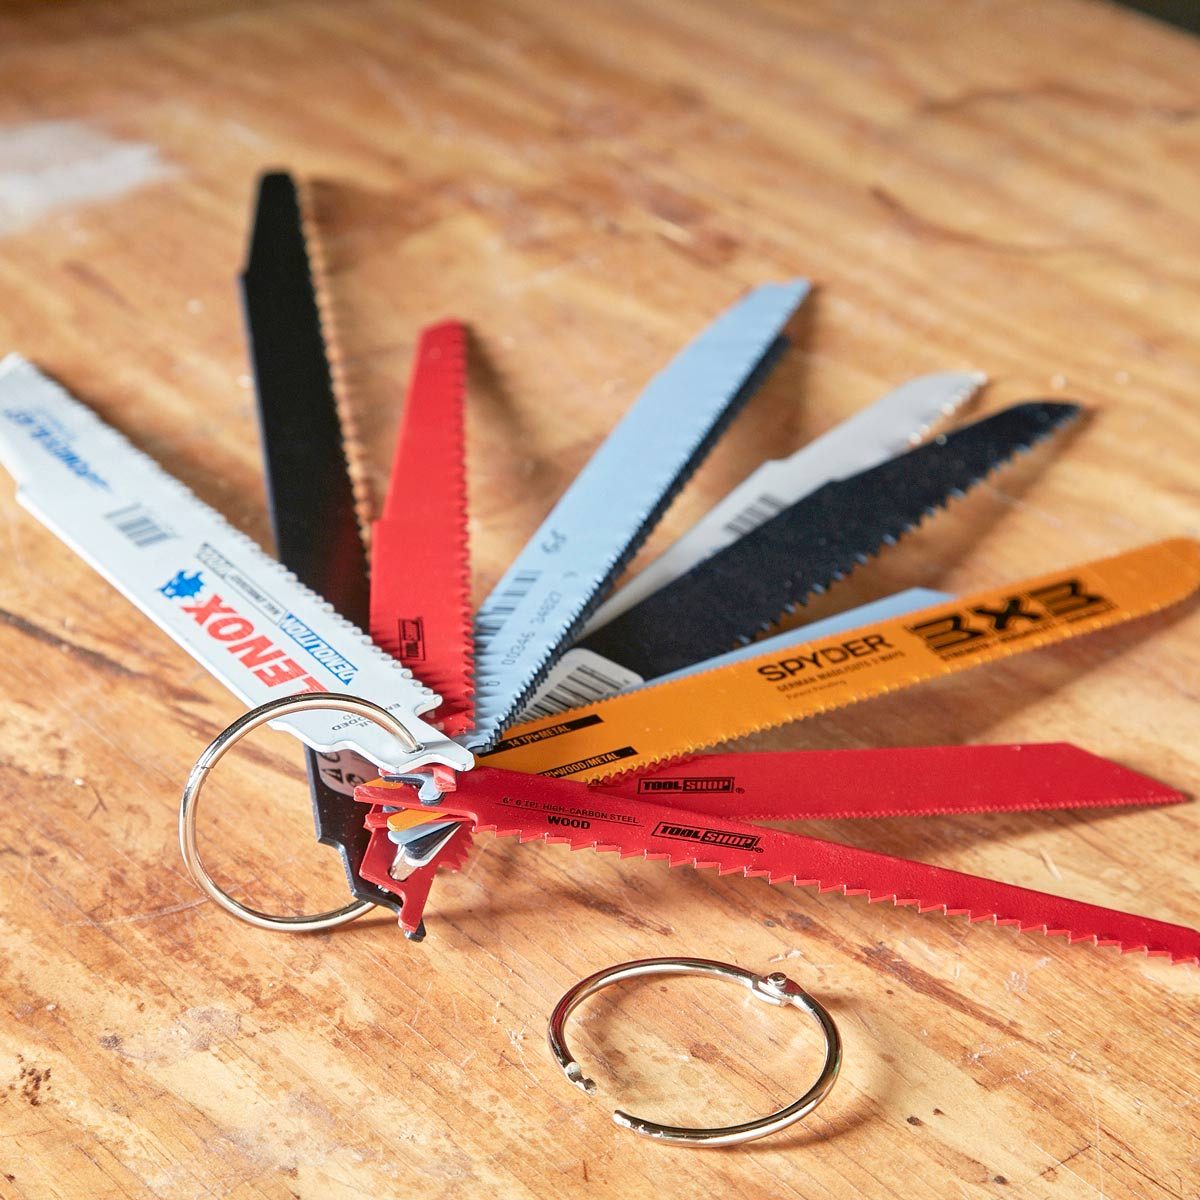
Reciprocating Saw Blade Binder
I used to keep all my reciprocating saw blades inside my saw’s case, but they were a mess and it was hard to find just the right one. So I found a binder ring at an office supply store to keep the blades together. — Andrew Wolf
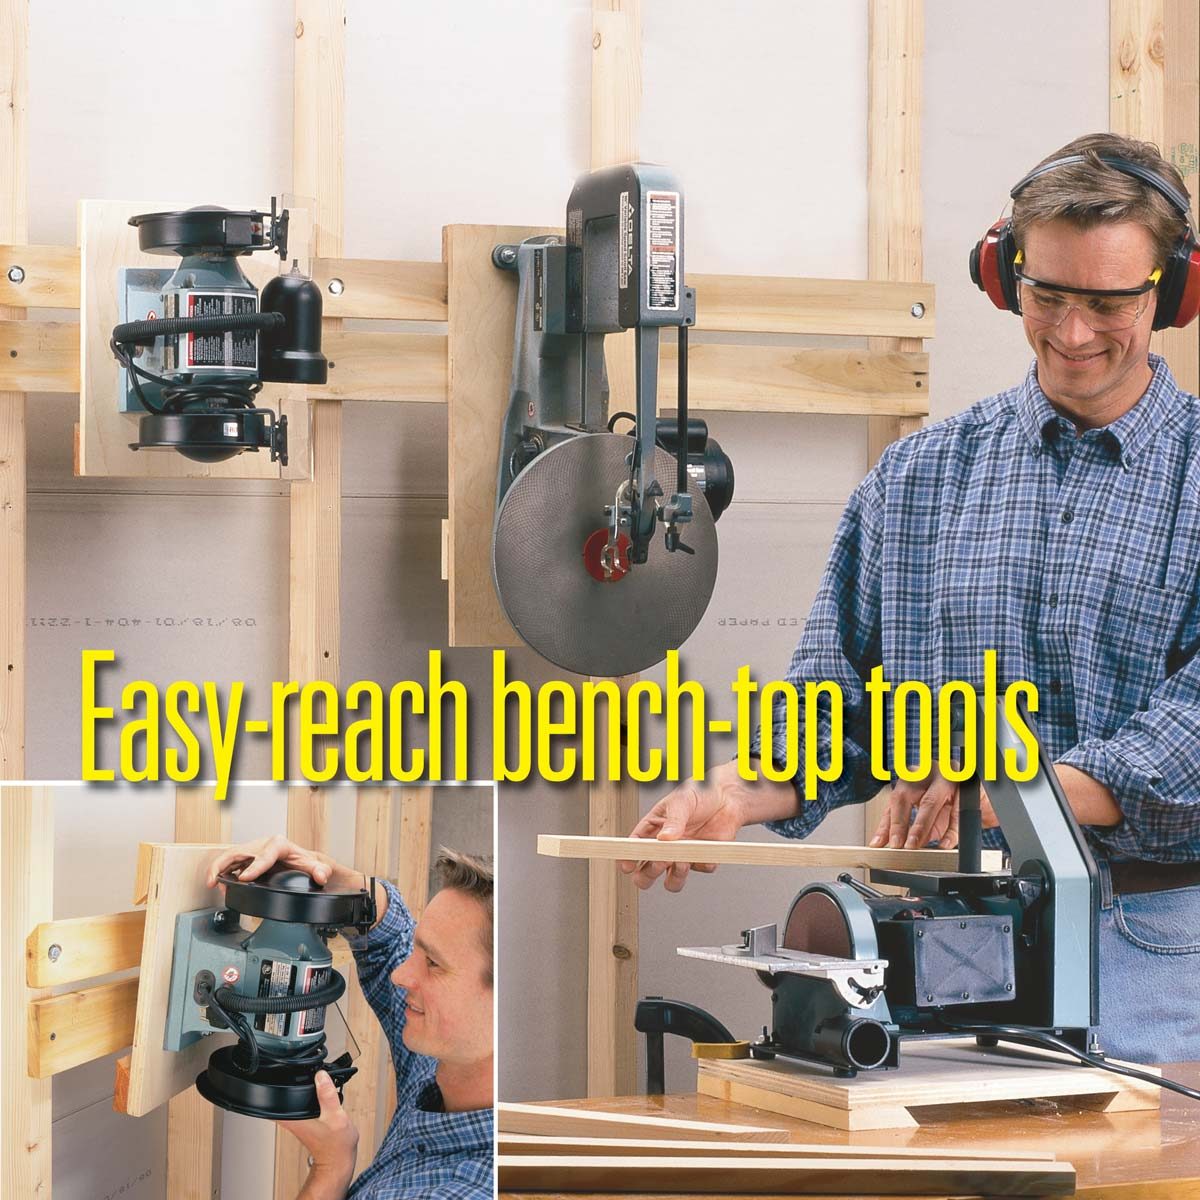
Easy-Reach Bench-Top Tools
Screw each tool to a 3/4-in. plywood base with lag screws and flat washers. Plane or saw a 40-degree angle on one edge of a 3-in. x 3/4-in. board and cut it into cleats. Screw two cleats to each base with the angled edge facing inward. Now, with 1/4-in. x 3-in. lag screws, screw another 3/4-in. board or long piece of plywood with a 40-degree edge to the wall, being sure the screws go into wall studs. That’s it—tool clutter ended. Hang the tools from either end of the base, but be sure to hang only the lighter-weight bench-top tools. For larger tools like table saws and planers, we recommend horizontal storage, not wall-hung.
Now go check out these 20 unusual uses for workshop tools!
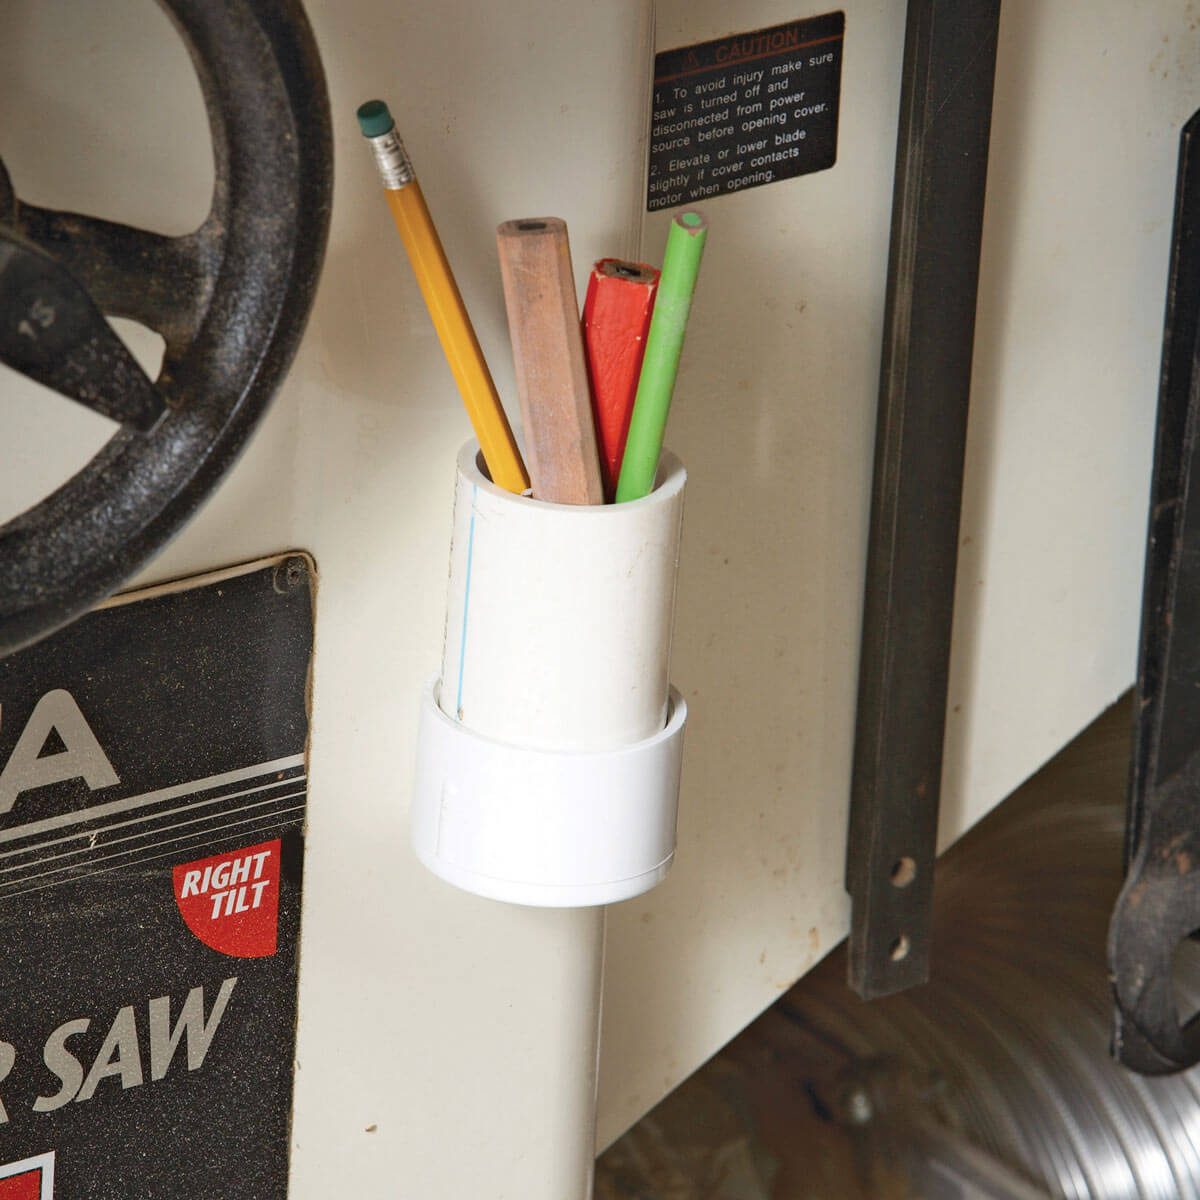
Pencils, Pencils, Everywhere!
If you spend one-third of your time woodworking, one-third looking for tape measures and the other third searching for a pencil, here’s what to do about the pencil part. Cut 3-in. lengths of 1-1/2-in. PVC pipe and hot-glue them near every tool and work surface in your shop. Choose a spot where they’re out of the way. Stock them all with pencils and you’ll have a third more woodworking time. We’ll get to work on the tape measure part next.
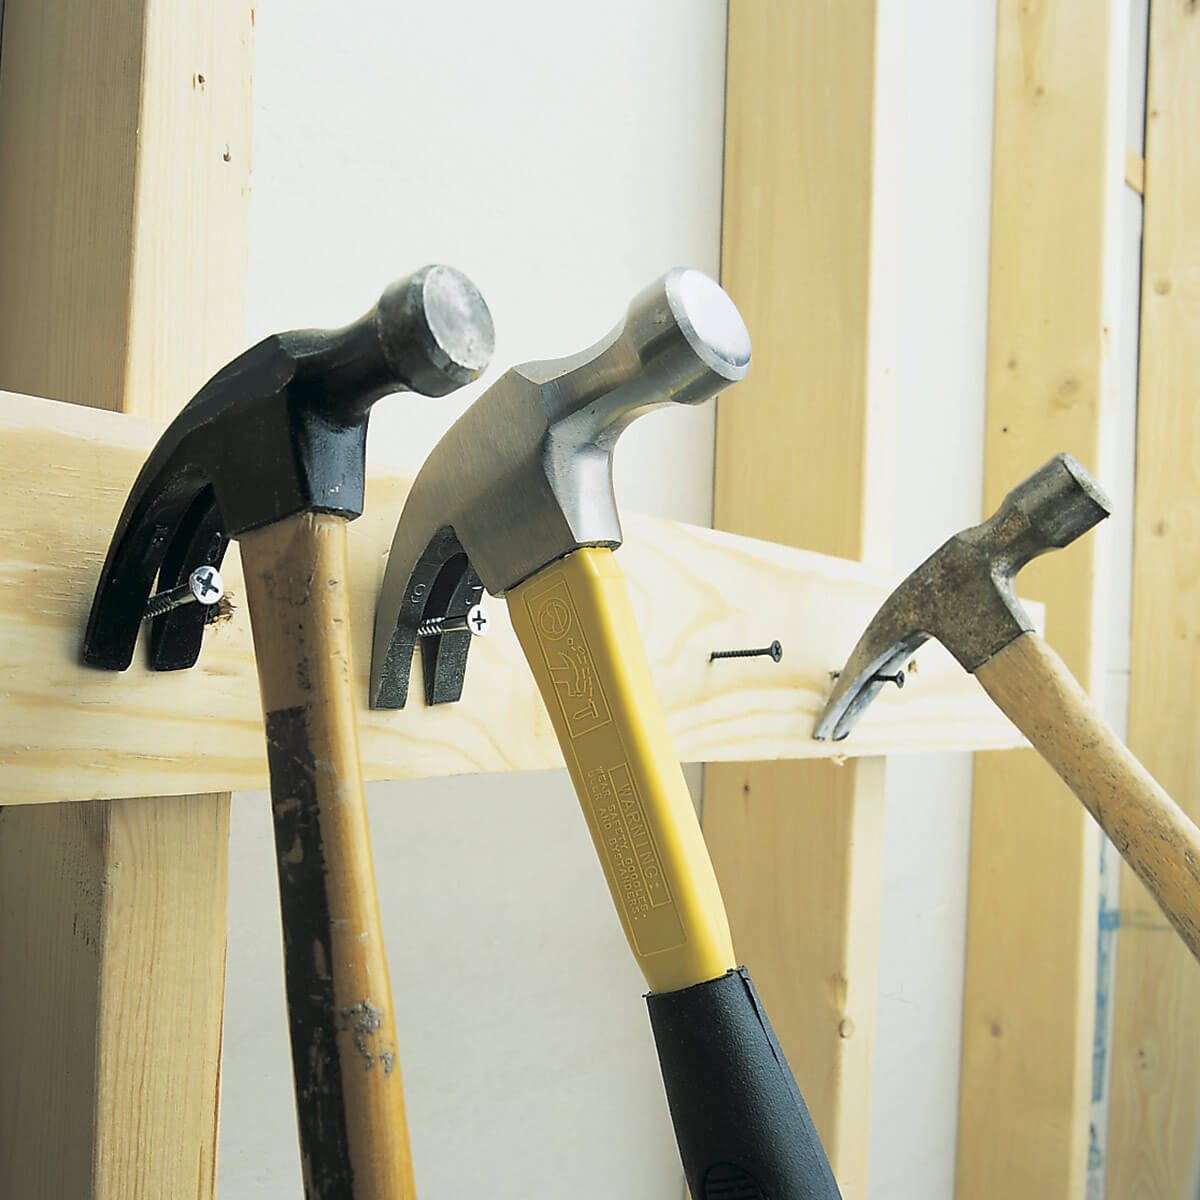
Quick-Draw Hammers
Here’s an instant rack for hammer storage! Drive 2-in. drywall screws into a board and tack it to a shop wall. Hook the hammers on the screws so it looks like they’re ready to pull out a nail. The hammer claw’s V-notch interlocks tightly with the screw threads sothe hammer won’t fall off, and the handle angles toward you for an easy grasp.
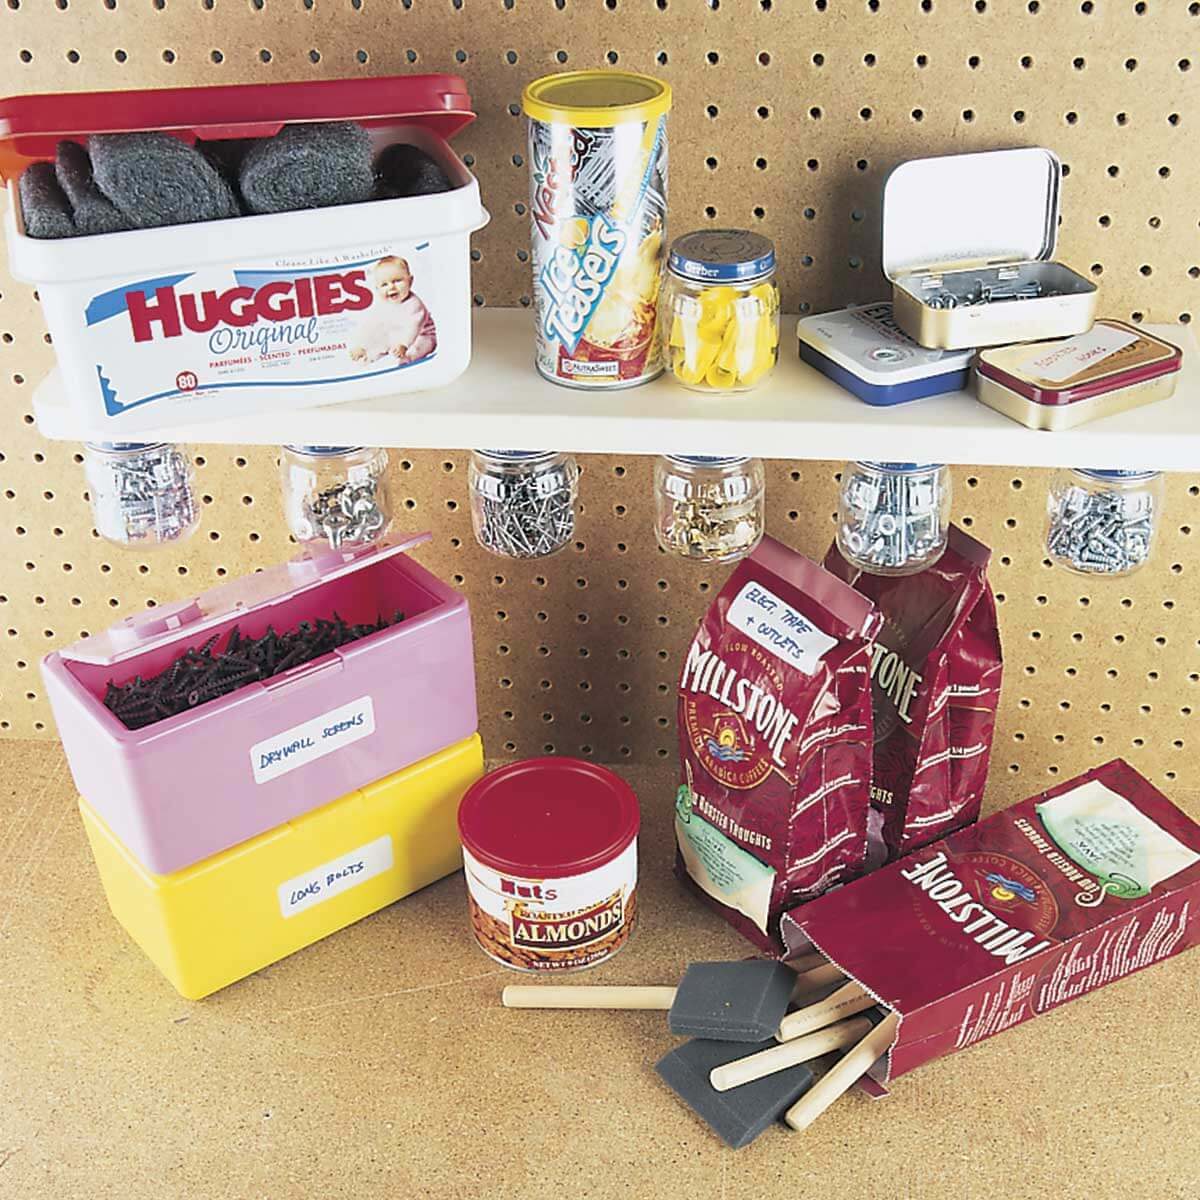
Free Storage from the Grocery Store
We actually pay a lot for all the disposable containers we throw away. Those empty coffee bean sacks, peanut cans with plastic lids, plastic snap-lid baby-wipe boxes, mint tins and baby food jars can bring order to shop chaos. Use them to hold the leftover project nuts and bolts, electrical outlets, screws, eyelets, PVC fittings, wire connectors, washers and nails that typically haunt dark shelf corners. So, check your empties and recycle them locally, on your home shop’s shelves. Thanks to reader Howard Greenberg for adding this recycling twist to grocery shopping.
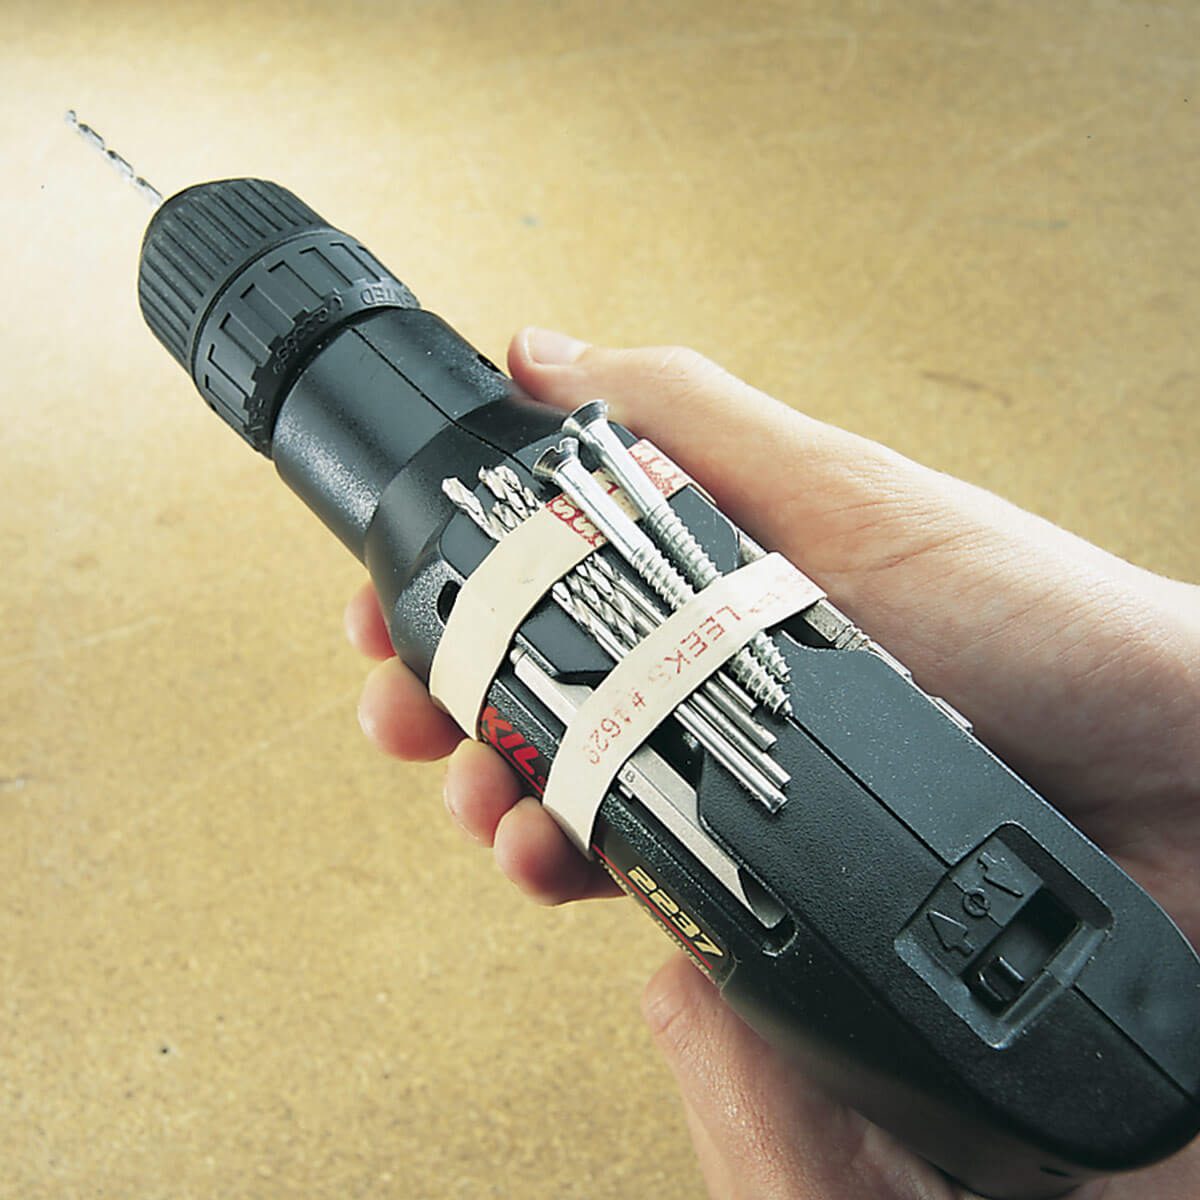
Drill Bit Girdle
Save those wide rubber bands that are wrapped around broccoli and other veggies and stretch them over your electric or cordless drill. Use them for onboard storage of smaller drill and driver bits and screws. We snapped up this tip from faithful reader Tom Halfmann.Check out 19 more handy hints for the workshop.
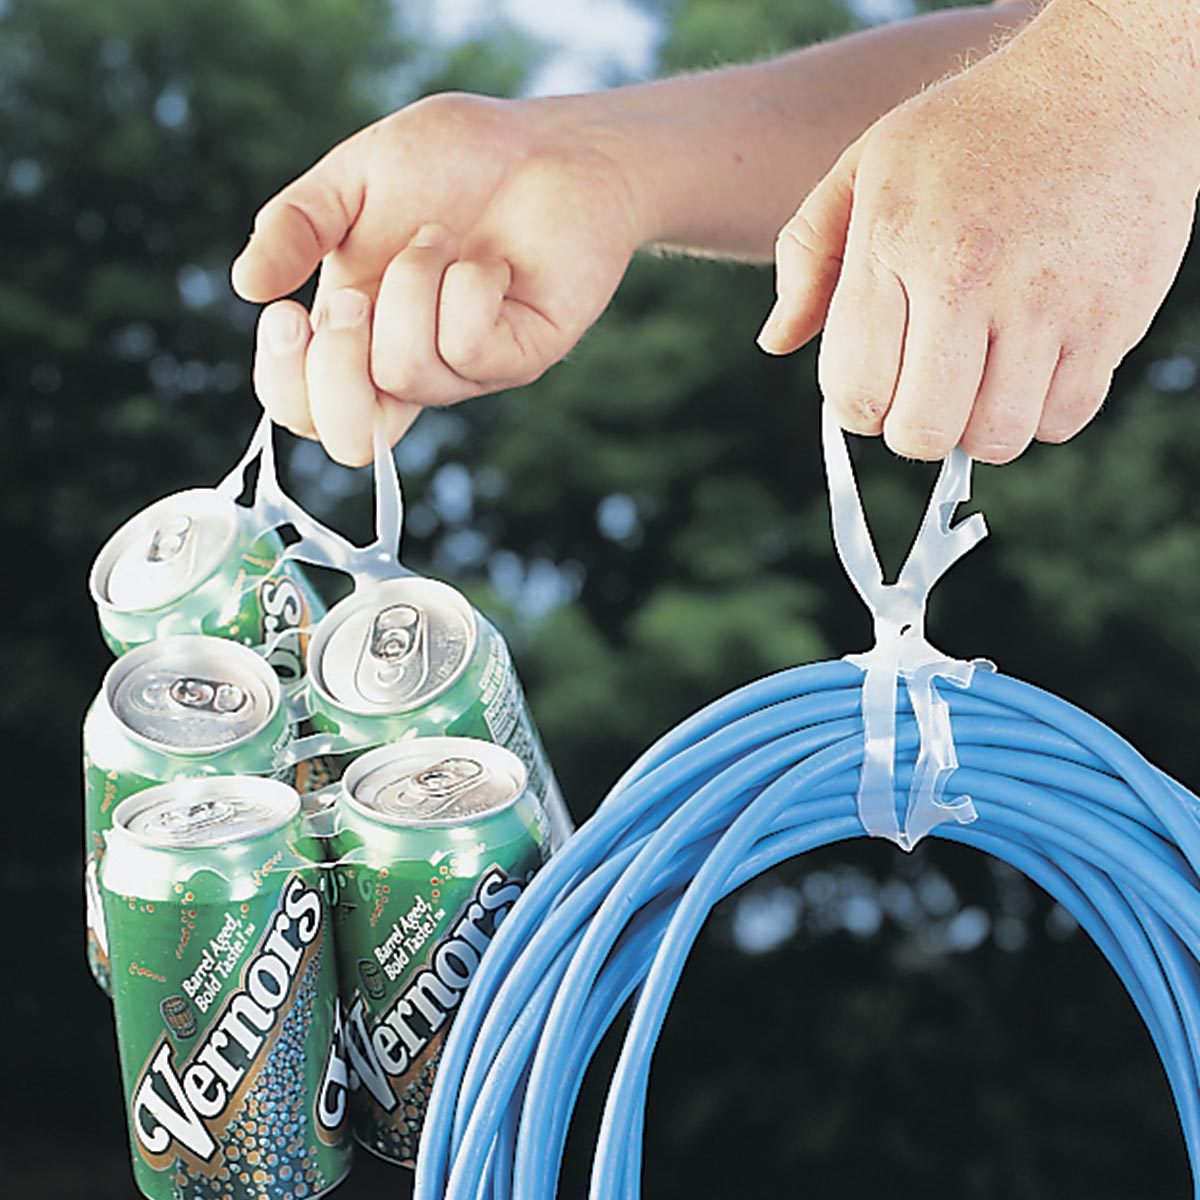
Six-Pack Hangers
Save those plastic six-pack rings to hang cords, ropes and air compressor hoses. Fold over the plastic holder to make a three-ring strip, then slide one end through the other—around the cord or hose—and hang it on a nail or peg. Thanks to reader Don Ruggieri for this environ-mentally friendly hang-up.
Here’s another way to recycle items from your love of soda.

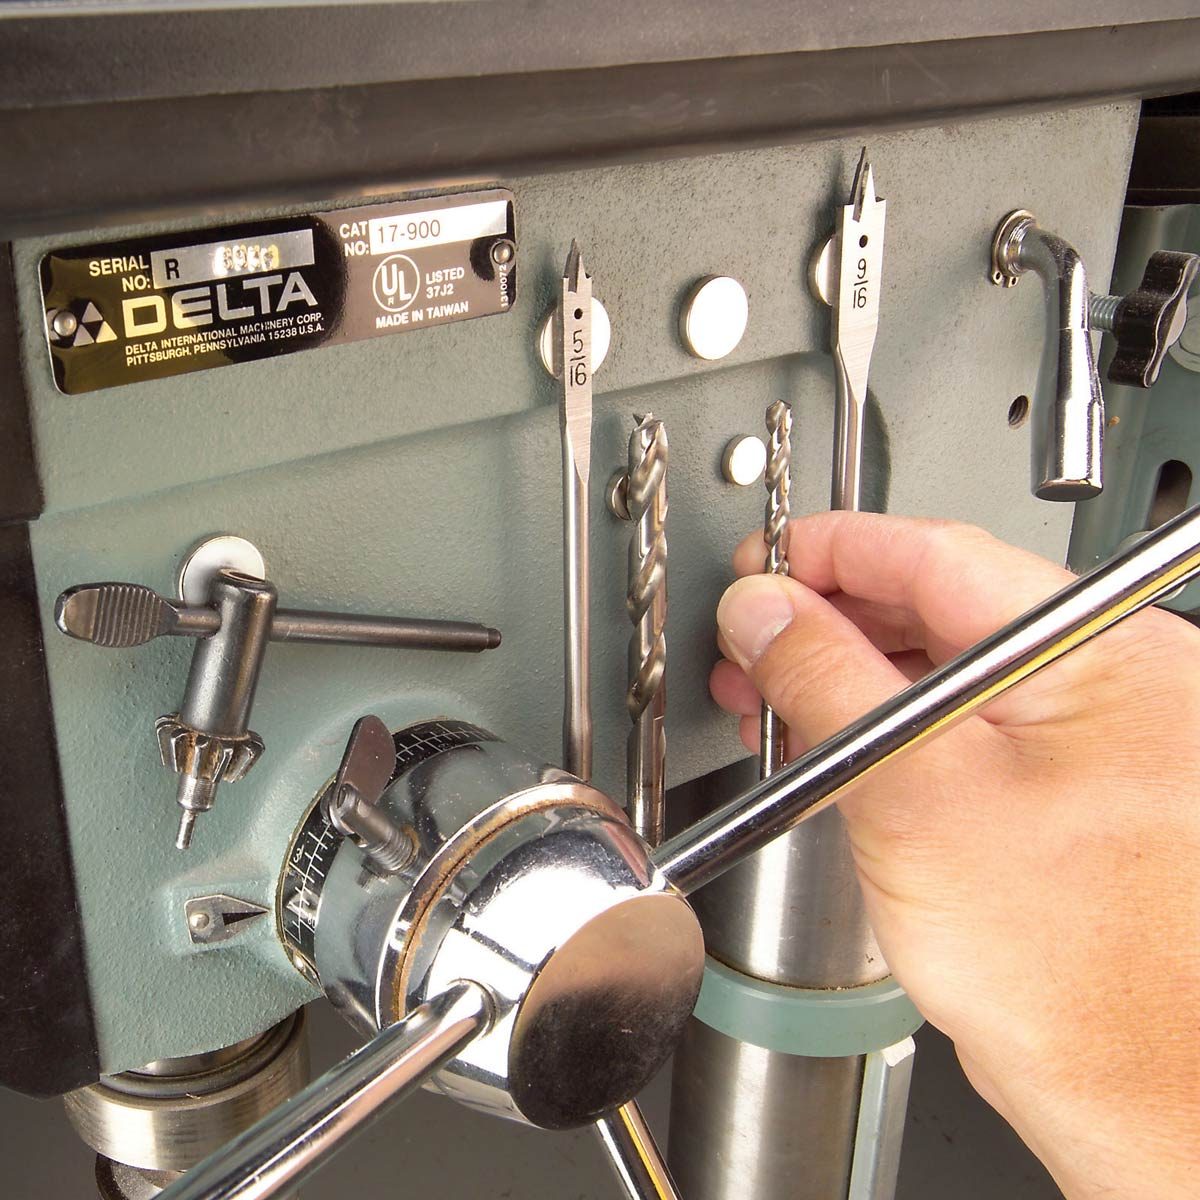
Never-Lose-It Chuck Key
Faithful reader Glenn Kirkpatrick sent us this great tip. Attach a spring-loaded key holder to your drill press so the chuck key is always at the ready and impossible to lose. Most key holders come with 20 in. of retractable line with a ring on the end. Link the line and chuck key with a rubber key holder ($1 at a hardware store) or a few wraps of electrical tape.
Attach the key holder to the drill press housing with metal epoxy, or, if your drill has a plastic cowl over the quill, remove it and drill a hole in the cowl and then bolt on the key holder.
NOTE: Check for clearance between the key holder and the drill’s handle-crank or other movable parts before attaching the key holder to the drill press. AND ALWAYS MAKE SURE THE KEY IS REMOVED FROM THE CHUCK BEFORE TURNING ON THE DRILL PRESS.
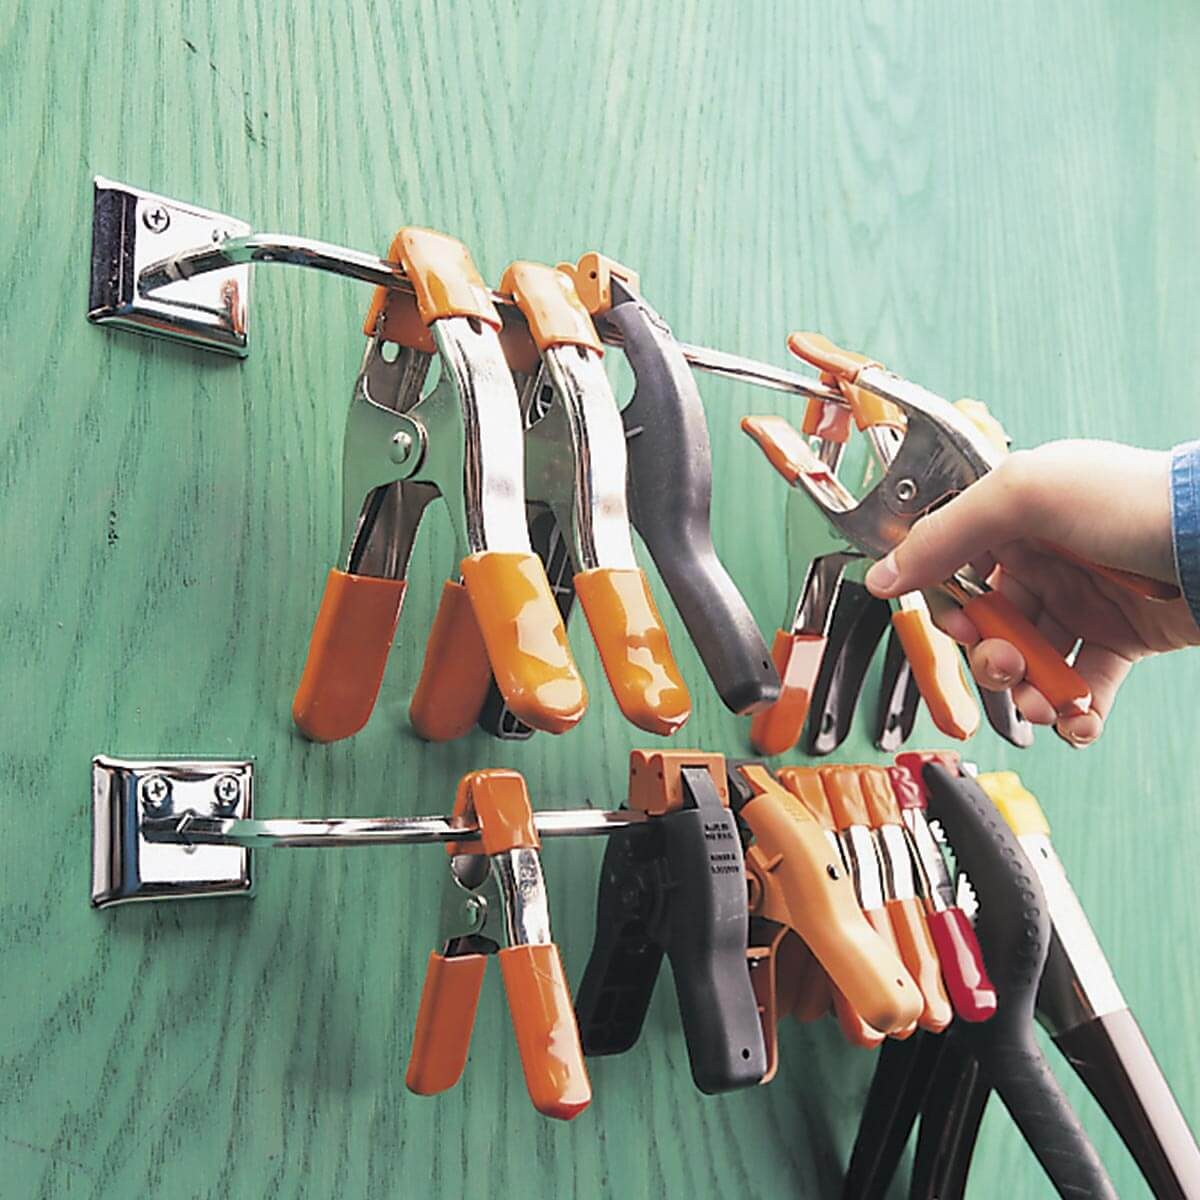
Spring Clamp Roost
Keep your spring clamps springy for a lifetime!Store them on a metal towel rod so the springs aren’t tensed or stressed (or stepped on!). With the towel rod roost, you’ll always know where to find these useful clamps in the heat of production. Thanks to reader Kurt Weinberg for this gripping tip.Here are several more great clamp storage solutions.
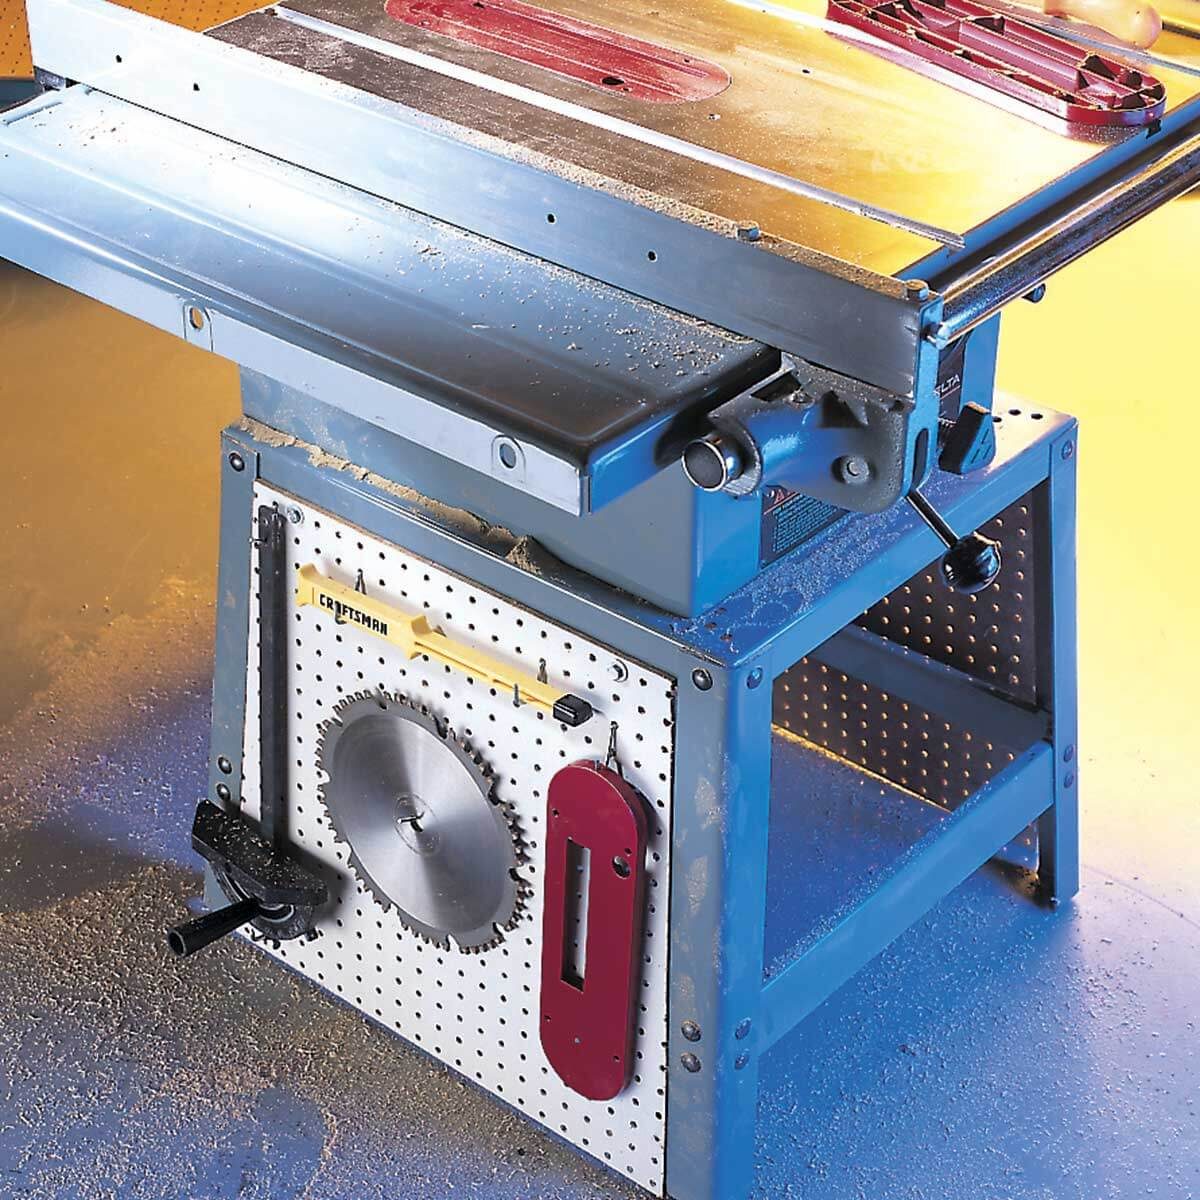
Pegged Table Saw Tools
Are your table saw accessories where you need them—when you need them? Follow reader D. E. Warner’s advice: Attach pegboard panels to the stand to hold the wandering herd of push sticks, blades, throat plates, wrenches and jigs. On an open metal stand with angle-iron legs, drill holes in the legs and bolt the pegboard in place.
Here’s another super storage project using pegboard.
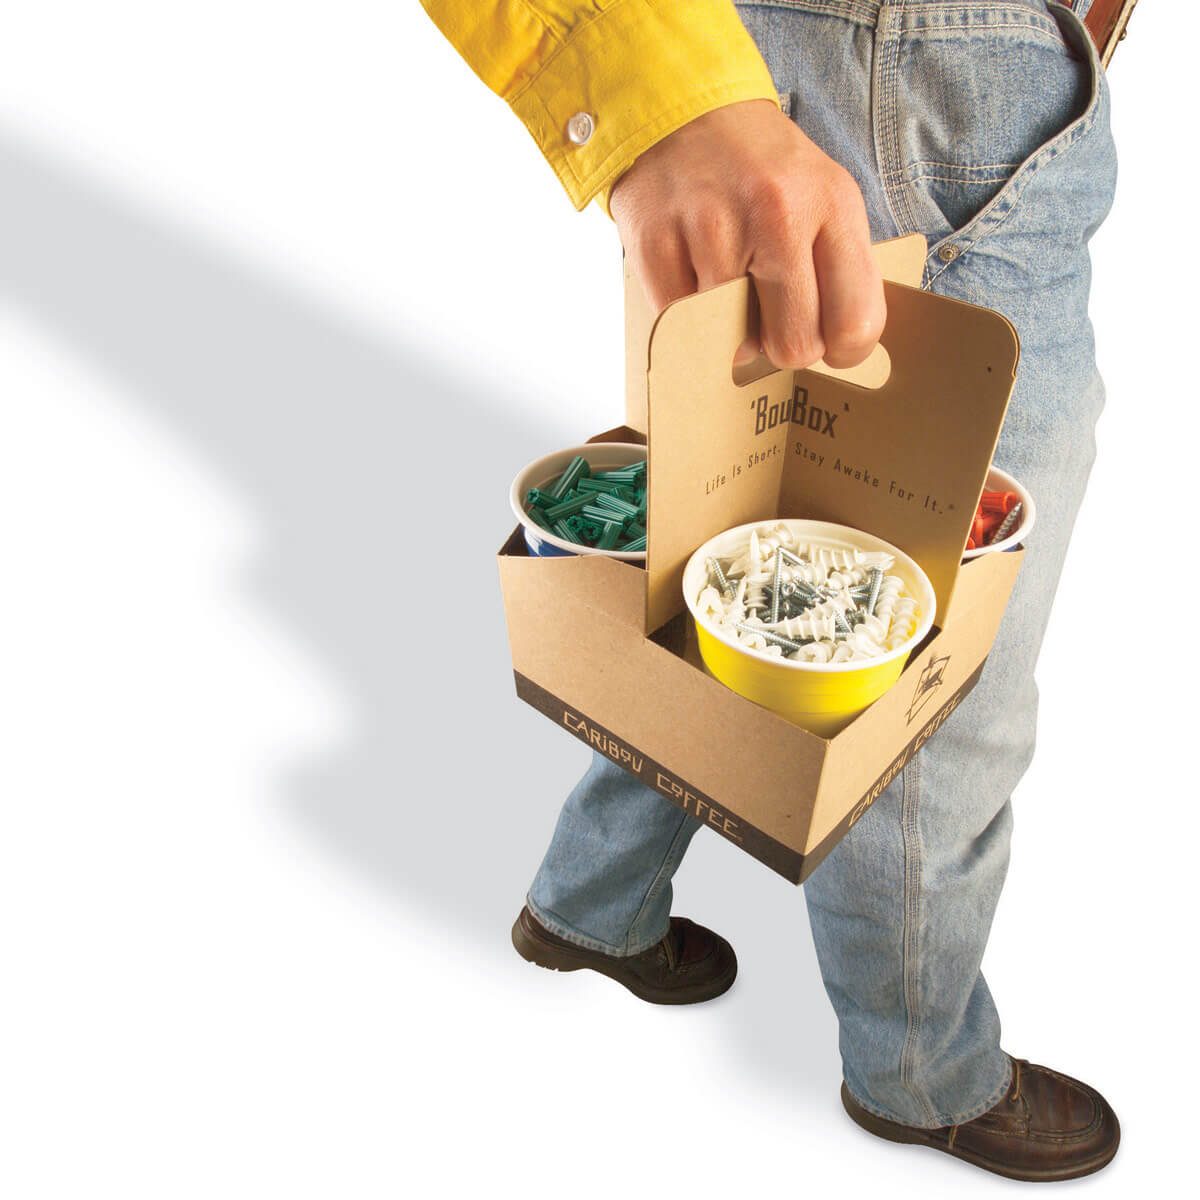
Coffee Carryall
Reader Herb Witt sent us a witty use for takeout coffee four-pack cartons. The ones we used are made of stiff cardboard and offer 3-1/2 in. wide square bins for jumbo plastic drinking cups. (Whoppers malt balls cartons cut in half are also great bin liners.) We loaded our carryall with a 10-year supply of four styles of drywall fasteners—we always need them but can’t find them in our heap of surplus hardware. You’ll know where your wire spools are for years to come!
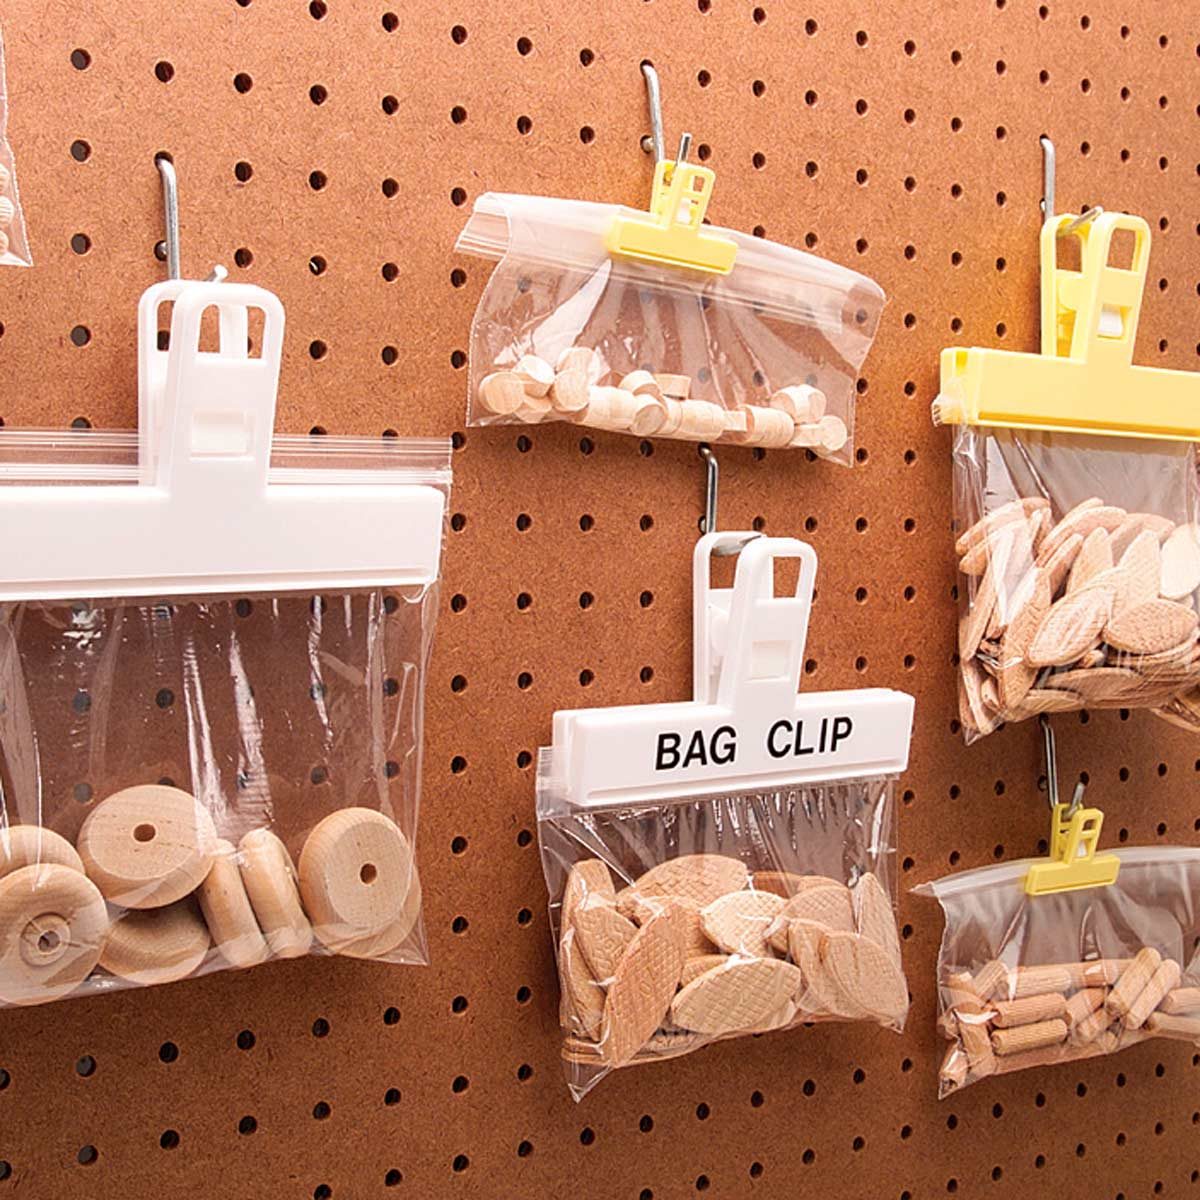
Bag-Clip Storage
Astute reader Tom Tighe has a great plan for keeping dowel pins, biscuits, wood plugs and other wood project parts from swelling in the humidity. A few potato chip bag clips ($1 each at a grocery store) and zipper bags are all you need. Load, zip, clamp and hang them on pegboard to keep your mini wood items dry and easy to eye.
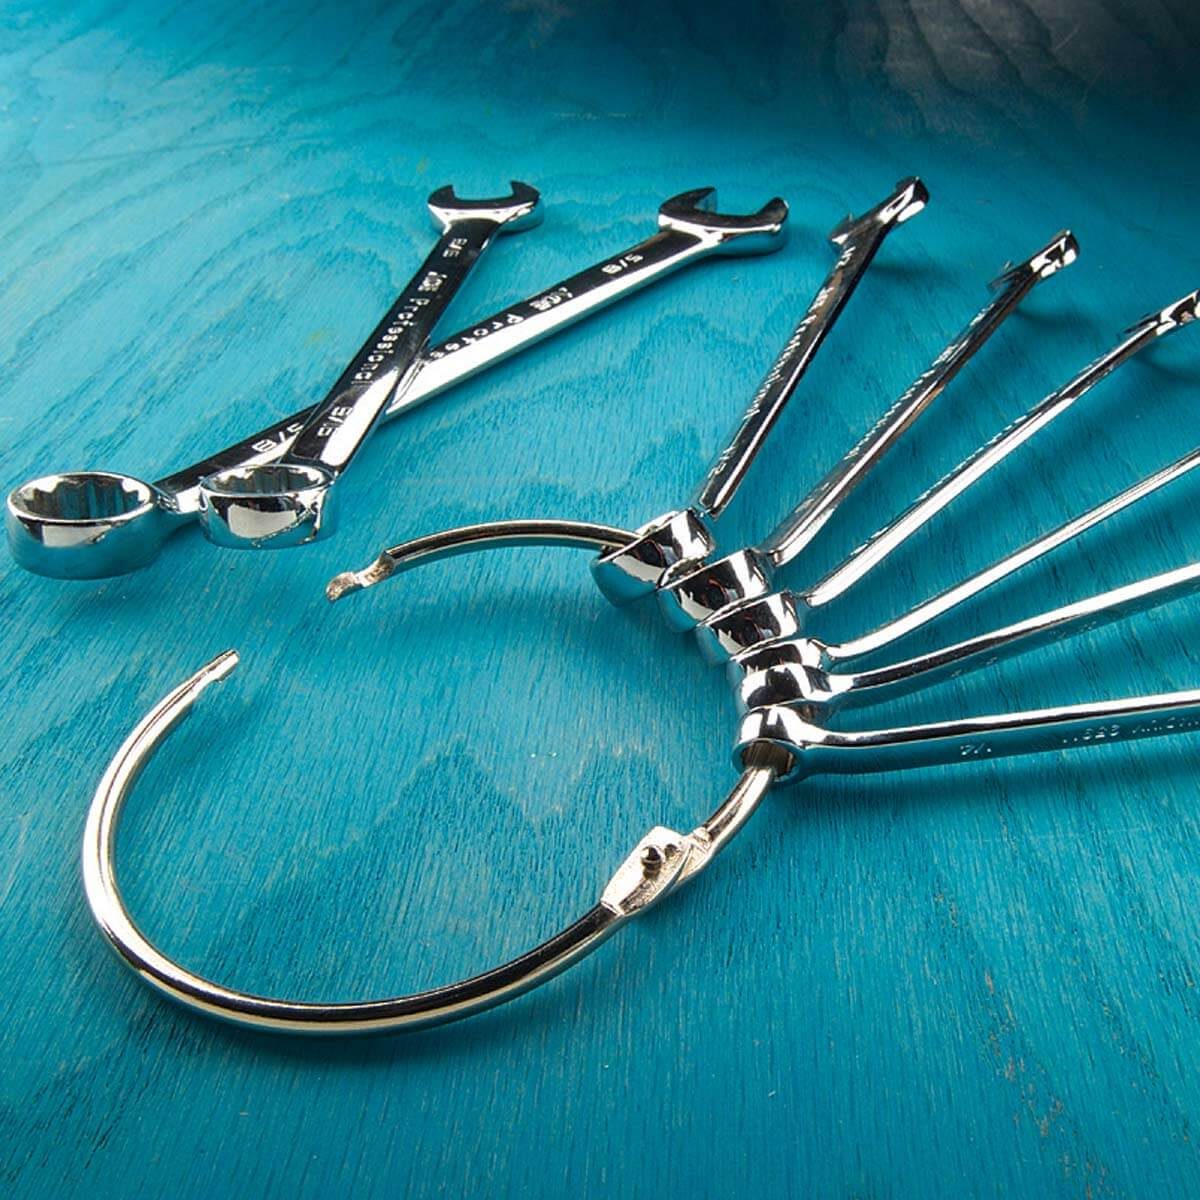
Wrenches Bound in the Round
Let’s see, you need a 5/8-in. wrench but can’t find it in the drawer without rummaging around and eyeballing all the other scattered wrenches. Take faithful reader Randy Witmyer’s advice and store end wrenches on a 3-1/2 in. diameter loose-leaf ring ($1 at a hardware store). It only takes a second to snap the ring open and pull off the one you need. And you can throw them back into the toolbox knowing they’ll stay together next time.Another workshop storage tip: How to organize anything using pegboard.
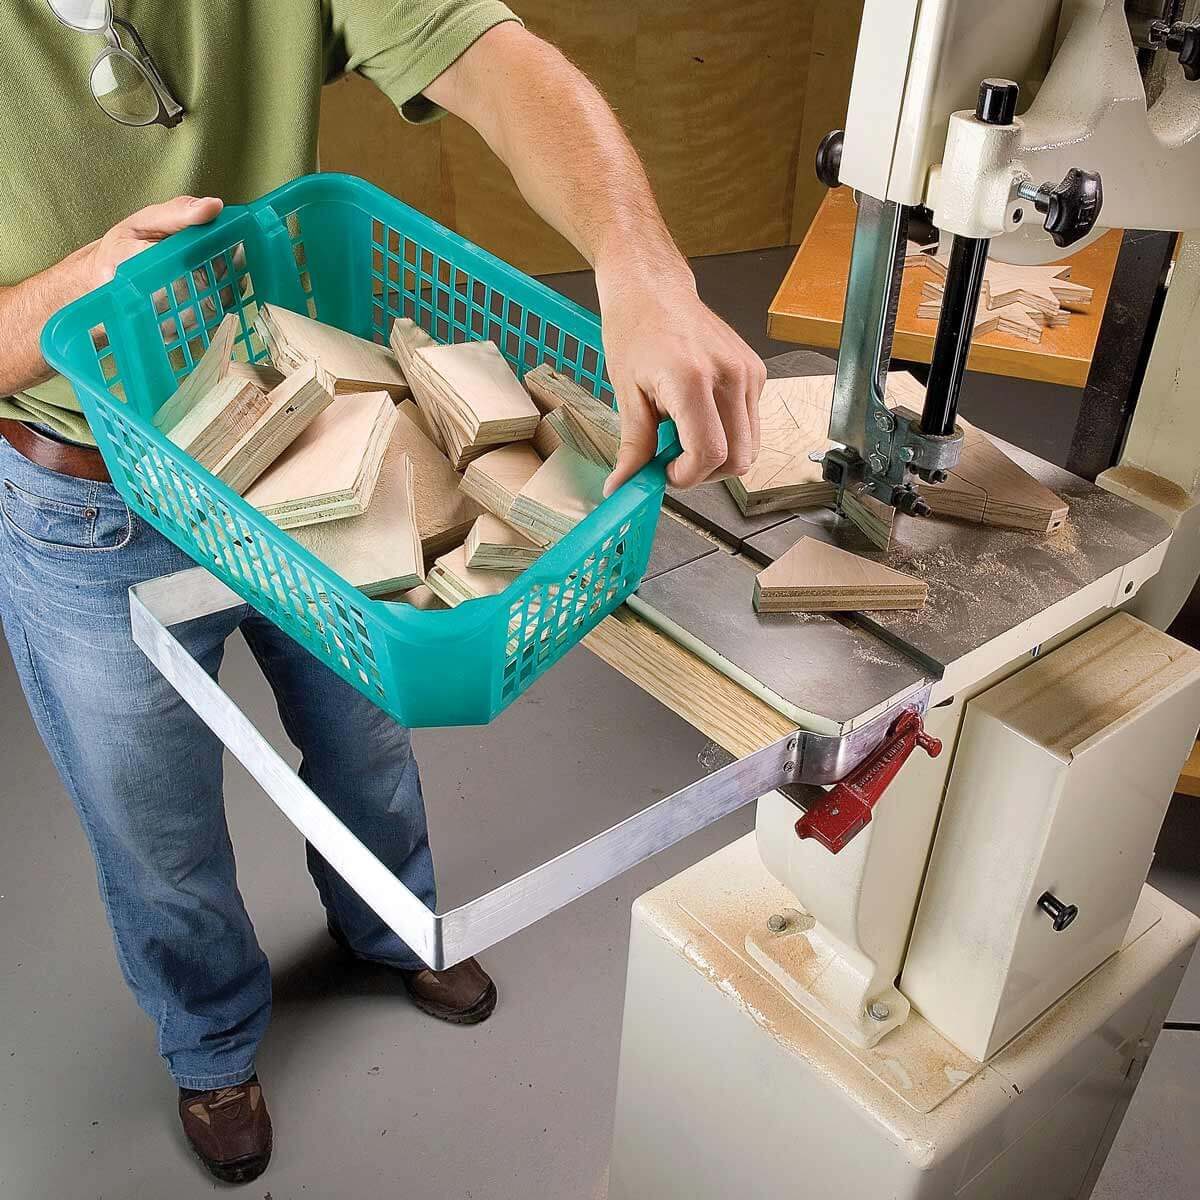
Onboard Garbage Bin for Your Band Saw
Don’t risk spraining your ankle on odd-shaped scraps scattered all over the floor during your next band saw project. Buy a lightweight plastic bin with a lipped rim and a 6-ft. length of 1-1/2 in. wide x 1/16-in. thick flat aluminum ($4 at a home center).The bin should be about the same length as the band saw table. Bend the aluminum into a U-shape to support the rim on three sides, and screw on a 2-in. x 1/2-in. board to beef up the U-frame. Bend the protruding ends as needed so they fit the saw table snugly,then firmly clamp the frame to the table with a bar clamp. The board side of the frame pressed against the band saw table helps lock the frame to the table when you tighten the clamp.
Once the bin is in place, you can toss in cutoff pieces as you work and lift it out when it’s full.You’ll never again slip on a pile of scraps or grab a broom to sweep them up. Thanks to William Johnsen for inspiring this tidy tip.
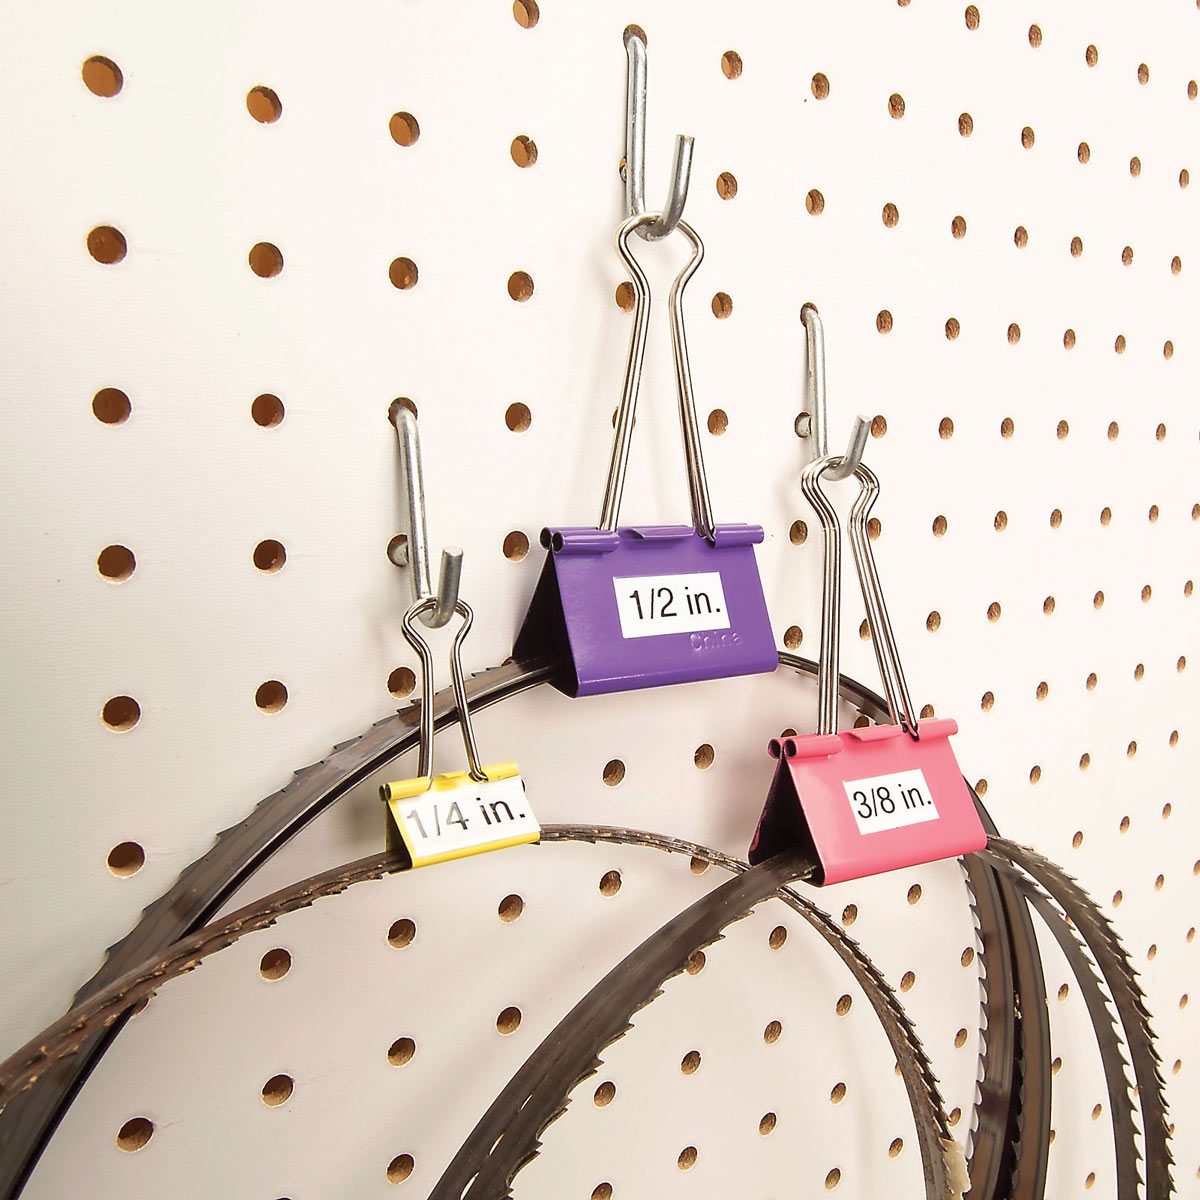
Bandsaw Blade Hangers
If you’ve ever suffered the indignity—and possible danger to eyes and face—of a bandsaw blade uncoiling as you’ve pulled it off the peg you hung it on, you’ll love this tip from reader David Shapiro. Nest the coiled blades into binder clips and store them on your pegboard, and they’ll never spring out at you again. Apply labels to the clip so you can simplify size selection and storage.
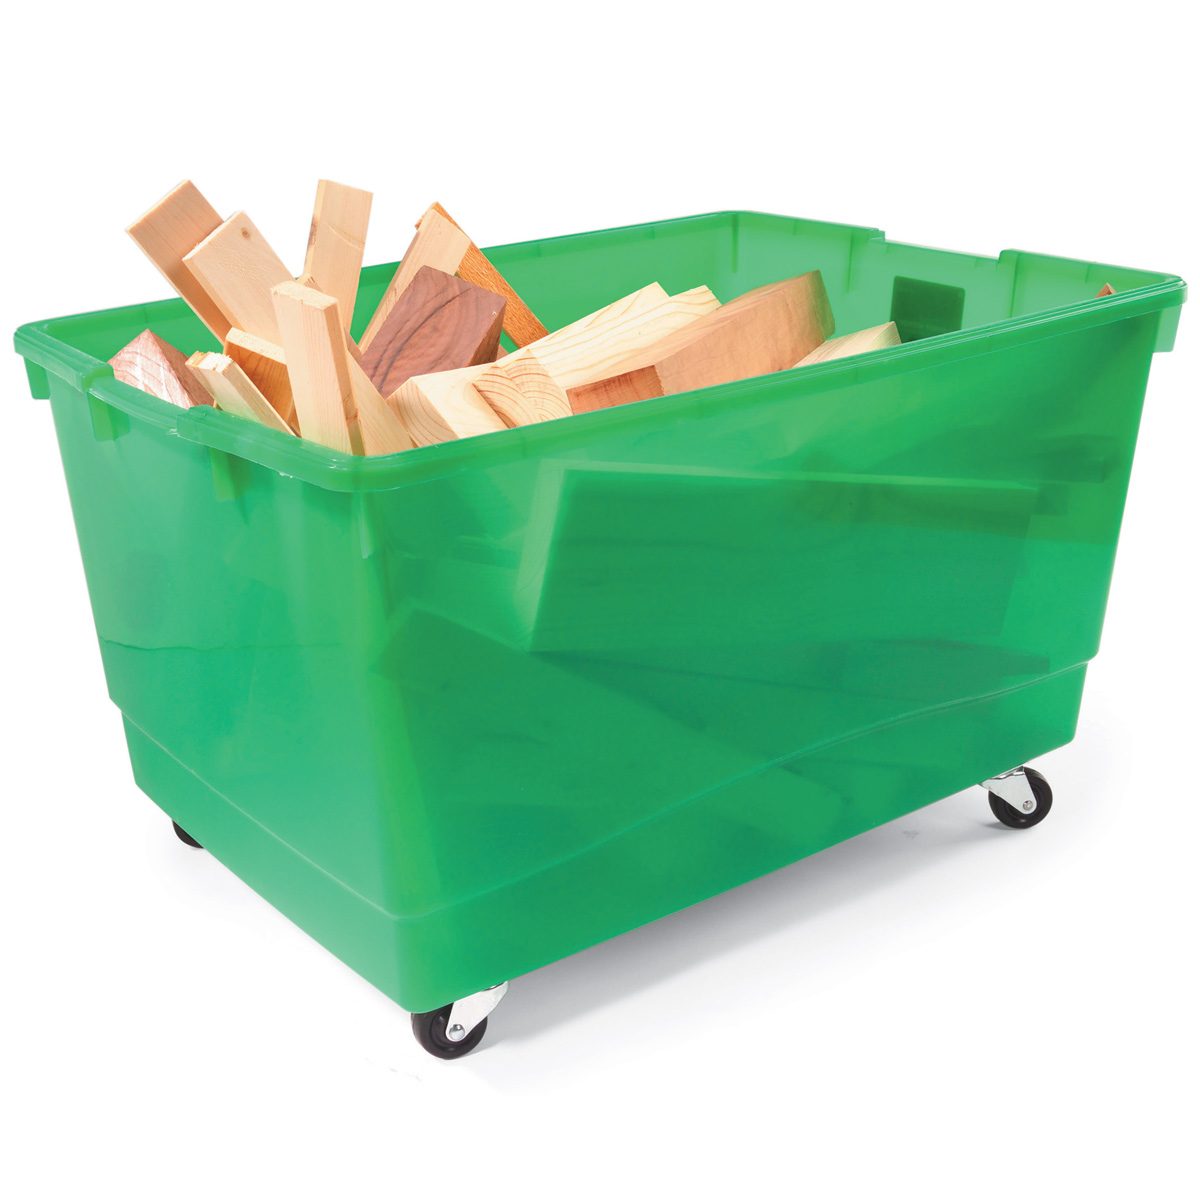
Scrap Bin on a Roll
Here’s a low-rolling wood scrap bin that’ll capture all the cutoffs while you work on your next project. Bolt swivel casters to the base of a storage bin ($6 at discount stores) and it’ll scoot right where you need it. Sure, you can take extra time to beef up the casters-to-bin connection by bolting plywood on before attaching the casters, but it’s easier to bolt them right through the thicker, reinforced area of the bin’s bottom. Thanks to Zachary Lesko for this handy idea!
Here’s an idea for a project made with your wood scraps.
Magnificent Magnets
Buy a handful of inexpensive, super-strong “rare-earth” magnets in varying diameters (www.leevalley.com) to store accessories on stationary power tools. You won’t believe just how strong they are, but here’s a clue: A 3/4-in. rare-earth magnet ($6.50 for a five-pack) will lift a 22-lb. hunk of steel right off the floor. My drill press bristles with magnets holding the chuck key and common sizes of drill bits. Magnets spaced on my table saw securely hold the miter gauge, blade-changing wrenches and a couple of saw blades to boot. For best results, lightly sand one side of the magnet with 100-grit sandpaper and glue it to the tool with a dab of cyanoacrylate glue (Super Glue). Warning! These magnets are strong enough to corrupt the electronics in computers, computer discs, cell phones and credit cards, so be careful where you put them! Thanks to Brian Campbell for this attractive idea.
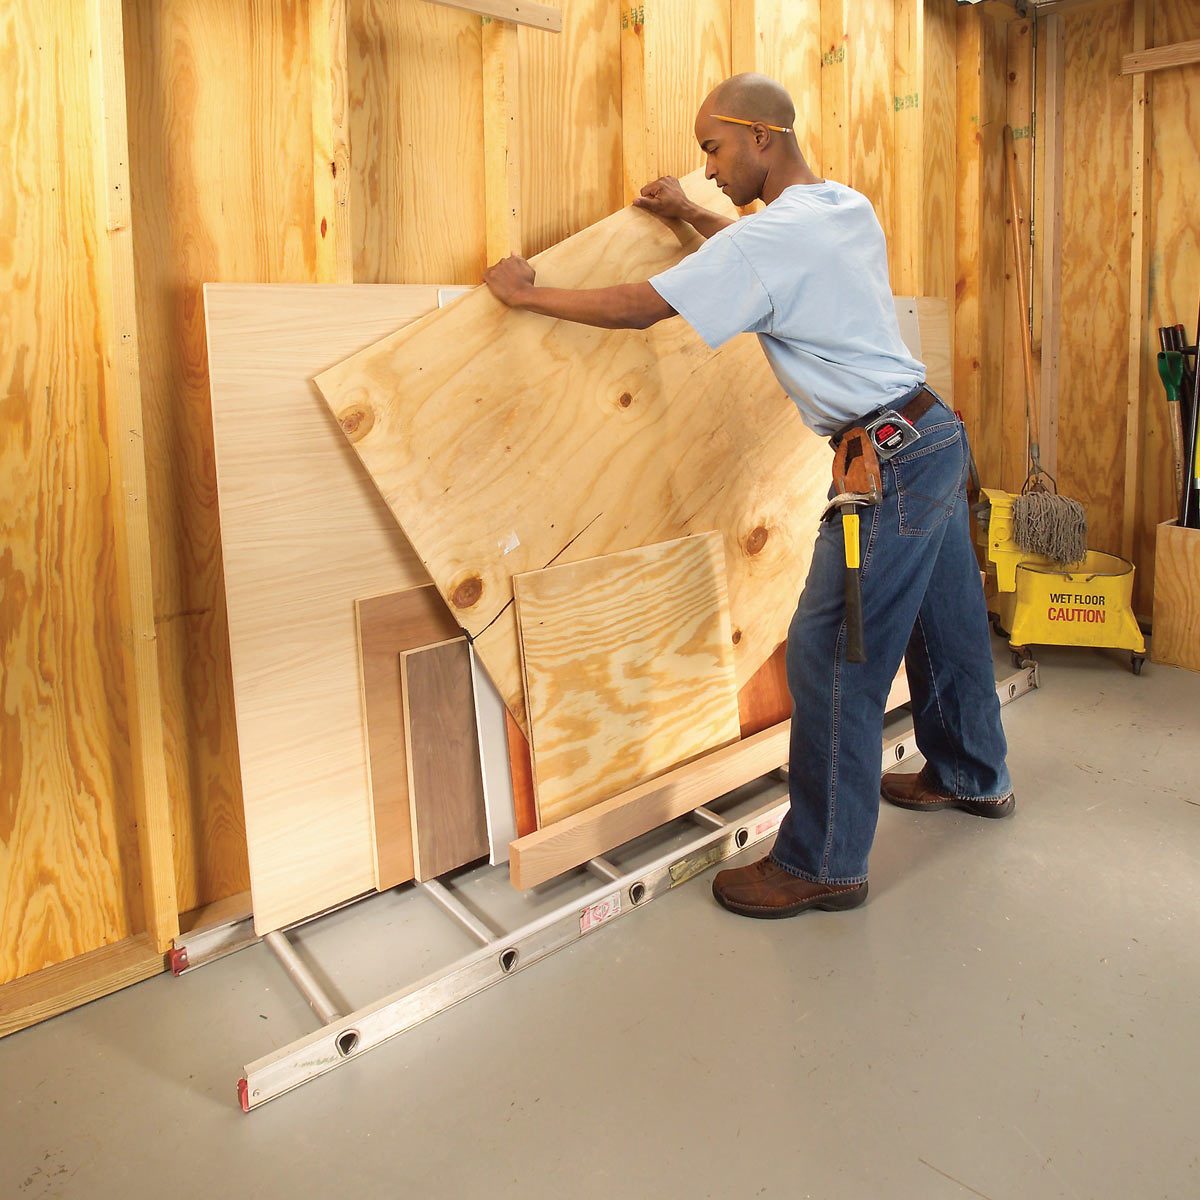
Store Sheet Goods on a Ladder
Got a decade’s worth of leftover pieces of plywood, drywall and plastic laminate and spare boards? Here’s how to round them up and protect them from moisture, dirt and dings. If you have an old extension ladder lying around, take the sections apart and lay one on the floor near a wall to use as a sheet goods rack. The rail will keep stuff from sliding off. It’ll hold everything high and dry off the floor and ready to sort when that next project comes along. Thanks to Grant Caulder for this tip.Check out plans for building a small shop cart.
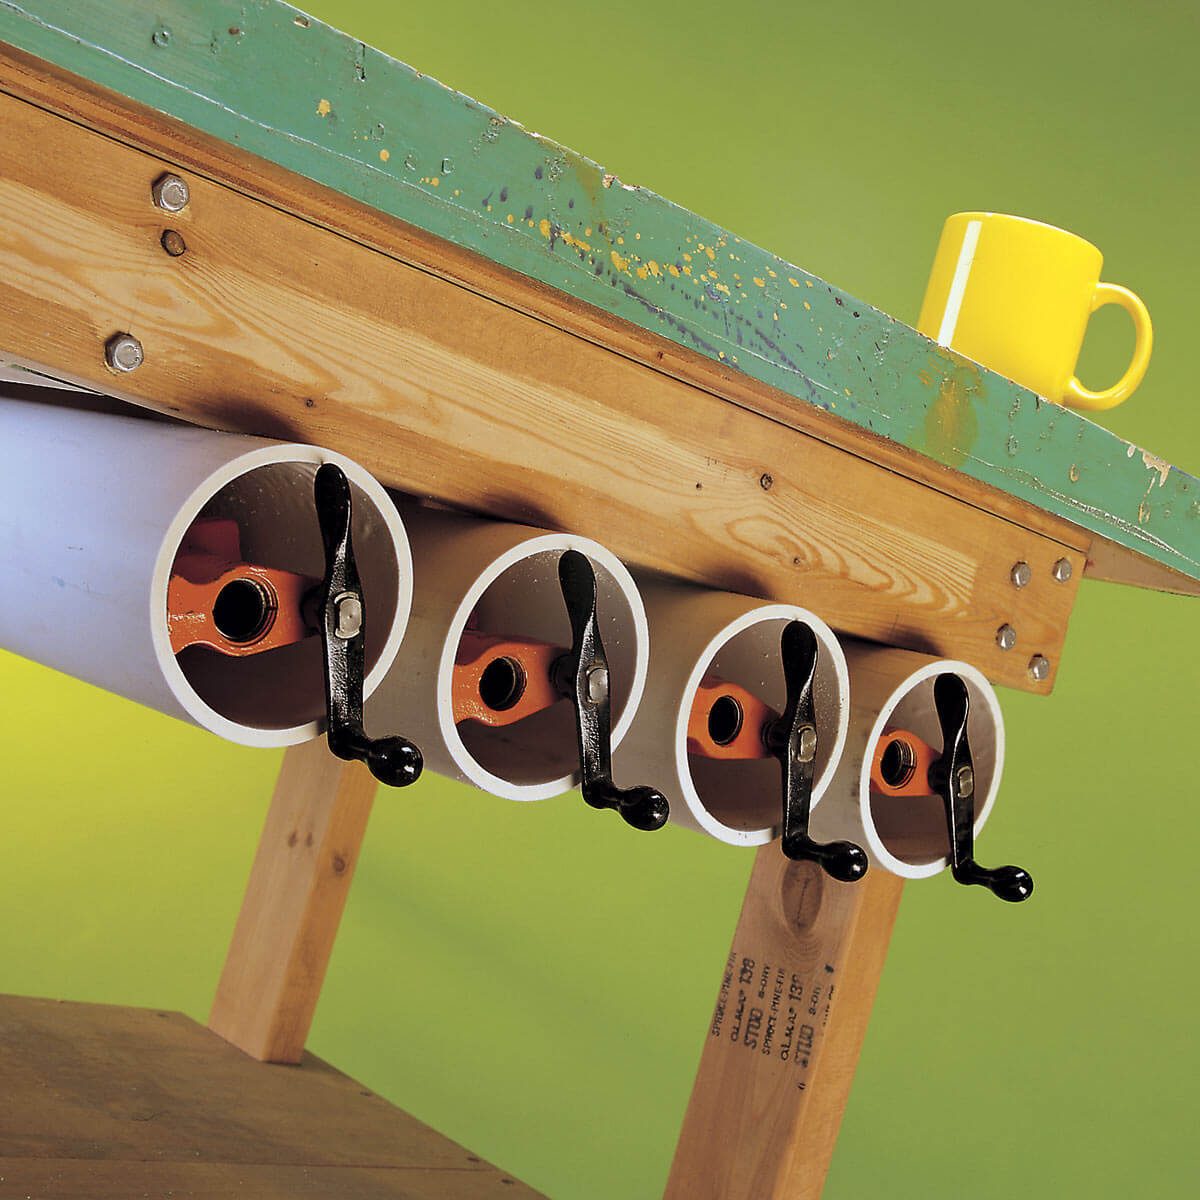
Pipe Clamp Quivers
A great way to store pipe clamps is in pieces of 4-in. dia. PVC pipe screwed under your work table. The PVC costs $4 for a 10-ft. length. To secure the pipes, use 2-in. lag screws and a socket wrench with a ratchet drive to allow you to reach in the end of the pipes and tighten them.
Three more ways to store pipe clamps in your workshop.
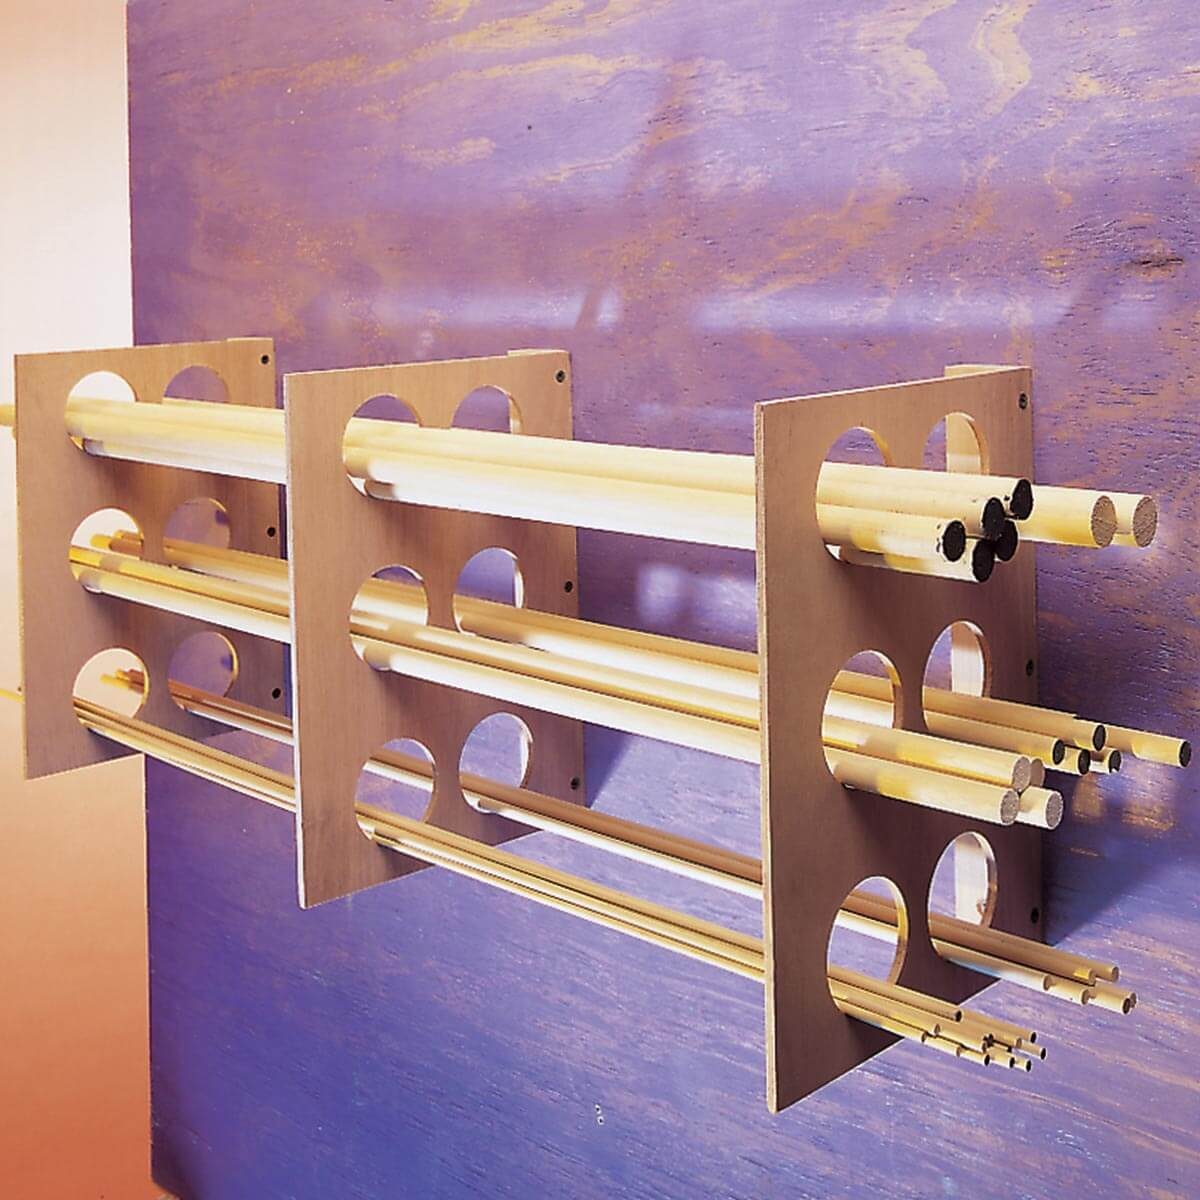
Plywood Rack for Dowels
Here’s a sturdy rack for storing and organizing wood dowels. Use a hole saw to drill 2-1/2 in. dia. holes in three sheets of 1/4-in. thick plywood. Screw or clamp the plywood pieces together at the corners so the holes will line up. Then screw the pieces to your shop wall or ceiling. If necessary, a 3/4-in. wide strip of wood makes a strong bracket for both holding the plywood and securing the units to the wall.Here’s a jig for drilling dowels.
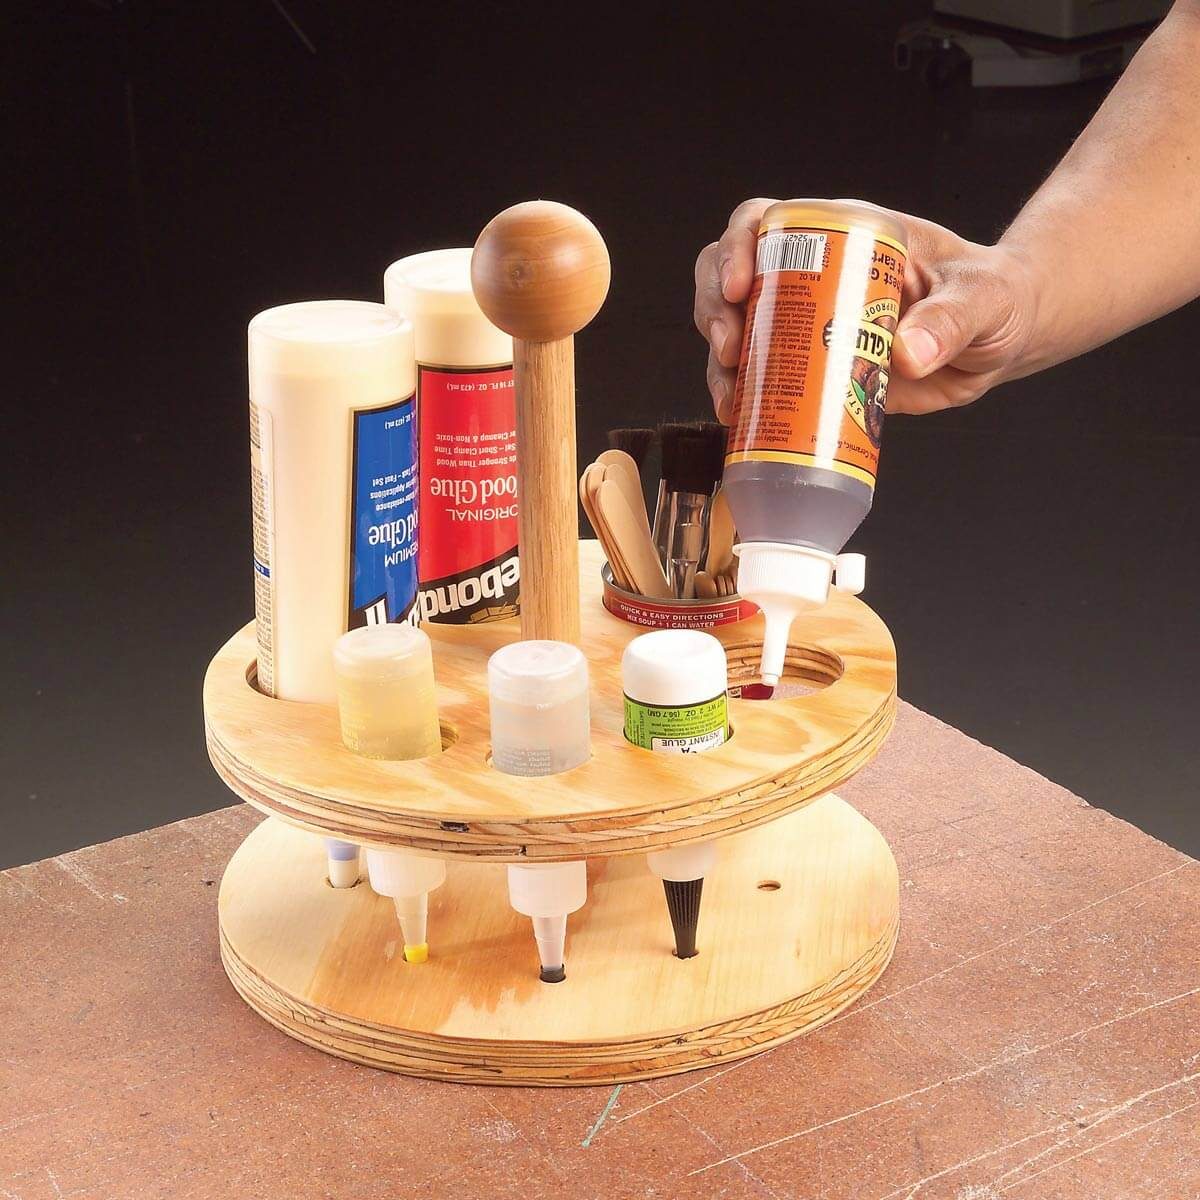
Glue-Go-Round Glue Caddy
Here are four good reasons to build this glue caddy for your shop. First, no more hunting for the right type of glue; they’ll all be right at your fingertips. Second, you can store the containers upside down. That keeps the glue near the spout—no more shaking down half-filled bottles. Third, upside-down storage helps polyurethane glues last longer without hardening because it keeps the air out. Last, the caddy is so doggone handsome.
Want to build another type of caddy? Try this beer caddy using reclaimed barn wood.

Towel Bar Shop Storage Solution
Next time you update your bathroom, save the old towel bar! You can use it for a variety of workshop storage solutions.
Just mount the towel bar in the location of your choice, and hang everything from clamps to safety glasses on your new storage system. This handy hint works great because it can store some of your most used items in an easily accessible spot.
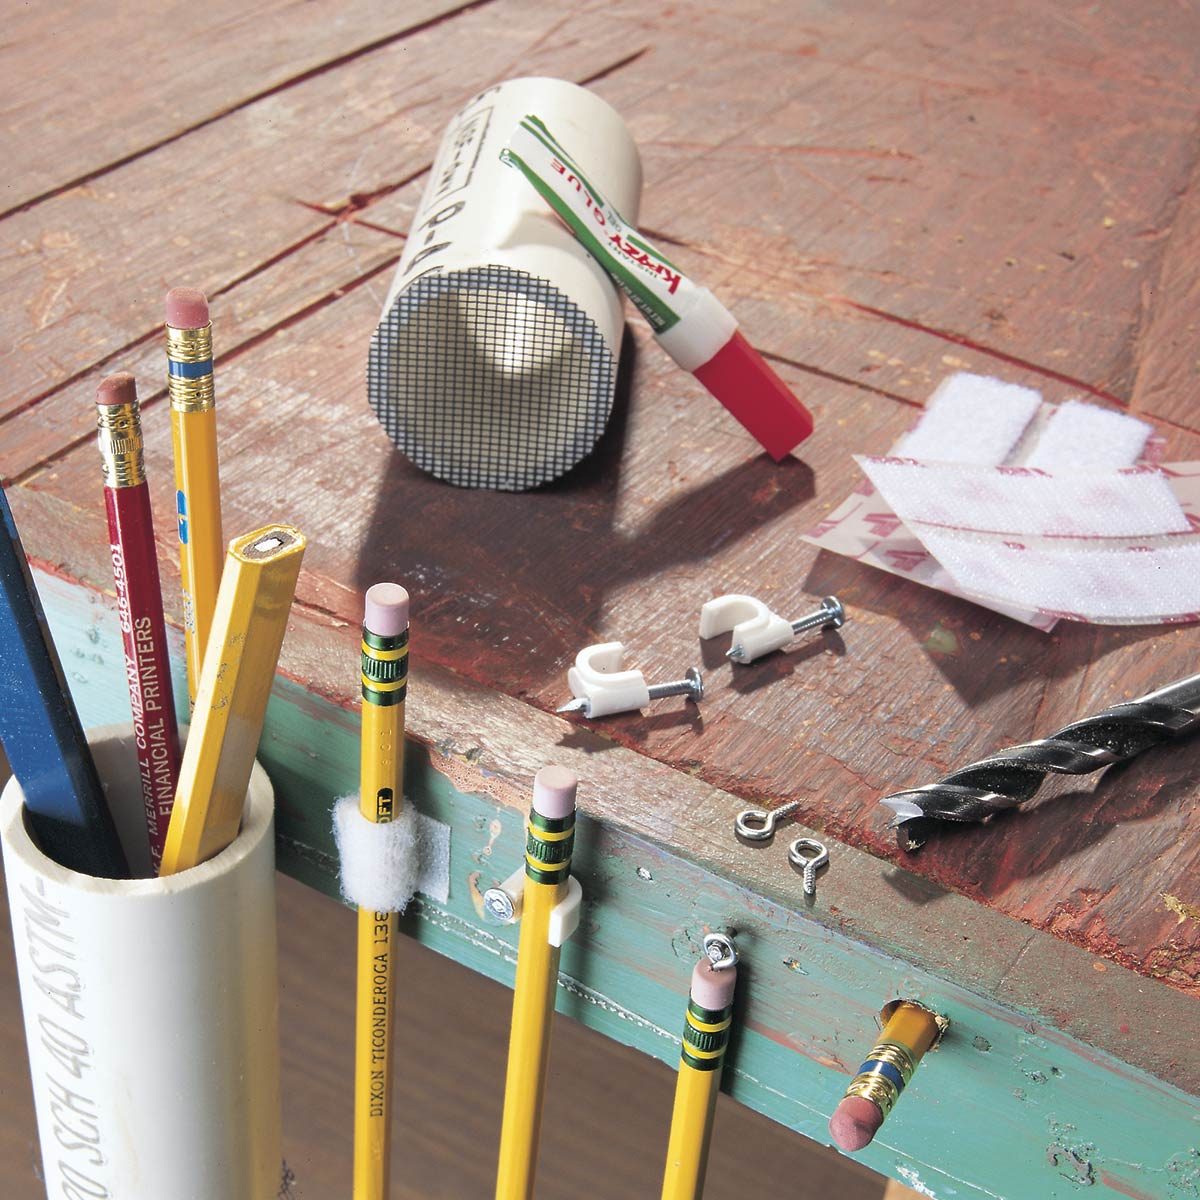
Pencils at the Ready
Reader R. B. Himes sent several cool tips for keeping pencils handy. Insert pencils into holes drilled in the edges of shelves, or put small screw eyes into the erasers and hang ’em from nails. Reader Jerry Seaward has another: Glue a scrap of window screen to the bottom of a piece of 1-1/2 in. dia. PVC pipe and clamp or screw the pipe to your workbench for a dust-free pencil holder. Other pencil hangouts? Wrap a strip of self-stick Velcro around a pencil and put a corresponding strip wherever you need a pencil. To make a pencil stay put on metal surfaces, attach a piece of magnetic tape ($2 a roll at fabric stores) to it.
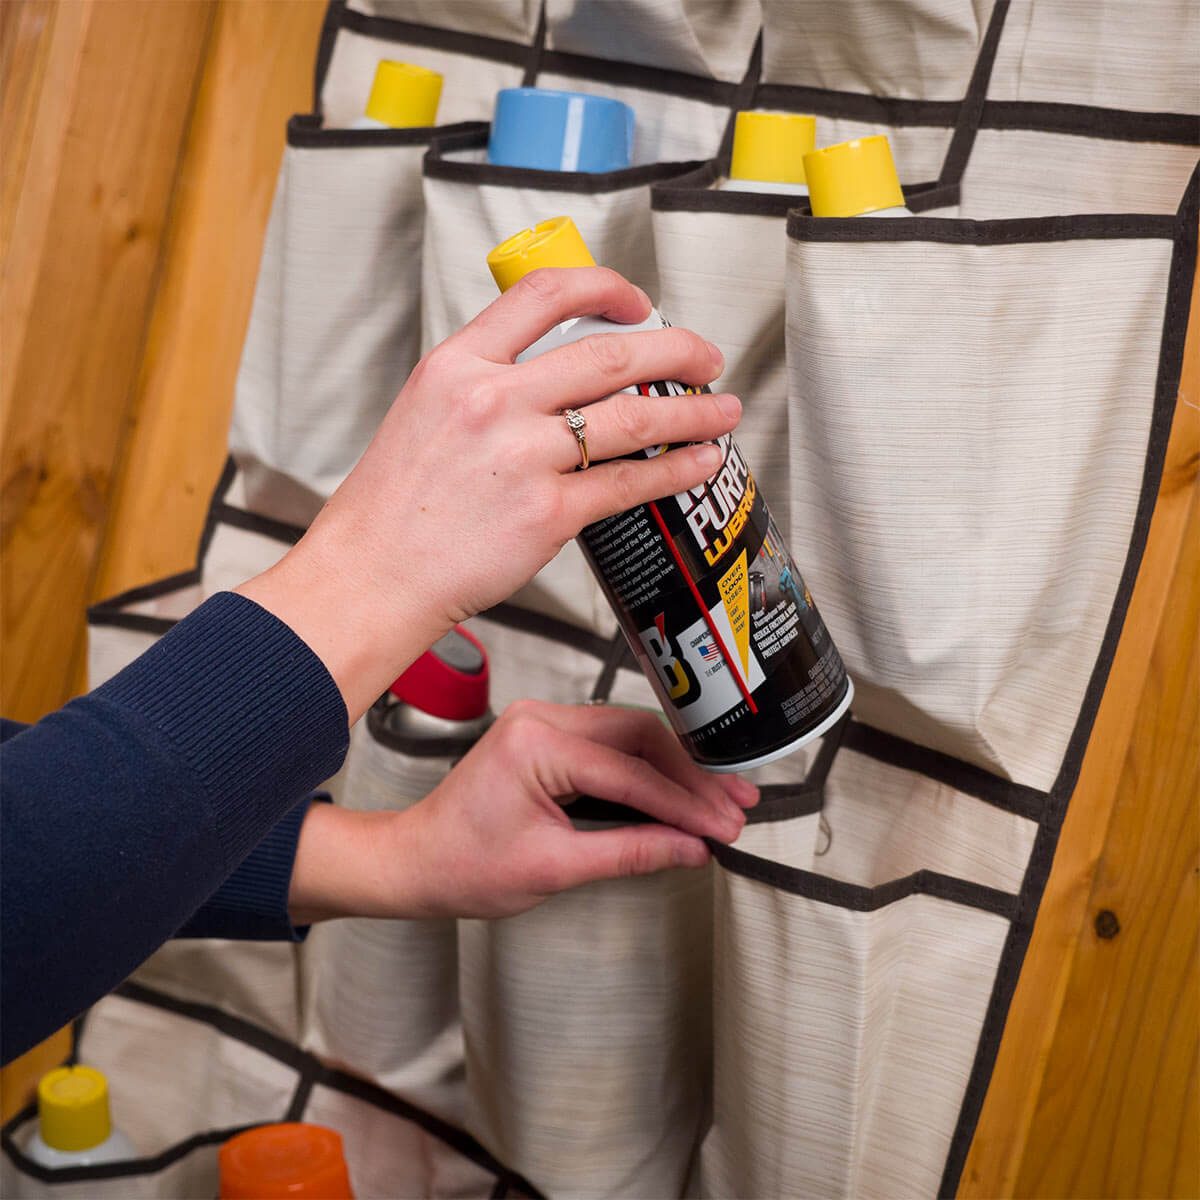
Shoe Holder for Spray Product Storage
A hanging shoe holder makes an excellent storage solution for spray products in your workshop. Keep spray paints, lubricants, etc., organized yet visible in each pocket.
Most hanging shoe holders are made with easy-to-clean material and come equipped with grommets or hanging hardware for mounting it to a door or wall. We mounted the shoe holder shown here on a couple of sturdy nails.Buy one of these shoe hangers to use for either materials or shoes right here.
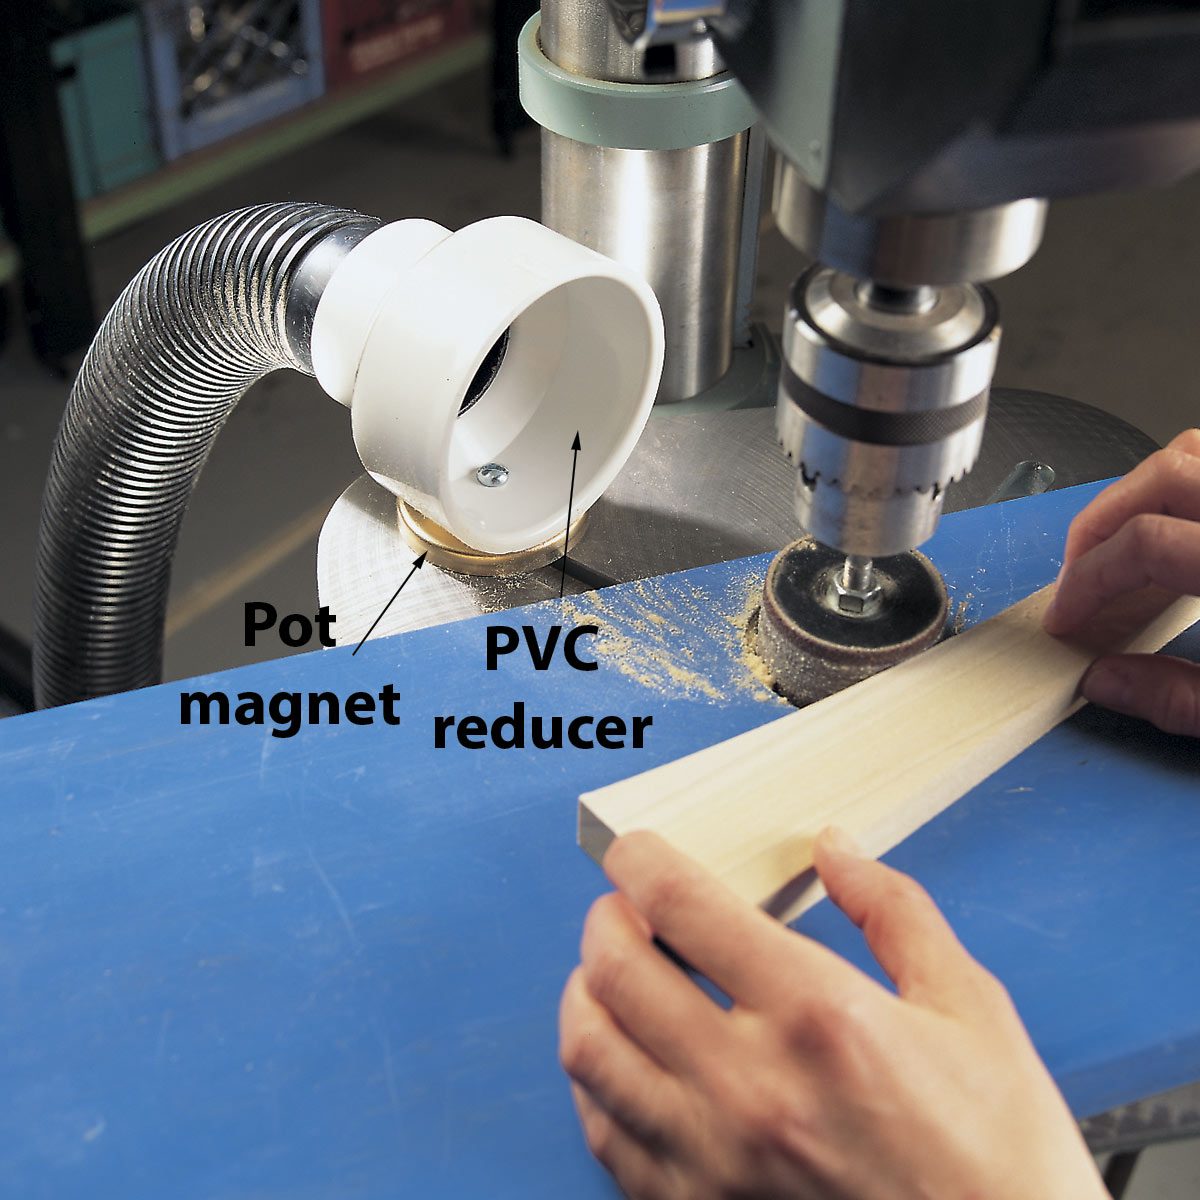
Drum-Sander Dust Collector
Capture the dust that flies off a sanding drum before it fills your shop and lungs! All you need is your shop vacuum, a 3 x 2-in. PVC reducing coupling and a pot magnet. Bolt the magnet to the coupling and put the coupling over the end of the vacuum hose. A 2-1/4 in. dia. shop vacuum hose fits snugly inside the coupling’s smaller end without clamps or glue. Then just set the hose on the drill press’s metal table and let the shop vacuum eat your dust. You can use this setup on any power tool with a metal table.
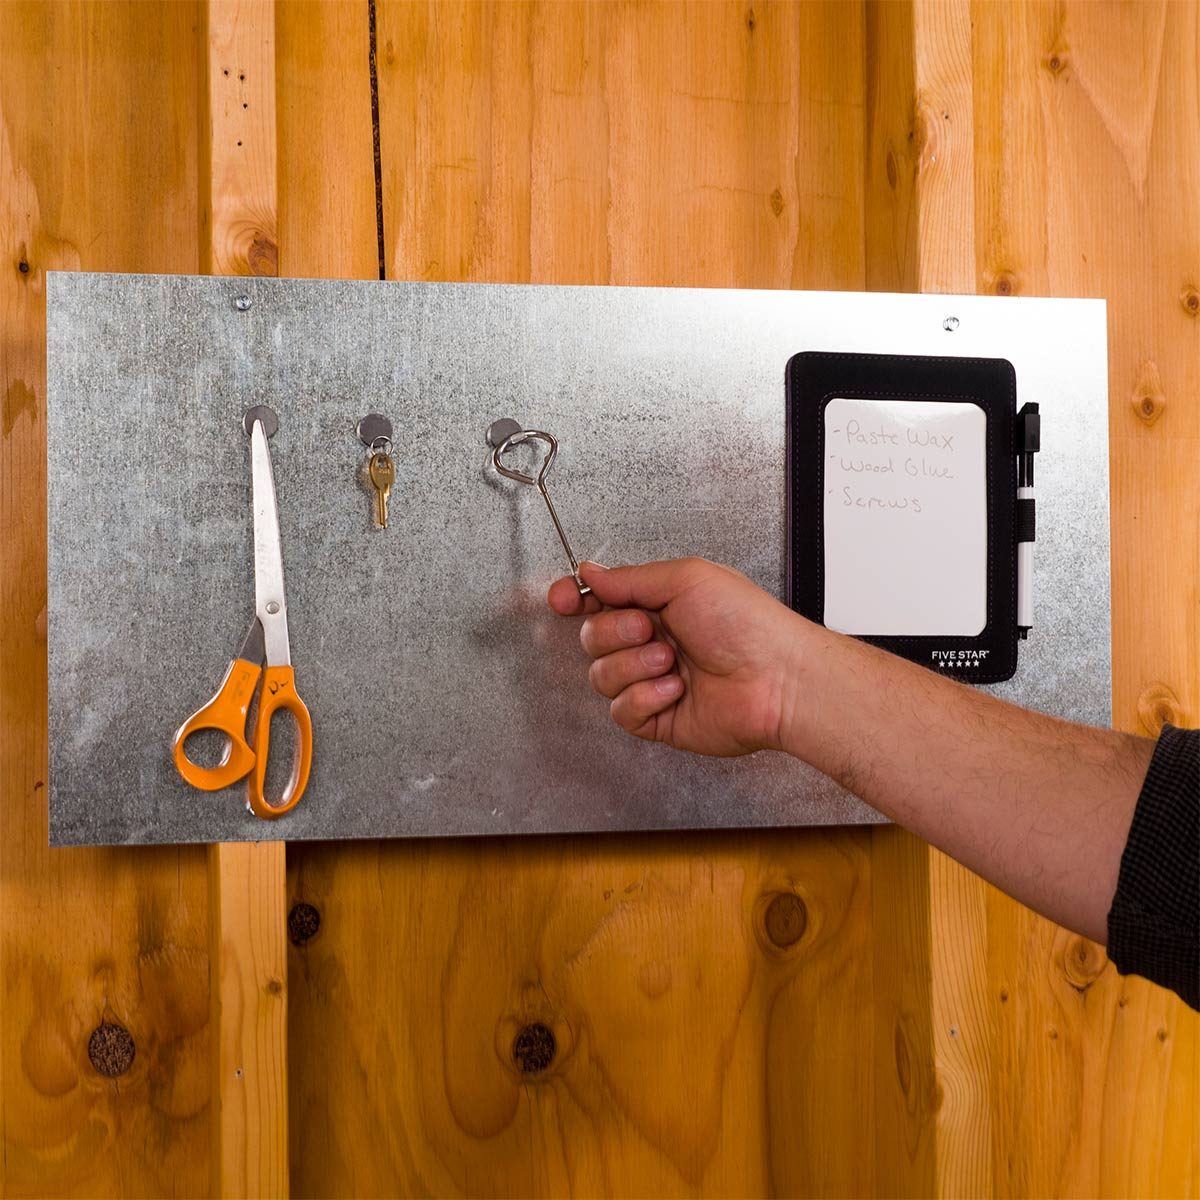
Sheet Metal Magnet Board
Sheet metal or strips of galvanized flashing make great magnet boards in the workshop. Be sure to level the material on the wall and use self-tapping sheet metal screws to fasten it to studs.
Then put several magnets on the message board for hanging project plans, supply lists and even small metal tools such as a paint can opener or scissors. Above the workbench is a perfect place for mounting a magnet board. — Bill Jones
It is always a good idea to keep rare earth magnets in your workshop. Check out these from Amazon.
Every product is independently selected by our editors. If you buy something through our links,wemay earn an affiliate commission.